

Proper attic insulation starts with deciding where the heated and cooled part of your house ends. If you have an unfinished, vented attic, that boundary usually runs across the attic floor. If the attic contains finished rooms, or the roof assembly is designed to bring the attic inside the conditioned space, it can follow the roof instead. Once you know where the boundary belongs, you can choose a material, work out the depth and plan how to keep the roof dry.
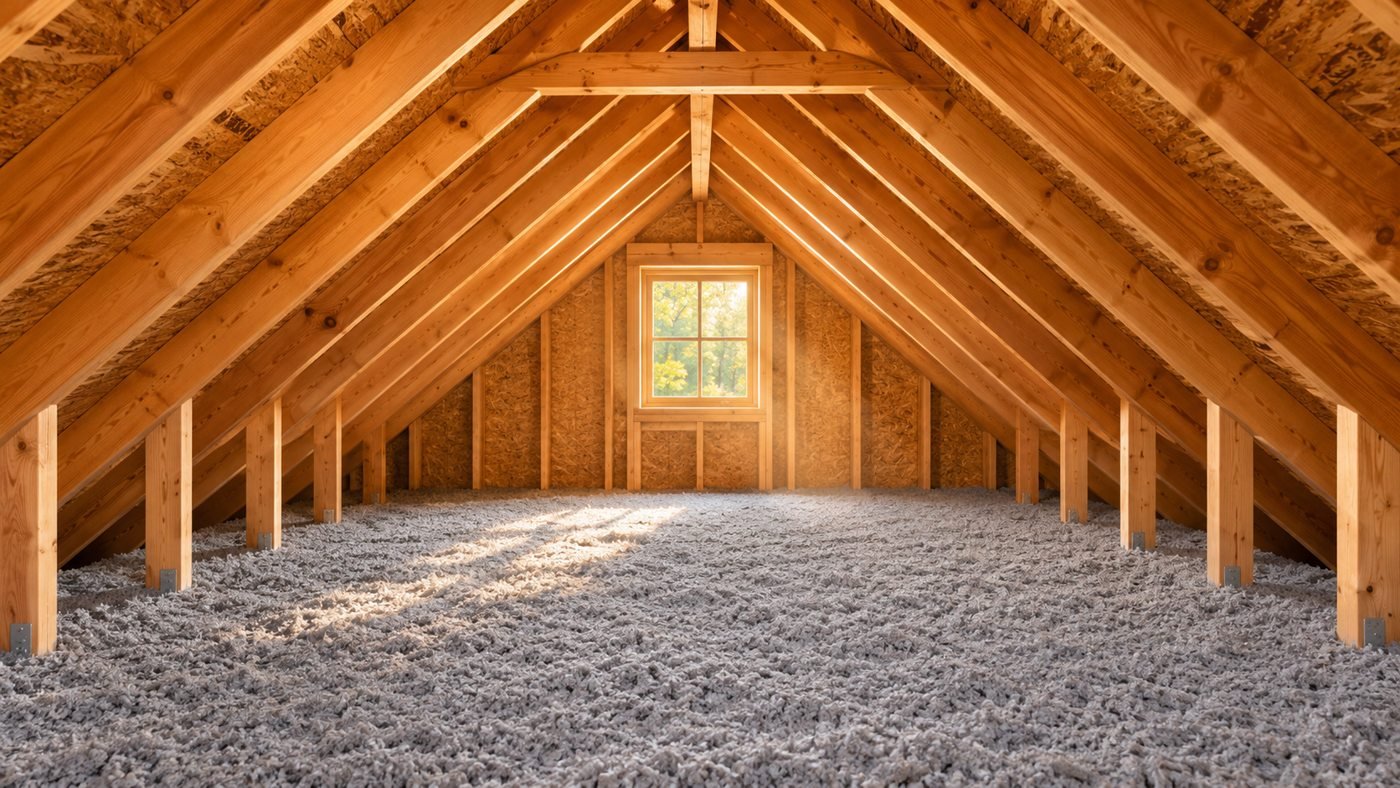
A good attic and roof insulation project has three parts: control air leaks, install continuous insulation and give the roof assembly a way to manage moisture. Use this guide to compare attic insulation types and costs, decide whether to insulate the attic floor or rafters, and prepare a scope you can check before any work disappears behind drywall or loose fill.
Start with the attic your house actually has
Before you buy materials, look at the attic from a secure access point and note what you can see. Is the attic empty, used for storage or finished as a bedroom? Can you see soffit and ridge vents? Are there air ducts, a furnace or water pipes above the ceiling? Take photos and draw a simple side view. Mark the ceiling, roof slope and knee walls, if any, then trace a line around the rooms your heating and cooling system serves.
In a typical unfinished attic, that line runs across the ceiling of the rooms below. A bedroom built into the attic can have a more complicated boundary that follows a flat ceiling, sloped roof and short vertical knee walls. Follow the line past every transition. An insulated slope can still lose heat where it joins a leaky knee wall or an open floor cavity behind the wall.
If the attic is unfinished and vented
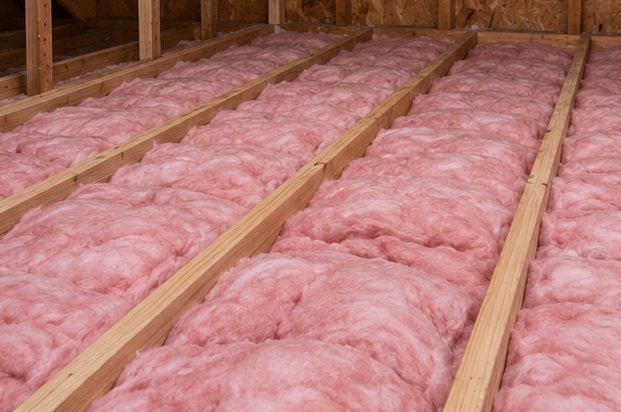
The best way to insulate this kind of attic is usually to air-seal the ceiling and improve insulation at the floor. The attic itself stays outside your living space. The vent paths stay open, and the insulation separates the rooms below from the air above. This approach often gives you a smaller surface to insulate than taking the boundary up and around the roof.
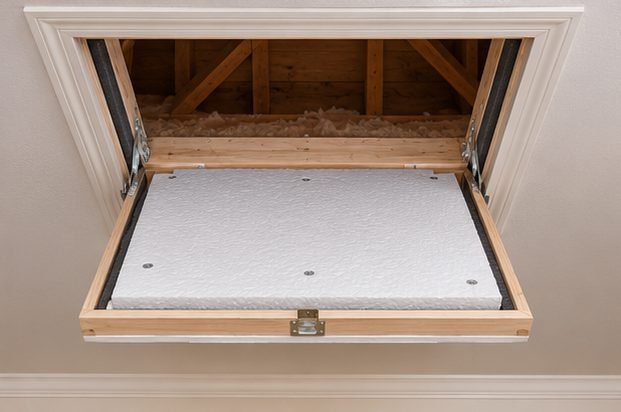
Treat the access hatch like a small exterior door. Check whether it closes tightly, whether the frame has a gasket and whether the lid is insulated. If you have pull-down stairs, include the assembly in the work scope instead of asking the installer to blow around the opening and leave it as it is.
If the attic is finished or needs to be inside the boundary
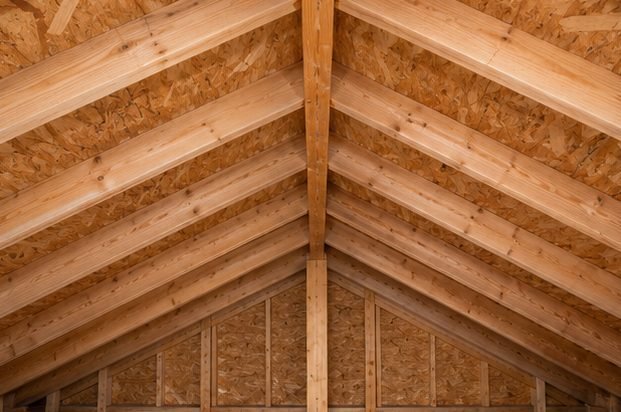
Roof rafter insulation may make sense in an attic conversion or when you want to bring attic HVAC equipment into the thermal envelope. Plan the complete assembly, including the roof deck, gable walls, eaves and any transition to a lower ceiling. A vented sloped roof can use a designed channel between the insulation and roof sheathing. An unvented roof follows a different set of moisture-control and code requirements.
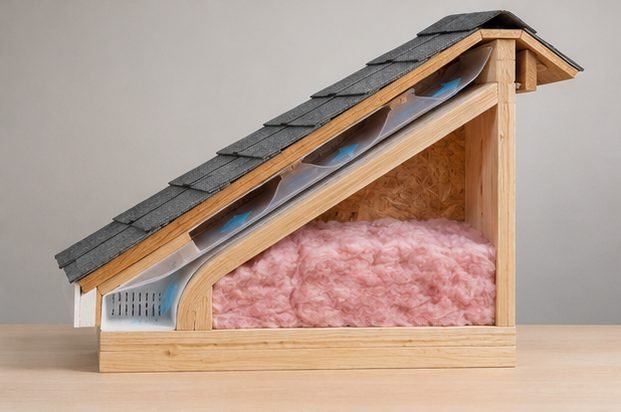
If you’re deciding between the two designs, use the Building America Solution Center guide to unvented attic insulation. Check the design against the roof covering, climate, existing ventilation and equipment in your attic. Make this decision before anyone closes vents or sprays foam. If a fuel-burning appliance is in the attic, have a qualified contractor assess combustion air and venting before changing the enclosure.
What does attic insulation do in summer and winter?
In winter, attic insulation slows heat flowing from the rooms below into a colder attic or roof assembly. The upstairs may feel more comfortable because ceiling surfaces stay warmer. In summer, it slows heat flowing from a hot attic toward the cooled rooms below. That can reduce the amount of heat your cooling system must remove, especially late in the day when the roof has absorbed hours of sunshine.
Does attic insulation help more in summer or winter? The answer depends on local weather, how often you heat or cool, existing insulation and how much air escapes through the ceiling. A house with scant insulation and large ceiling leaks can benefit in both seasons. A house with even coverage and an airtight ceiling may have more to gain by fixing duct leakage, improving shading or checking equipment performance.
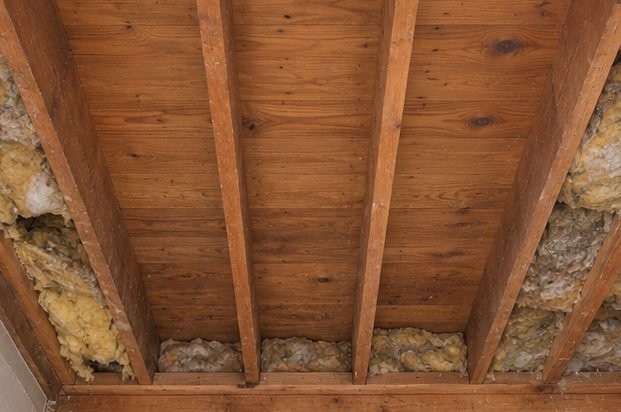
Watch for upstairs rooms that consistently feel hotter or colder than the floor below, patchy insulation, exposed joists, visible gaps near the hatch and uneven snow melt on the roof. These are clues. Compare individual rooms and look for other causes, such as a west-facing window or a disconnected supply duct. A home energy assessment adds evidence when the cause is unclear.
Air-seal and check for moisture before adding insulation
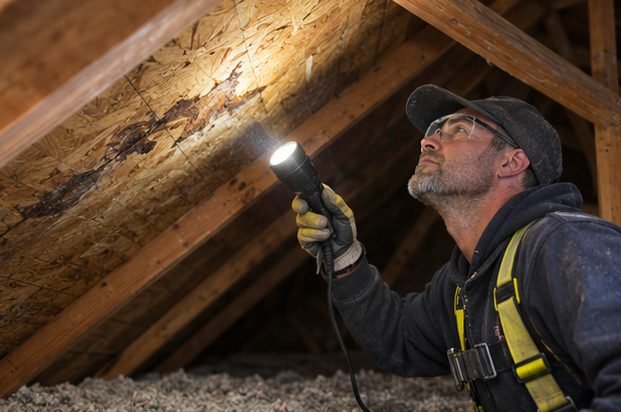
Look for staining around roof penetrations, damp insulation and signs that a bath fan ends inside the attic. Find the cause before burying the area under new material. Rain entry, humid indoor air escaping through a ceiling gap and a disconnected exhaust duct can leave similar-looking stains, but they need different repairs. Verify where bath and kitchen exhaust ducts terminate and have damaged roof materials evaluated before covering them.
In a vented attic, frequent ceiling leaks occur around top plates, plumbing and wiring openings, dropped ceilings and the attic hatch. Address what you can safely reach before adding loose fill. Take photos of the sealing work because a complete layer of insulation can hide those details later. Recessed lights, chimneys and flues need the clearances and materials appropriate to their listing and assembly. Have a qualified installer handle those details if labels or clearances are unclear.
If you see loose granular material that could be vermiculite, leave it undisturbed and arrange a qualified assessment. From the hatch, avoid stepping onto drywall or areas where framing is hidden. A contractor can also check access, electrical conditions and exhaust connections as part of a pre-work inspection.
How much attic insulation do you need?
Start with the climate zone and compare the recommendation for your existing condition. A bare attic and an attic that already has a few inches of insulation do not necessarily need the same amount added. Use the adopted local code to confirm what applies when the project requires a permit. Then use the manufacturer’s coverage chart to convert the R-value you need into installed depth and quantity.
R-value is resistance to heat flow. R-49 attic insulation has a higher rated resistance than R-30 when each product is installed as specified. R-38 can be suitable in some projects, while others need a higher target. The same depth can give different R-values in two different products. Compression, gaps and uneven coverage also affect how the installed assembly performs.
For a retrofit, ENERGY STAR’s U.S. recommendations range from R-30 in a previously uninsulated attic in climate zone 1 to R-60 in colder regions. Its guidance calls for R-49 in some zones where the attic already has a few inches of insulation. Check the row for your climate and existing coverage before deciding how much to add. For proper attic insulation, use that target alongside the product chart and the depth you can maintain near the eaves.
Measure coverage as well as depth
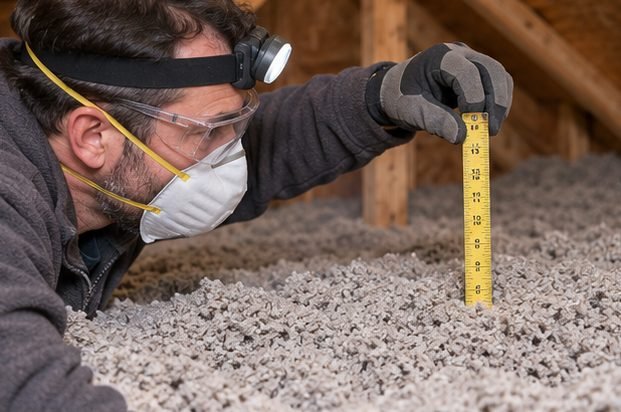
Take several readings across safely accessible parts of the attic. Include the center, eaves and an area beside the hatch. Mark bare spots, compressed insulation and places where wind appears to have pushed loose fill away. A single deep spot can make a job look better than it is. When comparing estimates, ask each contractor how it will keep coverage consistent over the top plates and around platforms.
If a product has separate initial and settled depths, have the installer document which number it will check on installation day. Keep the bag labels or product sheet with your photos. Depth markers make later checks easier, especially when a roof leak or a duct repair disturbs a small area.
Use the bag chart for blown-in insulation
Measure the net attic floor area that will receive insulation. Find the manufacturer’s maximum coverage per bag for the R-value you plan to add. Divide the area by that coverage and round up. Check the listed minimum number of bags and installed depth together. If your target or product changes, repeat the calculation with the new chart.
For example, if the coverage chart allows 40 square feet per bag at the target R-value and the open floor covers 900 square feet, the planning estimate is 23 bags. Those figures illustrate the calculation. Your product may use a different coverage rate. Ask for a separate plan for narrow eaves, short access routes or sections already filled to the desired depth.
Compare attic insulation types and costs
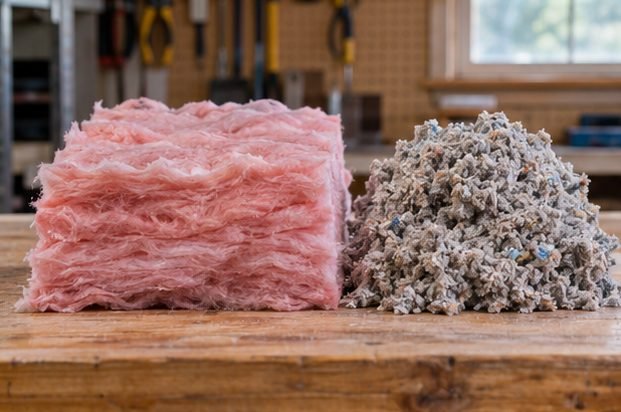
Fiberglass attic insulation comes in batts, rolls and loose fill. Rolls or blankets work well over clear, regular framing when they can lie flat. Precut batts can work between accessible joists if they fit the bay and are cut around obstructions without bunching. Loose fill can cover irregular spaces and reach around framing when the installer has room to direct the hose and check the result.
Blown cellulose is another common option for a vented attic floor. It conforms around many small obstacles. Compare the product’s listed coverage and settled depth before ordering materials. If the ceiling is old or has unusual construction, ask the installer whether the planned material weight and access are suitable. Blown fiberglass also fits irregular areas. Its bag count and depth come from its own coverage chart. For more on how fiberglass performs in framed assemblies, see our fiberglass insulation guide.
When blown-in insulation beats rolls
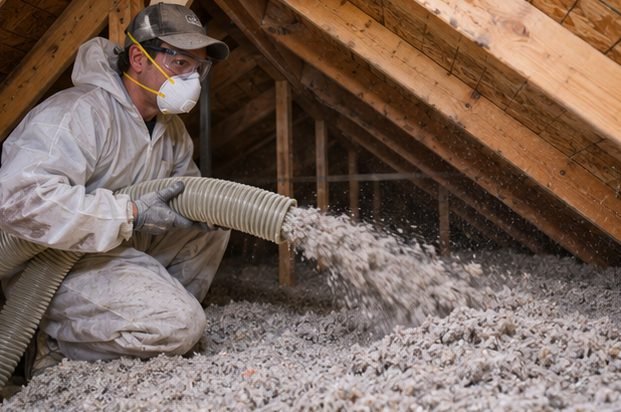
Loose fill is often practical in a broad attic with irregular joist bays, crossings and shallow access near the eaves. Its advantages are coverage around obstructions and faster installation over a large area. It can also cover framing as part of a continuous layer. The drawbacks include the need for equipment, the risk of uneven depth and the extra care needed to protect vents and access points. Storage and service paths need to be planned first.
Rolls can be easier to handle in a small attic with open, regular framing. You can check the fit as you work. The drawback comes when every roll needs several cuts around pipes, braces and wiring. Poor fit leaves gaps. Unfaced batts may also be useful as an added layer where the assembly permits it. Decide what works by comparing accessibility and fit in your attic.
Spray foam and rigid boards are common considerations when designing roof assemblies. An estimate should identify product type, thickness, where it goes and required coverings. Spray foam pricing can rise when the installer must prepare or repair the deck, provide safe application conditions, or work around equipment. Rigid insulation above the deck may make sense during a planned reroof, when nail bases, flashings and the roof edge can be redesigned together.
How to compare 2026 U.S. quotes

Ask each installer to state what area the price covers. Attic floor area and sloped roof-deck area are different. Compare like for like and request separate prices for removal, air sealing, ventilation work, the hatch, baffles, duct repairs and cleanup. Confirm how roof leaks or hidden damage would affect the price. Use a local written quote for current costs, especially if spray foam, removal or difficult access drives the budget.
If one quote is $2,400 for 1,200 square feet, it works out to $2 per square foot for that quoted scope. A $3,000 quote for the same space works out to $2.50. These are sample figures to show the math. Check whether the higher quote includes ceiling sealing, hatch work or a better inspection record before comparing the totals.
For Utah attic insulation rebates, check the current program for your utility and address and confirm if preapproval, contractor qualifications or an energy assessment are required. For attic insulation R-value in Maryland, verify your address, climate zone and applicable approach before selecting a target. Local program eligibility and code compliance are separate questions.
Faced or unfaced insulation and attic vapor barriers
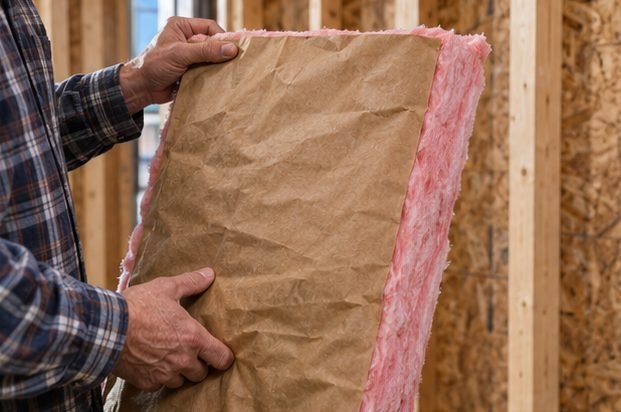
Faced insulation has a layer attached to one surface. Depending on the product, that layer can help control vapor movement. Unfaced insulation has no attached facing. Decide which to use by looking at the full assembly, including climate, ceiling finish, existing vapor-control layers and whether the attic is vented. Before adding batts over old insulation, check what facing already exists and where it sits. If the project also includes walls, compare both products in our faced vs. unfaced wall insulation guide.
An attic vapor retarder manages vapor diffusion through materials. Air sealing controls the movement of air through openings. One layer can sometimes do both jobs as part of a continuous system, but what matters is how the assembly is built. A loose sheet laid over framing and penetrations may leave many air paths. Two low-permeability layers can also limit drying. Get advice on the complete assembly before adding interior polyethylene or changing the roofline.
Attic baffles, soffits and ventilation
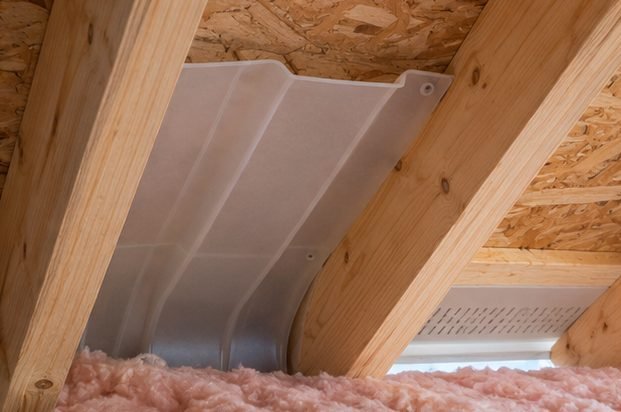
An attic insulation baffle is a chute that keeps a path open where air enters through a vented soffit. It lets air move above the insulation near the roof edge and helps keep loose fill out of the intake. The baffle and any blocking around it should protect the vent path while allowing insulation to cover the wall top plate as well as the geometry permits.
Do you need a baffle in every rafter bay? Check which bays have functional intake vents and how the assembly was designed. Many vented eaves need a clear path at each active intake. Inspect the exterior soffit and the attic side together if possible. Foam or plastic baffles can both work when suitable for the application and installed to preserve the intended opening. Homemade chutes need the same attention to durability and clear airflow.
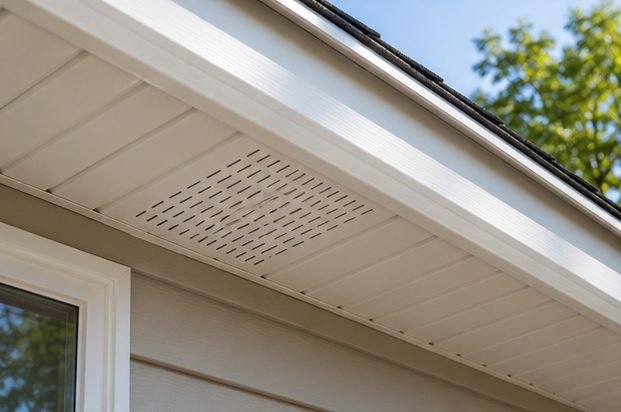
If your attic has no soffit vents, first identify its existing intake and exhaust, such as gable vents or a roof-level intake system. Ask a roofer to evaluate the layout before adding a ridge vent or mixing ventilation strategies. A low roof, blocked framing or a finished ceiling can make it difficult to create a continuous route for outdoor air. A designed alternate intake or an approved unvented assembly may make more sense for that roof.
Special cases that change the plan
Attic flooring over insulation
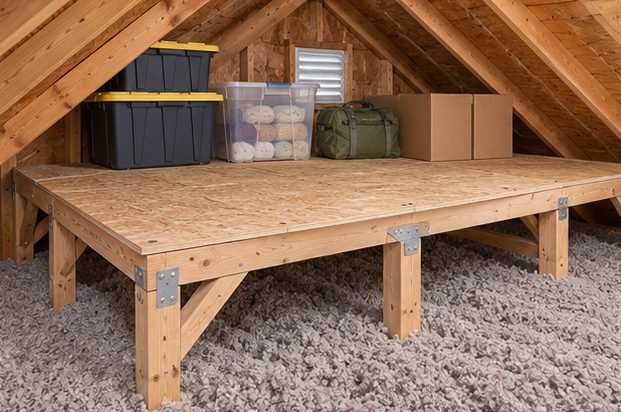
A storage deck can compress insulation and leave a shallow section under the floor. Before adding decking, ask whether the framing is designed for the intended storage load. A suitable raised platform can preserve insulation depth and access to equipment. Plan safe service paths, keep the hatch usable and record the locations of junction boxes or other service points before the platform goes down.
Attic bedrooms, knee walls and small crawl spaces
A finished attic room can lose heat through several surfaces at once. Mark the knee walls, small side attics, ceiling slopes and floor cavities on a sketch. Check whether the short wall has a continuous air barrier and how it joins the floor and roofline. Decide whether to leave the side attic outside the boundary or bring it inside as part of a roofline design. The choice affects access panels, ductwork and moisture control.
Ductwork in an unconditioned attic
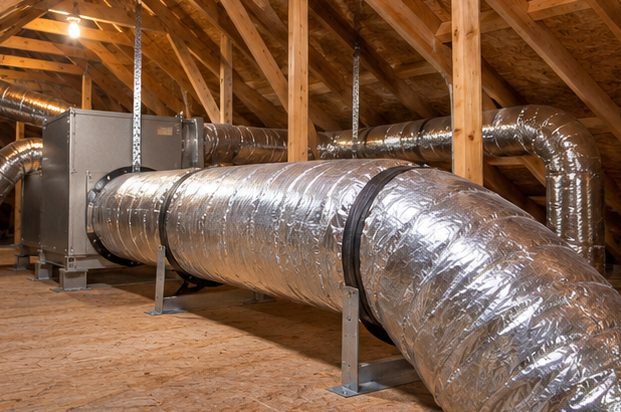
Check for loose connections, damaged jackets and crushed flexible ducts. Ask an HVAC contractor to identify where to repair leakage before adding duct insulation. The outer jacket needs to remain continuous where the system relies on it for moisture control. Keep required service areas accessible, and discuss whether a roofline retrofit would change equipment access or ventilation.
Ice dams and roofs without an attic
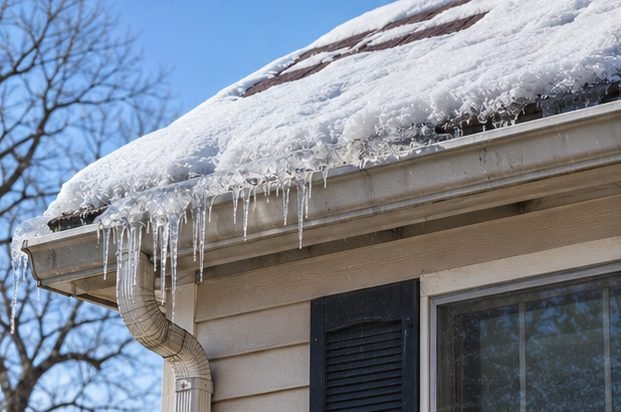
Ice dams can develop when heat warms the roof enough to melt snow and water refreezes at the colder eaves. A well-sealed, insulated ceiling can reduce heat loss into a vented attic. Investigate uneven ceiling insulation, bath exhaust, duct leaks and other heat sources if the problem recurs. Check roof drainage and roof details with a roofer. Keep off icy roofs.
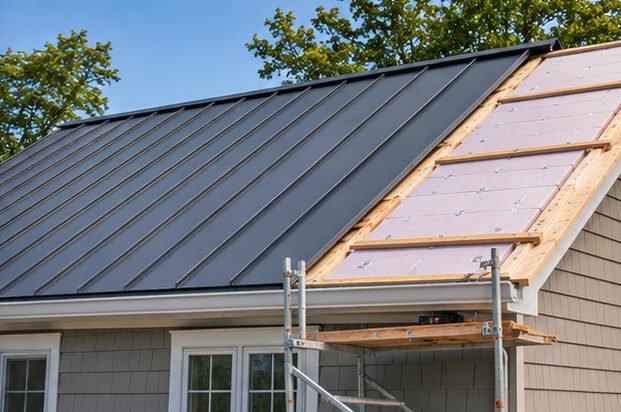
For a vaulted ceiling or flat roof without an attic, access may only be possible during reroofing or an interior renovation. Above-deck insulation can be an option during roof replacement. Interior work can provide access to shallow cavities where a vented or unvented design may be possible. Ask for a drawing that shows all layers and how they meet existing wall insulation. Our wall insulation pillar explains how to plan that adjacent boundary.
Final inspection checklist
To verify proper attic insulation, review the work before loose fill or drywall hides it. Confirm that the leak repairs and ventilation details match the agreed scope. Ask for photos of the eaves, ceiling penetrations and repaired areas. Confirm that the hatch closes and that vent routes remain clear where the attic is designed to be vented. Record the material, quantity, target R-value and observed depth. Walk through the finished work from a safe access point with the installer.
Save the quote, photos and product details together. If an upstairs room is still uncomfortable, you can use that record to decide whether to look at duct performance, air leakage or a different part of the home. The home energy efficiency guide covers related upgrades you can plan in stages.
Frequently asked questions
Can you over-insulate an attic?
More insulation brings smaller gains as an assembly improves. Trouble can arise if extra material blocks vents, overloads a section of ceiling, covers a fixture that needs clearance or traps moisture in a poorly designed assembly. Know the intended depth and fix those details first.
Should I insulate the attic floor and rafters together?
Choose the thermal boundary first. In an ordinary vented attic, that boundary usually sits at the floor. A roofline retrofit moves it to the roof and may change the way the space is ventilated. If existing floor insulation will remain during a conversion, have the designer explain how the completed attic will be conditioned and dried.
Can I blow insulation into the attic myself?
A DIY job can be practical in a dry, accessible vented attic with straightforward framing and a clear plan. Arrange professional help if access, safe footing, wiring, combustion equipment or existing materials are uncertain. Ask for an assessment before anyone disturbs suspected vermiculite.
Does proper attic insulation replace air sealing?
Both jobs matter. Insulation slows heat flow through the assembly. Air sealing closes paths that let indoor and outdoor air move between spaces. Doing both before the attic floor is covered makes the work easier to inspect.