

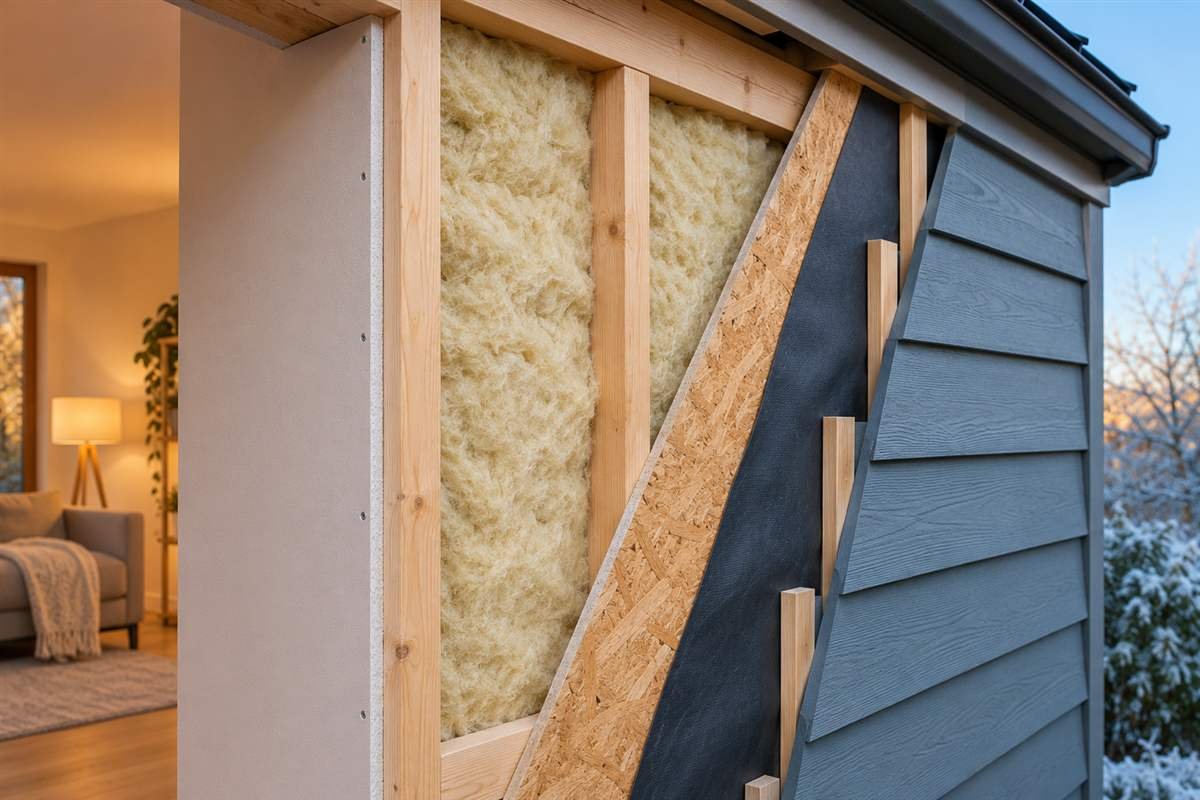
Wall insulation slows heat moving through the walls of a home. In winter, it helps reduce heat escaping indoors; in hot weather, it can slow unwanted heat entering. The right approach depends on the wall, local climate, moisture exposure, and how people use the home. This guide explains the main materials and methods, what to check before work begins, and how to plan a safe, effective upgrade.
What Is Wall Insulation?
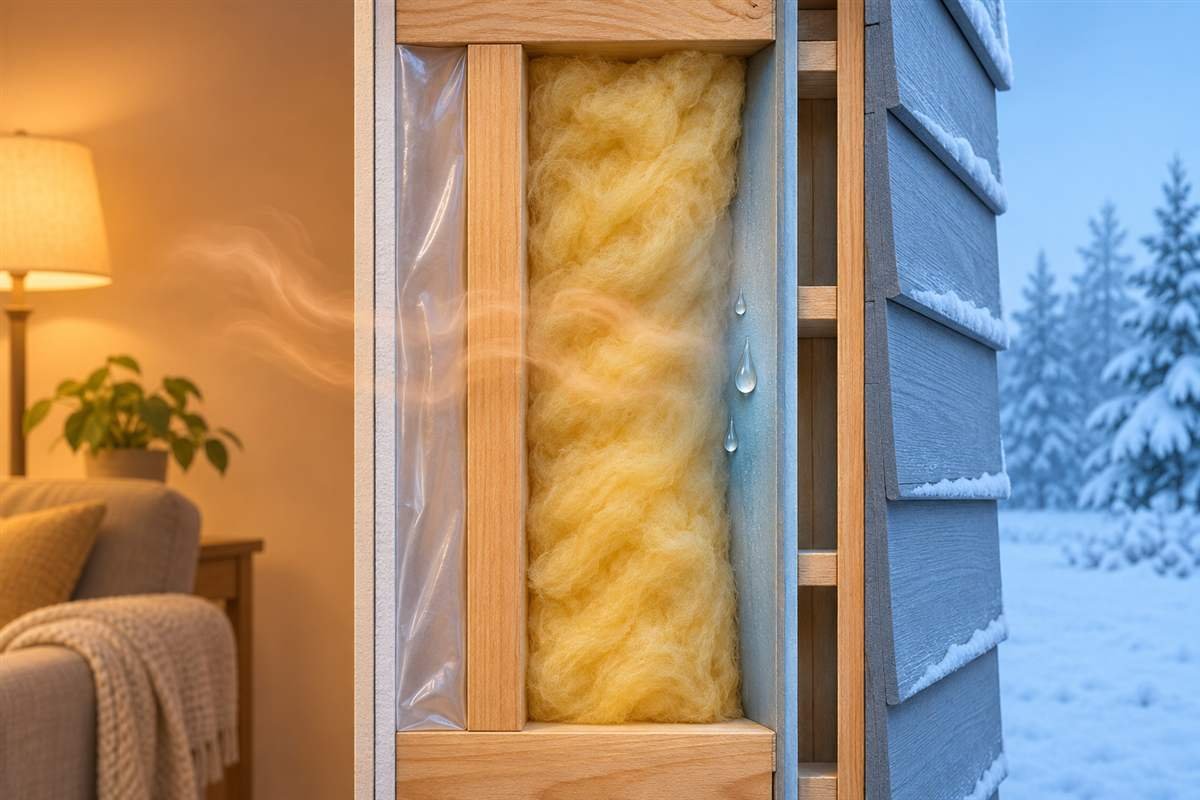
Wall insulation is material placed within, on, or sometimes over a wall assembly to resist heat flow. Common products include fiberglass, mineral wool, cellulose, foam board, and spray foam. Each material performs differently, and the complete wall matters as much as the product: framing, sheathing, cladding, air barriers, and moisture-control layers all affect performance.
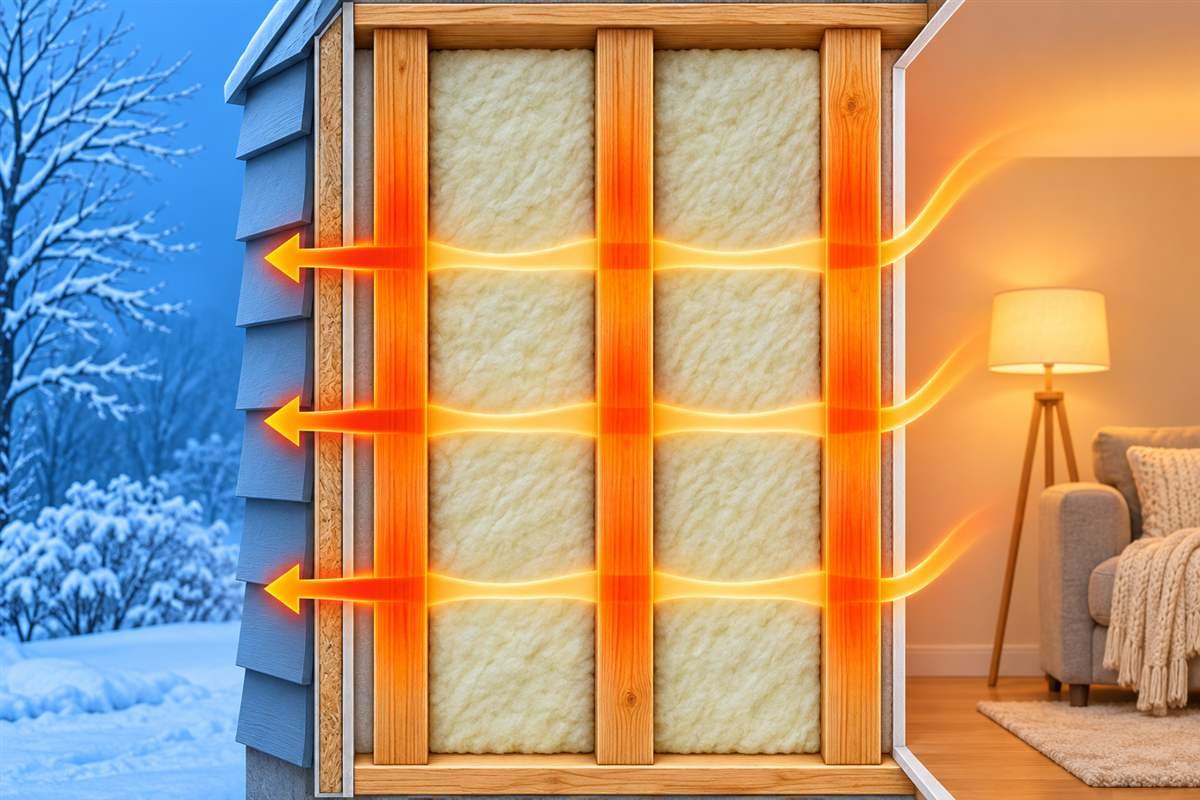
Insulation is commonly described by its R-value, a measure of resistance to heat flow. A higher R-value indicates greater resistance for the tested material and thickness. However, a wall’s actual thermal performance also depends on thermal bridges—areas such as timber or metal studs that conduct heat around the insulation. For that reason, the product label alone does not tell the whole story.
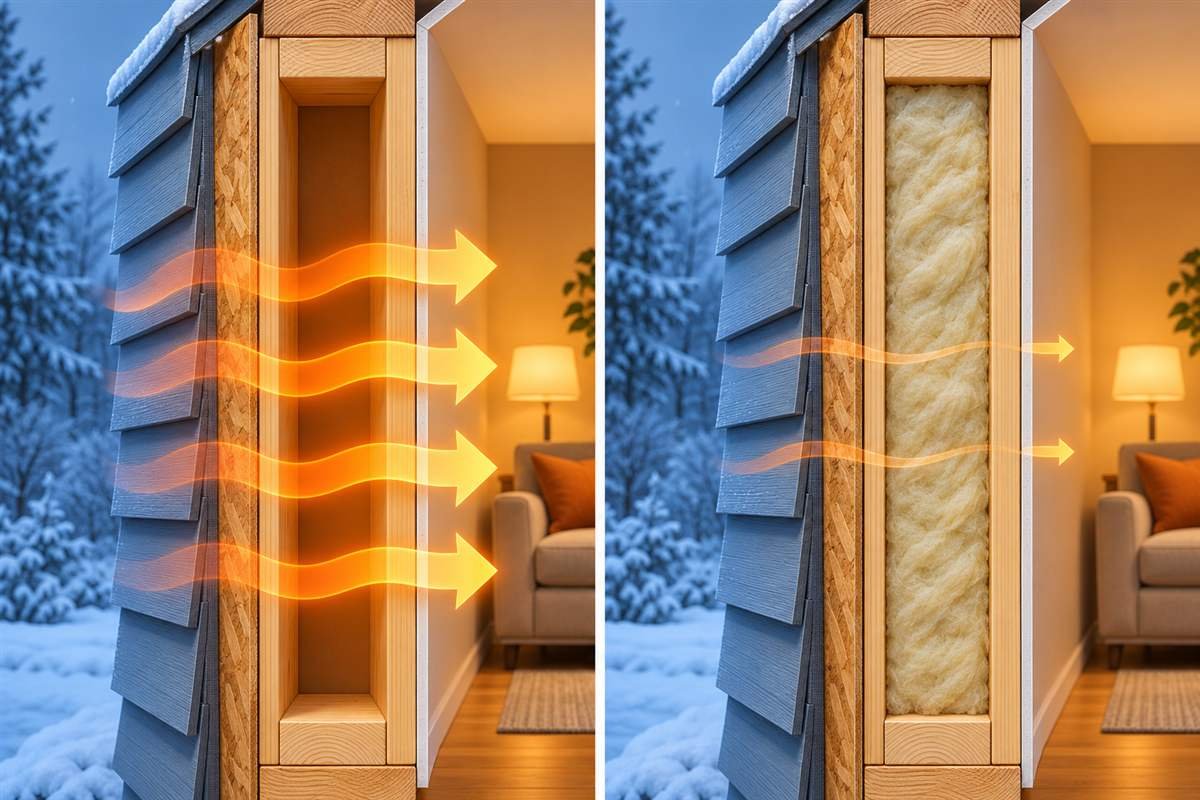
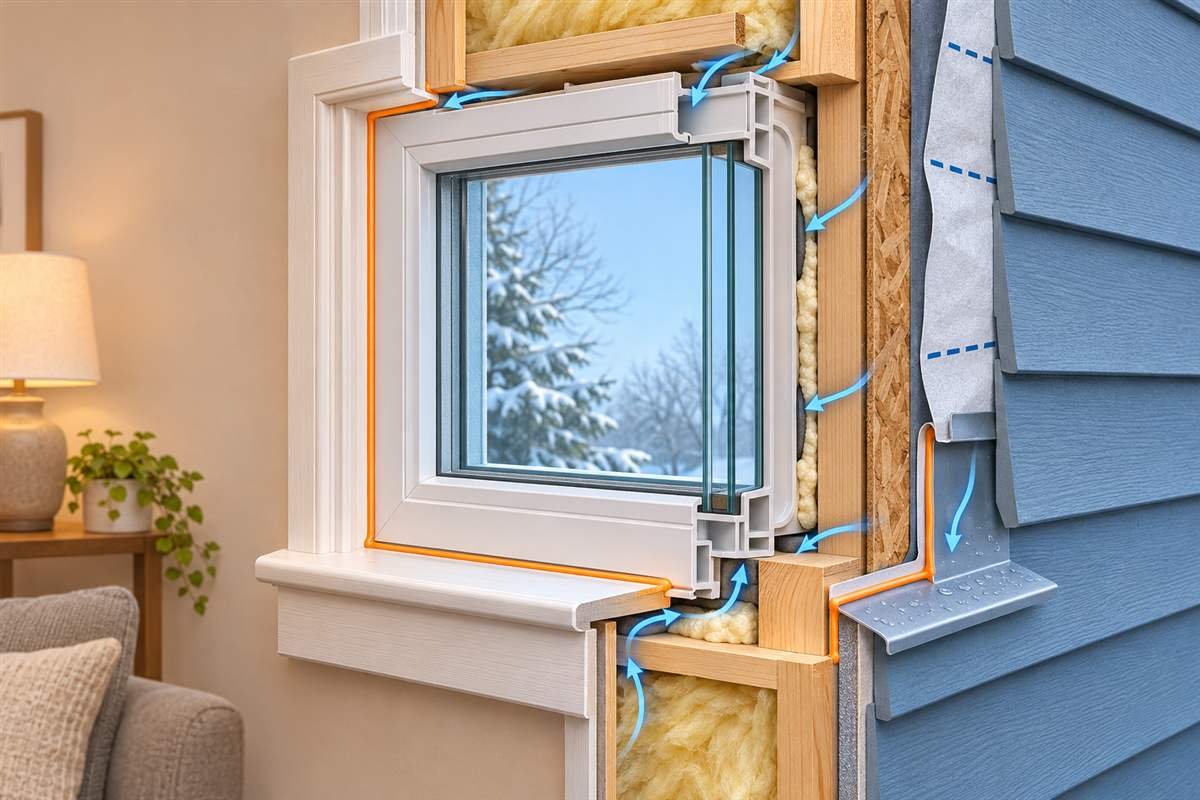
Air sealing and insulation work together, but they do different jobs. Insulation slows heat transfer through materials. Air sealing closes gaps that let air leak around windows, electrical penetrations, floor edges, and other joints. The U.S. Department of Energy explains that insulation does not necessarily stop air movement; sealing leaks is a separate part of improving the building envelope. DOE: Air Sealing Your Home.
Why Wall Insulation Matters
Wall Insulation for More Even Room Temperatures
An under-insulated wall can feel cold in winter or hot in summer, even when the thermostat says the room has reached its target temperature. Insulation can make indoor temperatures more even and reduce the chilly or overheated feeling near exterior walls. Results depend on the whole home, including windows, roof, floors, air leakage, shading, and heating or cooling equipment.
Reduce heating and cooling demand
When less heat passes through the wall, a heating system may need to replace less heat in cold weather. In a warm climate, wall insulation can slow outdoor heat from entering conditioned rooms. Actual energy savings vary with climate, energy prices, existing insulation, household habits, and equipment efficiency. Avoid promises of a specific percentage unless a qualified audit or local study supports the estimate for that home.
Wall Insulation and Indoor Sound Control
Some insulation products can reduce sound transmission through a wall, especially when installers fit them into a well-designed assembly. Acoustic performance also depends on wall mass, gaps, doors, windows, and the way installers connect the layers. If sound control is a priority, ask for tested assembly performance rather than assuming any insulation product will make a room soundproof.
Help protect the building when moisture is managed correctly
Insulation can improve comfort, but an incorrectly designed wall can trap moisture. Rain leaks, plumbing leaks, indoor humidity, and condensation all need attention. The U.S. EPA emphasizes that moisture control is central to preventing mold. Dry any wet area promptly and address the source; insulation is not a repair for a leak or existing dampness. EPA: A Brief Guide to Mold, Moisture and Your Home.
Types of Wall Insulation
Fiberglass batts and rolls
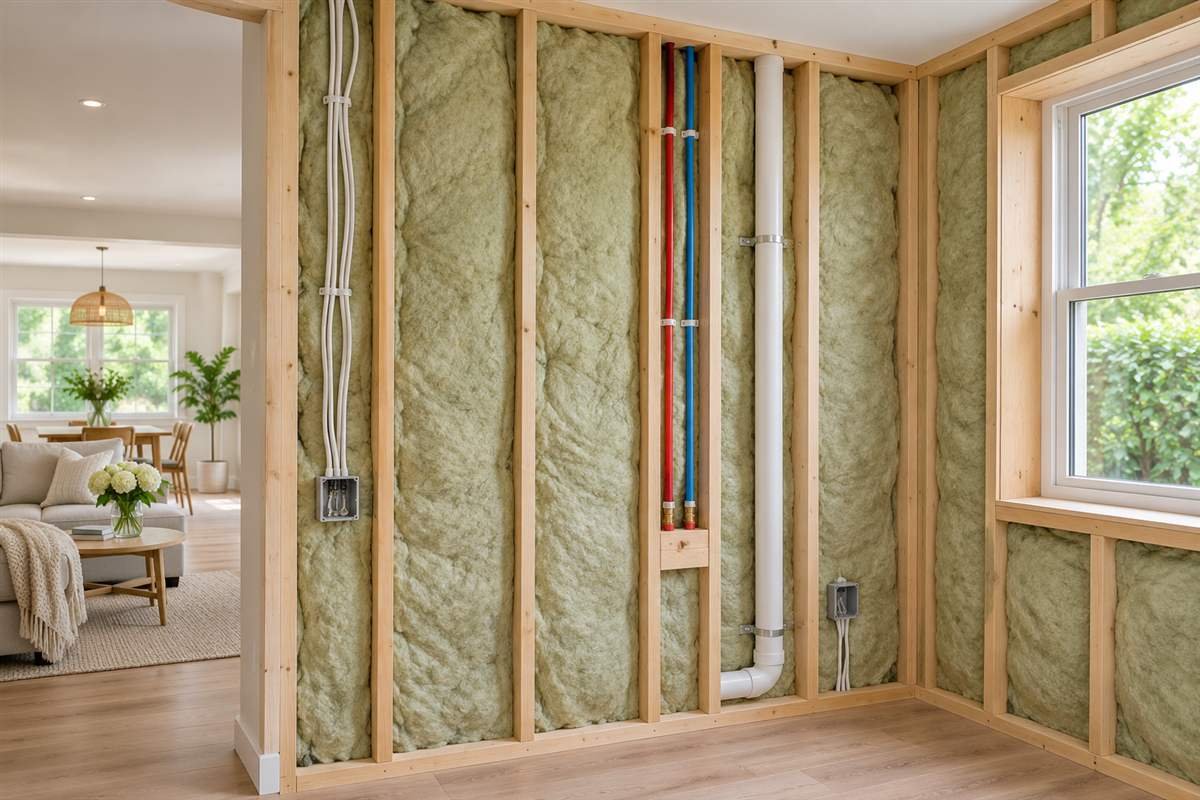
Manufacturers make fiberglass insulation from fine glass fibers and often sell it in batts or rolls sized for framed cavities. It is widely available and can be a practical choice for open walls in new construction or renovation. Batts need to fit the cavity without gaps, compression, or folds. Wiring, pipes, and irregular framing can make a neat fit more difficult, so careful cutting and installation matter.
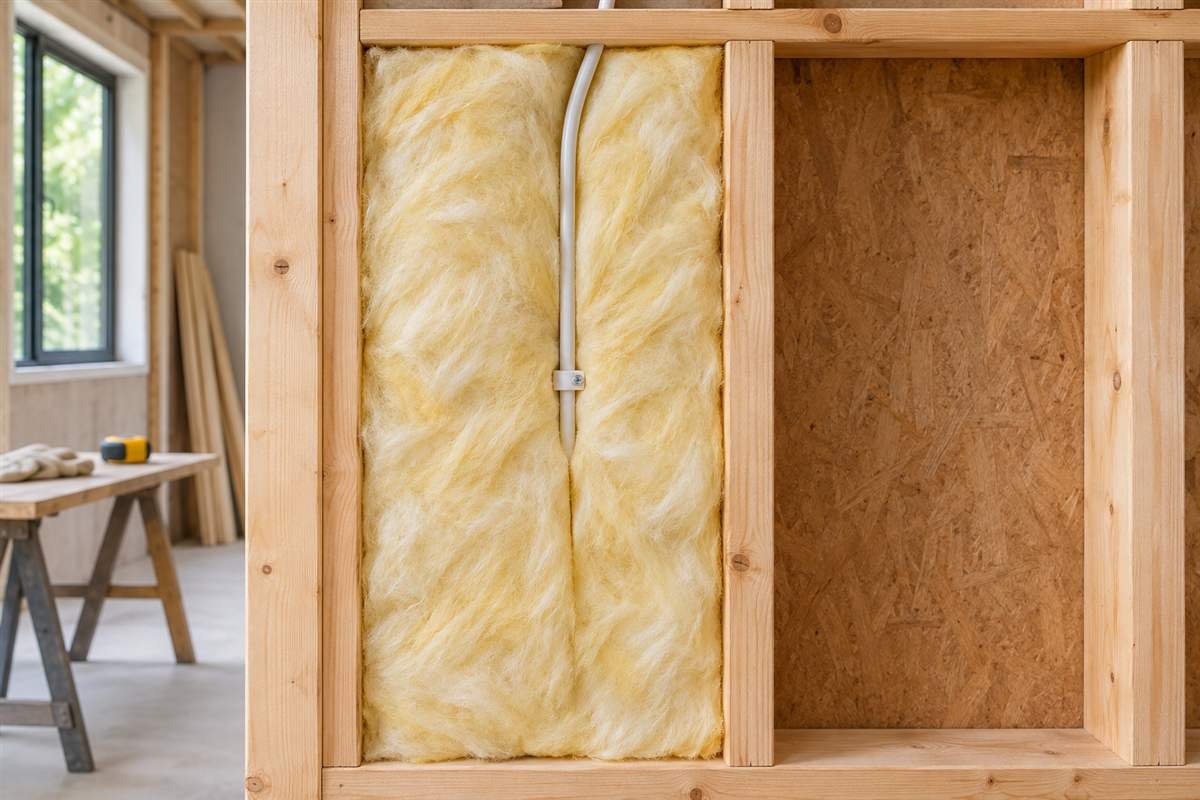
Fiberglass does not stop air leakage by itself. The wall still needs a continuous, properly detailed air-control layer. Follow the product instructions and local safety requirements, including protective clothing and respiratory protection where specified.
Mineral wool batts and boards
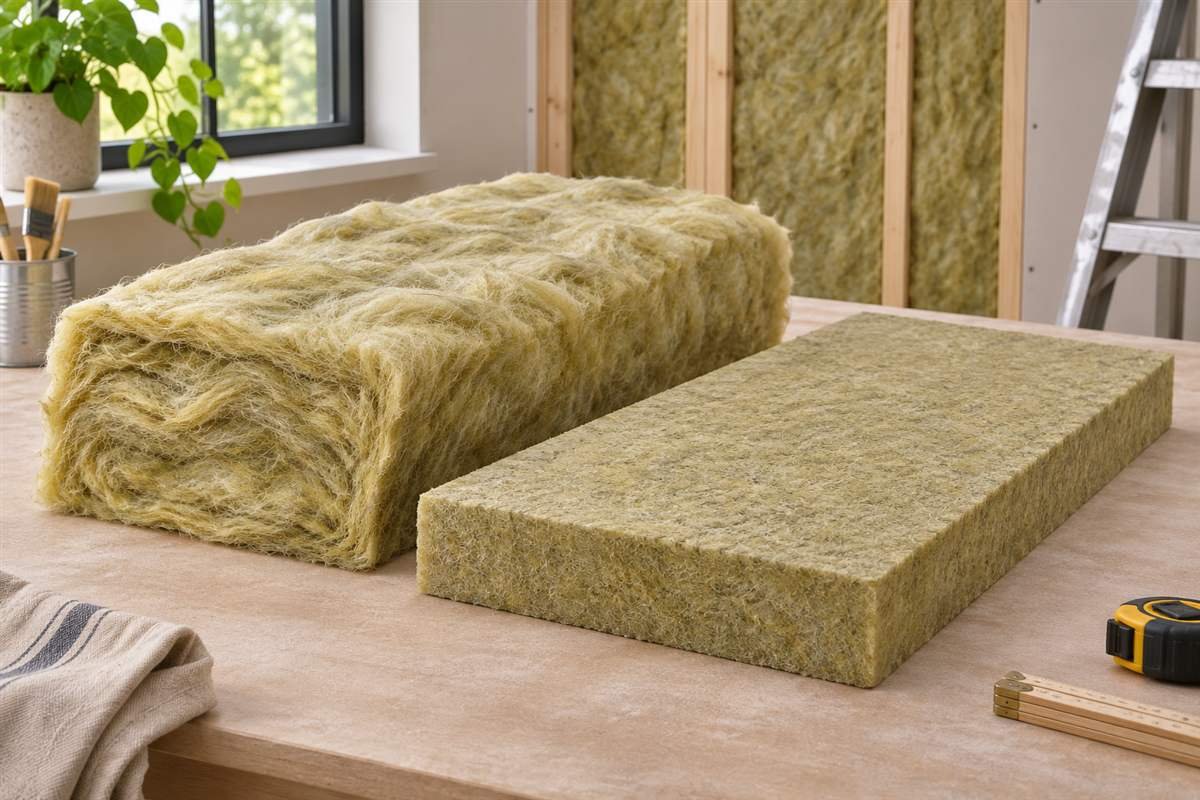
Mineral wool is made from mineral fibers and is sold as cavity batts or rigid boards. Some products offer useful fire and sound characteristics, but performance varies by product and assembly. It can be easier to cut snugly around framing than some alternatives, though the installer still needs to avoid voids and maintain the wall’s air and water-control details.
Check the manufacturer’s technical documentation for the intended application, tested R-value, fire performance, water behavior, and installation guidance. Do not infer that a material is waterproof or suitable for every wall simply because it is mineral-based.
Cellulose Wall Insulation for Existing Cavities
Cellulose is generally made from recycled paper fiber and is commonly installed as loose fill or dense-pack material in existing wall cavities. Dense-pack installation can fill a closed cavity through small access holes, which helps avoid removing all the interior finish. The installer must use the specified density and technique; inconsistent filling can leave voids or lead to settling.
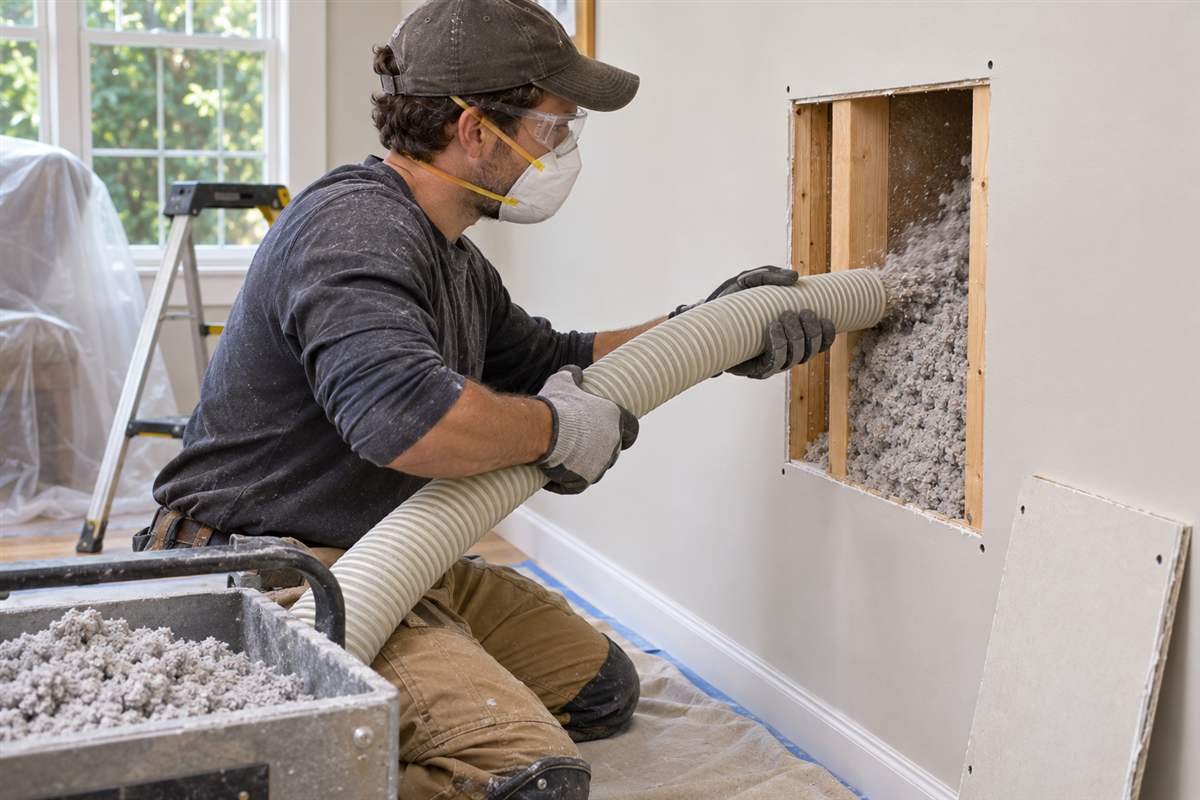
Before choosing dense-pack cellulose, confirm that the cavity is dry and suitable. Older walls may contain wiring, fire blocking, plumbing, or unknown materials that affect the installation plan. A contractor should identify these conditions rather than drilling blindly.
Rigid Foam Wall Insulation
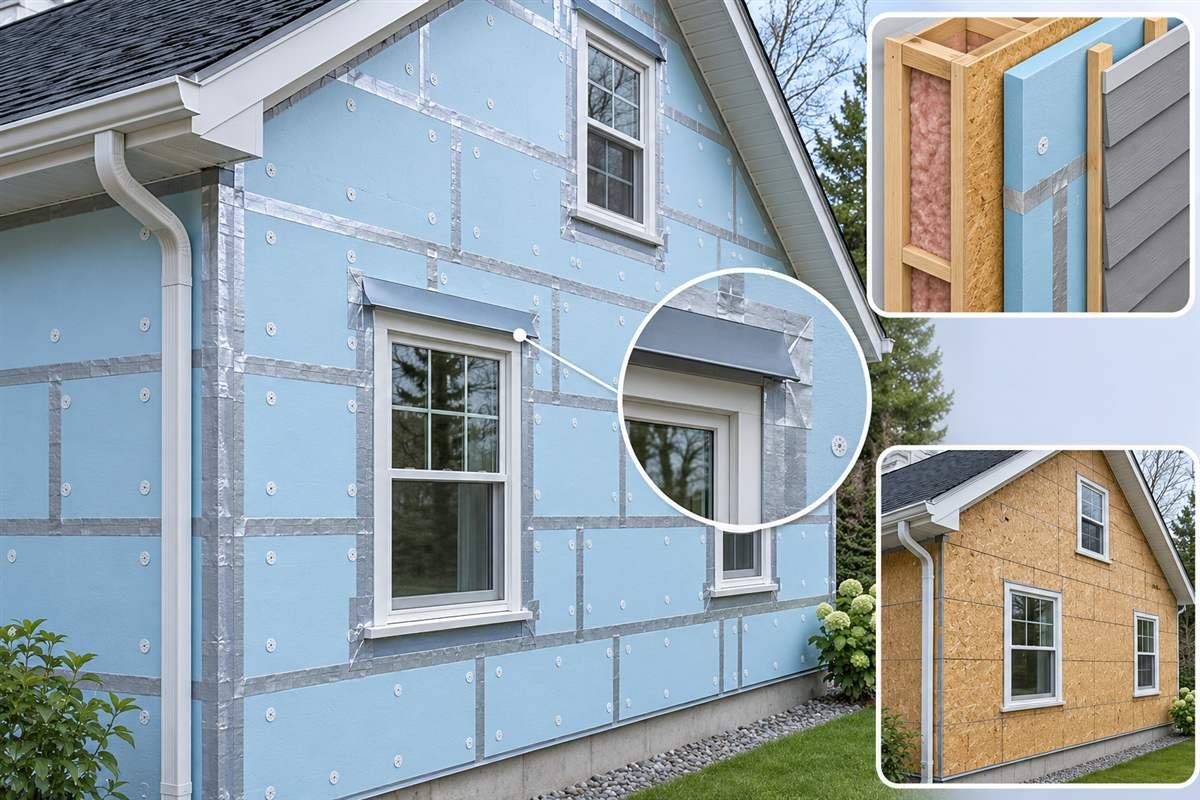
Installers can place rigid foam insulation on the interior or exterior side of a wall, depending on the assembly. Exterior continuous insulation can reduce thermal bridging through framing, while interior boards can be useful in some retrofit situations. Foam products differ in vapor permeability, fire behavior, and compatibility with finishes, so plan the entire wall system around the product.
Foam board often requires taped or sealed joints to contribute to an air-control layer. Fire protection and cladding requirements may apply. Follow the product’s approved installation details and local building rules.
Spray Foam Wall Insulation
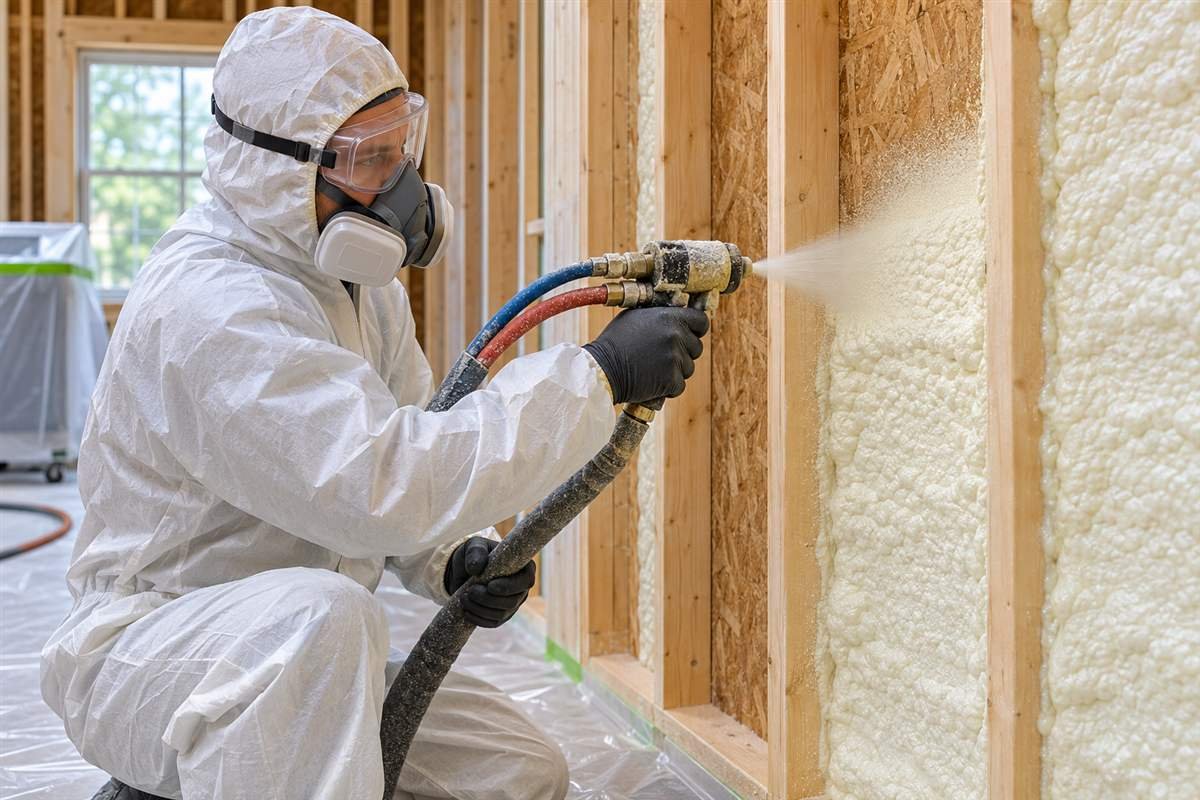
Installers apply spray polyurethane foam as a liquid that expands and cures. Depending on the product and installation, it can provide insulation and help limit air leakage. Open-cell and closed-cell foams have different properties, including density, vapor transmission, and R-value per thickness. They are not interchangeable in every wall.
Because installation quality, chemical handling, ventilation, and curing conditions matter, spray foam is usually a specialist application. Ask for the product name, safety data, manufacturer instructions, and a written scope. Do not cover foam until the installer confirms it has cured correctly and any required inspections are complete.
How Wall Insulation Is Installed
Insulating an open wall
When wall finishes are already removed, installers can access the cavities directly. They inspect the framing and sheathing, repair water damage, air-seal accessible gaps, and fit the insulation around services. Installers finish the air and moisture-control layers before they cover the work with drywall or exterior finishes.
This access makes it easier to check coverage, but it does not eliminate design decisions. For example, adding insulation changes the temperature of surfaces inside the assembly. The vapor-control strategy and drying direction should suit the climate and wall construction. Building Science Corporation explains that moisture behavior varies by climate and wall design; a single vapor-barrier rule is not right for every assembly. Building Science Corporation: Moisture Control for New Residential Buildings.
Filling existing framed walls
For a finished wall, a contractor may use dense-pack cellulose, blown fiberglass, or another suitable product. Installers drill small holes through the interior or exterior finish, fill each cavity with insulation, and patch the openings. The exact method depends on siding, interior finishes, framing, cavity obstructions, and access.
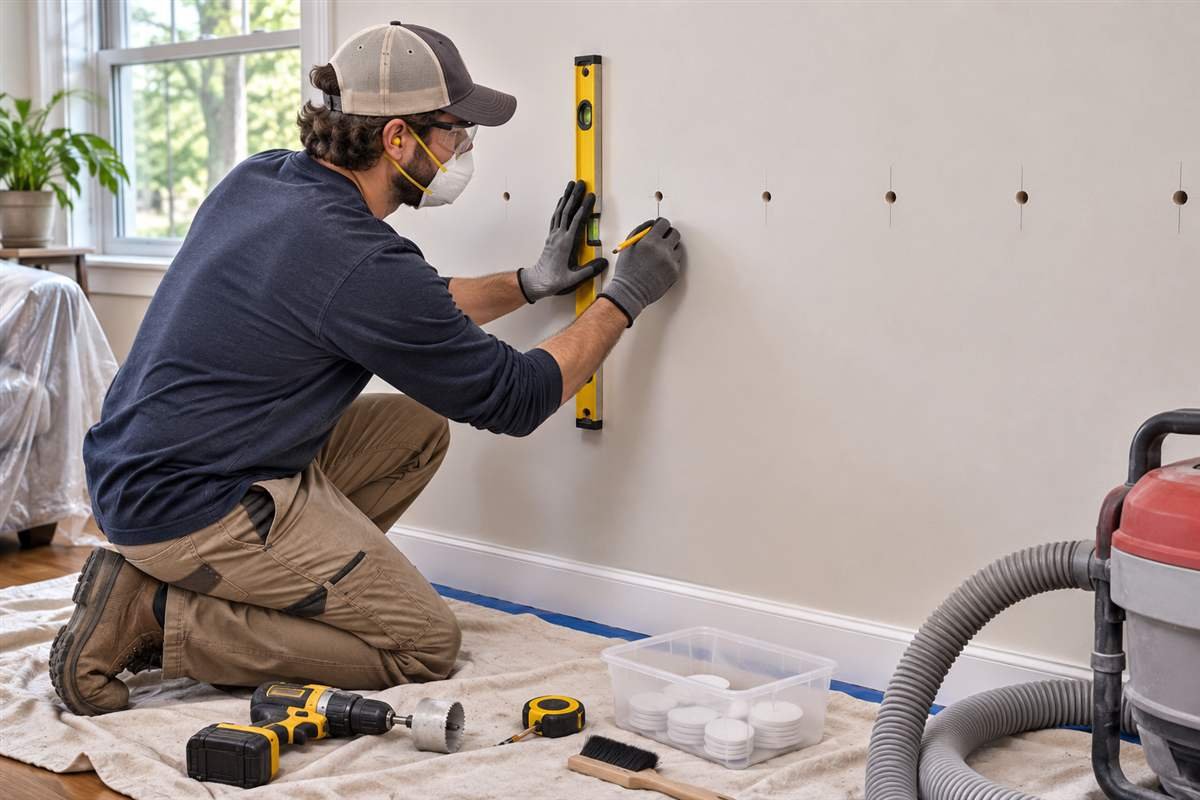
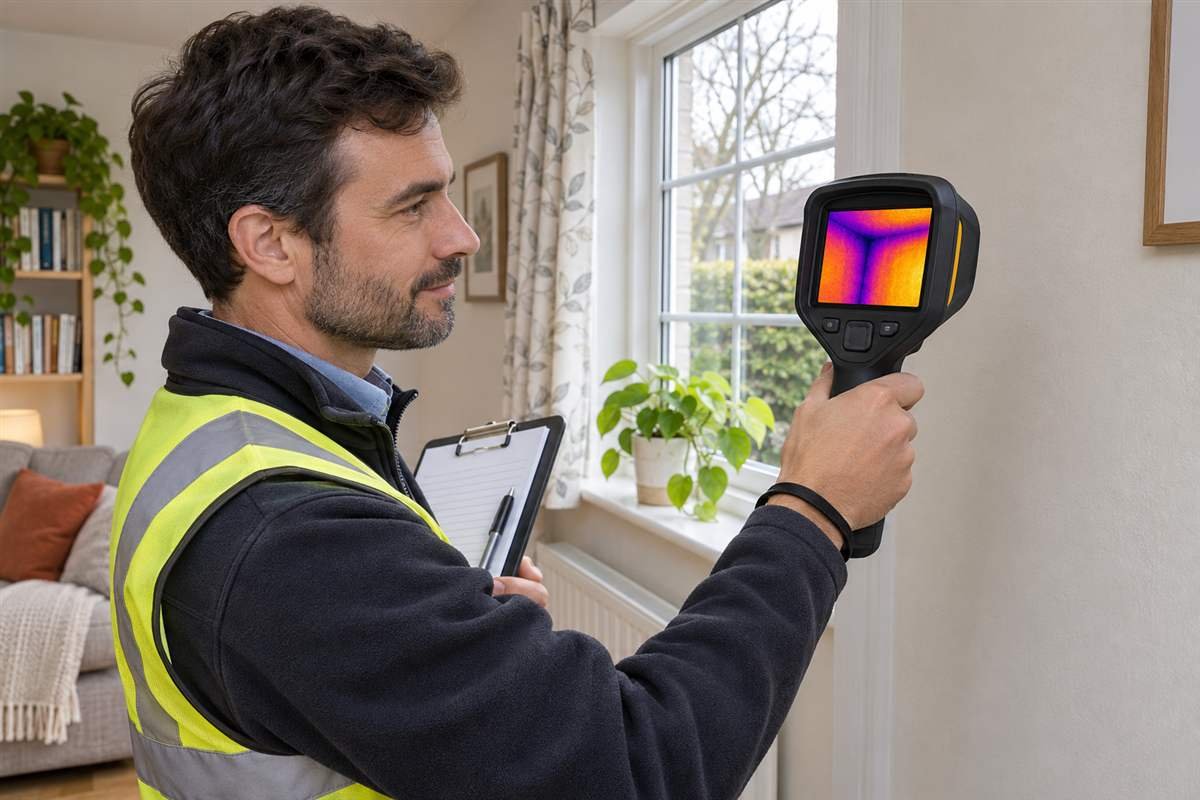
Before work begins, ask how the contractor will confirm cavity coverage and handle fire stops, wiring, plumbing, and unexpected obstructions. A thermal camera can help locate temperature differences after the work, but it does not prove by itself that every cavity is fully insulated. Combine visual inspection, installation records, and other appropriate checks.
Adding insulation to the exterior
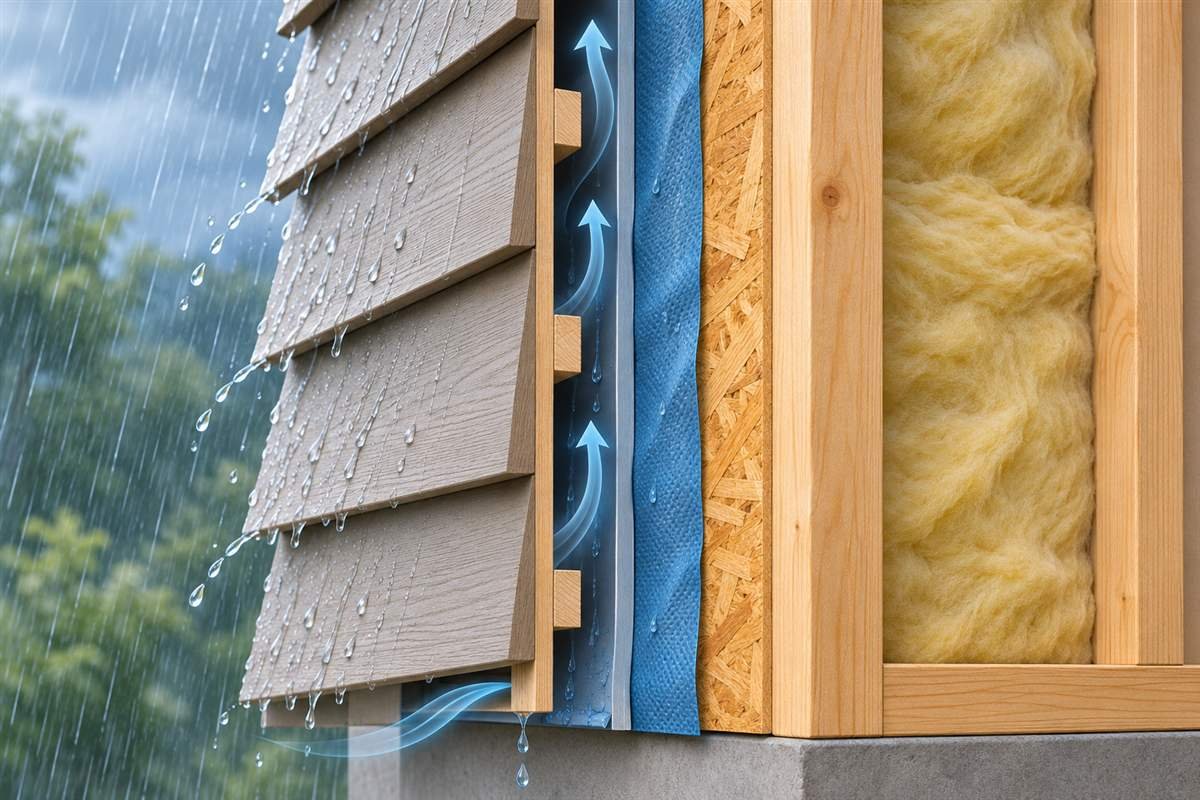
Exterior insulation usually involves removing or modifying siding or cladding, adding a continuous insulation layer, and reinstalling a compatible weather-resistive system and finish. This can reduce thermal bridging and may create an opportunity to improve flashing and drainage details. It can also affect window depth, roof edges, trim, and property boundaries.
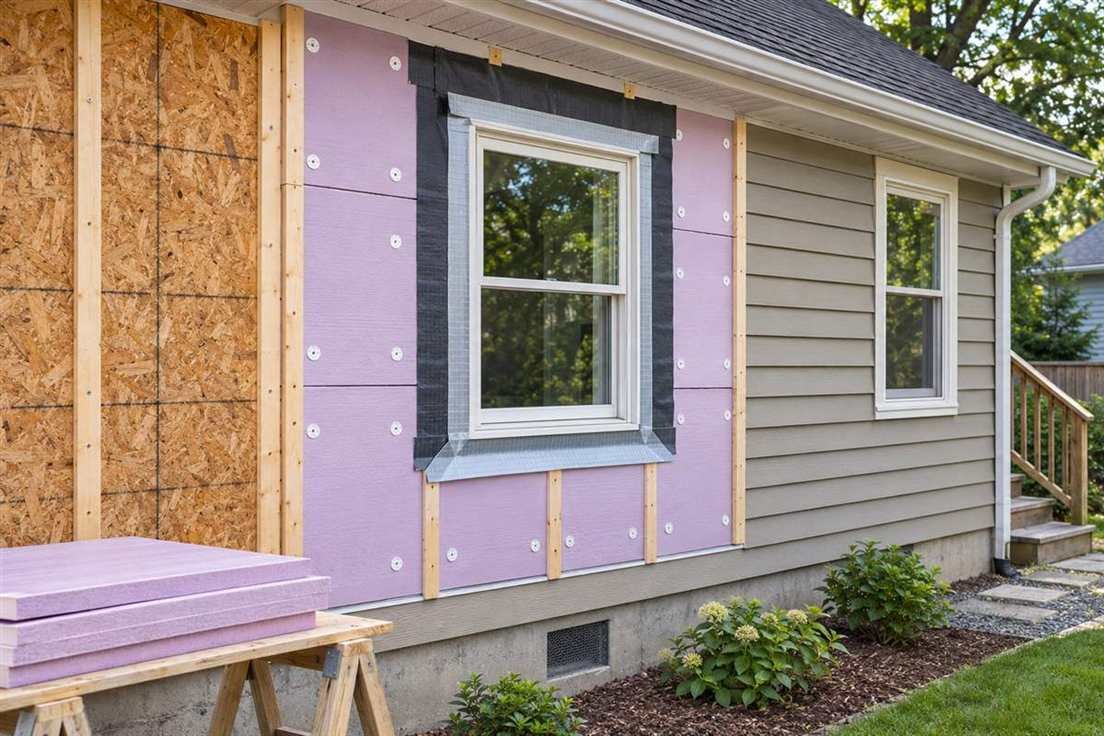
The new wall must manage bulk water, air leakage, vapor diffusion, and drying. These functions are related but distinct. Design an exterior insulation retrofit for the existing wall and local exposure, especially for masonry or rain-exposed cladding.
Adding insulation on the interior
Interior insulation can be useful when exterior work is impractical, but it reduces room area and may complicate electrical boxes, trim, radiators, and window returns. It also changes temperatures within the existing wall. Masonry walls, historic buildings, and walls exposed to wind-driven rain need a careful assessment before installers add interior insulation.
Do not cover damp masonry, active leaks, or mold with a new insulated lining. First find and correct the moisture source. Then choose an assembly that can manage moisture and dry safely under local conditions.
Wall Insulation Checklist Before Work Begins
- Identify the wall type. Determine whether it is wood-frame, steel-frame, brick, concrete block, solid masonry, or a layered cavity wall. The right method depends on what is behind the finish.
- Check for water problems. Look for roof or plumbing leaks, damaged flashing, rising damp, cracked mortar, condensation, and musty odors. Repair the source before covering the wall.
- Find the existing insulation. Review building records or have a qualified person inspect the wall. A small inspection opening or suitable diagnostic method may be needed.
- Consider air leakage. Seal appropriate gaps at transitions and penetrations. Keep required ventilation and combustion safety provisions in place; do not seal openings that serve a safety function.
- Choose a climate-appropriate assembly. Local climate, indoor humidity, air conditioning, rain exposure, and wall materials all affect moisture strategy. Check local codes and qualified building-science guidance.
- Review hazardous materials in older buildings. Older paint, insulation, wiring, and other components may require assessment before drilling, cutting, or removal. Follow local rules for testing and safe handling.
- Compare written proposals. Ask for the product and thickness, installation method, expected coverage, air-sealing scope, moisture details, cleanup, warranty, and inspection plan.
Common Wall Insulation Mistakes
Choosing by R-value alone
R-value is useful, but it does not show whether the product fits the wall, controls air leakage, dries safely, or works with the cladding. Compare complete assemblies and installation details, not just a number on a package.
Compressing batts or leaving gaps
Batts perform best when installed to the product’s intended thickness and fit. Compression can reduce performance, while gaps create weak spots. Around wiring and pipes, split or fit the batt according to manufacturer directions instead of stuffing material into the space.
Installing over water damage
Insulating over damp materials hides the symptom and can reduce drying. Repair leaks, dry the assembly, and assess damage before work. Persistent dampness or suspected mold may need a qualified building professional.
Using the same vapor-control detail everywhere
Vapor retarders slow vapor diffusion, but the right location and permeability depend on climate and wall layers. In some assemblies, adding an impermeable layer on the wrong side can trap moisture. Ask for a design that considers both seasons and the wall’s ability to dry.
Treating insulation as soundproofing or air sealing
Insulation can help with heat flow and may contribute to sound control, but it does not automatically seal gaps or create a soundproof room. Address air paths and sound flanking separately, with an assembly selected for the goal.
Wall Insulation Costs and Savings
There is no reliable universal price for wall insulation. Costs depend on the wall area, material, access, local labor rates, the need to remove finishes, repairs, scaffolding, electrical work, permits, and the complexity of moisture detailing. Exterior work may cost more when it includes new cladding, flashing, or window adjustments. Cavity fill can be less disruptive, but only when the existing wall is suitable and installers can fill the cavities reliably.
Ask at least two qualified contractors for itemized proposals. Compare what each includes, rather than comparing only the total. A lower quote may omit air sealing, patching, moisture repairs, inspection, or disposal. Ask whether the contractor has experience with your wall type and climate, and request references or examples of similar work.
Energy savings also vary. A home energy assessment can help identify whether wall insulation is the best next improvement or whether roof insulation, air sealing, windows, heating equipment, or controls should come first. The U.S. DOE’s insulation guide recommends matching insulation choices and levels to the home and climate rather than assuming one value suits every building. DOE: Insulation.
DIY Wall Insulation or Hire a Professional?
DIY installation may be reasonable for accessible, open framed walls when the work is within your skill level and local rules allow it. Read the product label, use appropriate protective equipment, and keep insulation away from heat-producing fixtures unless the product and assembly are specifically rated for that use. Electrical and fire-safety details need particular care.
Consider a professional for dense-pack retrofit work, spray foam, exterior insulation, masonry walls, historic buildings, signs of moisture damage, or complex wiring and plumbing. A qualified contractor should explain how the wall will control rain, air, vapor, and heat; how they will verify installation; and what warranty applies. For major projects, an independent energy assessor or building-science professional can help compare options.
How to Choose the Right Wall Insulation
Start with the wall, not the product brochure. Identify the construction, current condition, climate, rain exposure, and moisture history. Then decide what you want to improve: comfort, energy use, sound, or a combination. That makes it easier to compare a realistic set of options.
For open framed walls, batts can be straightforward when cavities are regular and installers can inspect their work. For finished framed walls, dense-pack products may reduce demolition when an experienced installer can fill the cavities properly. Continuous exterior insulation may be worth considering during a siding replacement, while interior approaches need special thought for masonry and moisture-sensitive walls. Spray foam can suit some assemblies, but the product and installer must match the design.
Before signing, confirm the installed R-value or target performance, the air-sealing scope, the moisture-control approach, the exact product, and the quality checks. Ask the contractor to explain trade-offs in plain language. A sound proposal should state what the insulation will do and what it cannot fix.
Frequently Asked Questions
Does wall insulation make a home warmer?
It can help reduce heat loss in cold weather and make rooms feel more even, especially when the existing wall has little insulation. Comfort also depends on drafts, windows, roof and floor insulation, heating controls, and moisture. A home assessment can identify which improvement is likely to make the biggest difference.
Can you insulate walls without removing drywall?
Often, yes. A contractor may drill small access holes and blow suitable insulation into framed cavities, then patch the openings. This method depends on the wall layout and cavity condition. It is less suitable when the wall is damp, obstructed, or built with materials that cannot be safely drilled or filled.
Can wall insulation cause mold?
Insulation itself does not create mold, but a poorly designed retrofit can change temperatures and drying conditions in a way that allows moisture to accumulate. Leaks and high indoor humidity also contribute. Control water sources, ensure the assembly suits the climate, and avoid covering damp materials. EPA moisture guidance explains practical ways to manage indoor moisture.
Conclusion: Plan the Wall Assembly Before Choosing the Product
Wall insulation can improve comfort and reduce heat flow, but the best result comes from treating the wall as a complete system. Confirm the wall type, repair moisture problems, address air leakage, and choose materials and details for the local climate. Then compare written proposals that explain product, coverage, installation, and inspection. If you are planning a wider upgrade, start with a home energy assessment and link this article to your site’s broader home insulation guide.
Suggested call to action: Explore our home energy efficiency guide or request a wall assessment from a qualified local professional.
2 thoughts on “Wall Insulation: Types, Costs & Installation Guide”