

A useful home exterior before and after shows more than a different paint color. It reveals which problem was solved: a hidden front door, damaged siding, an unsafe path, or several finishes competing for attention. The strongest makeover starts with repairs, respects the home’s architecture, and gives each visible change a practical job.

Use these home exterior before and after ideas to build a plan for your own home. Start with the examples closest to your house type, existing materials, and budget. A cottage with sound brick needs a different approach from a house with failing stucco or an entry that needs better access.
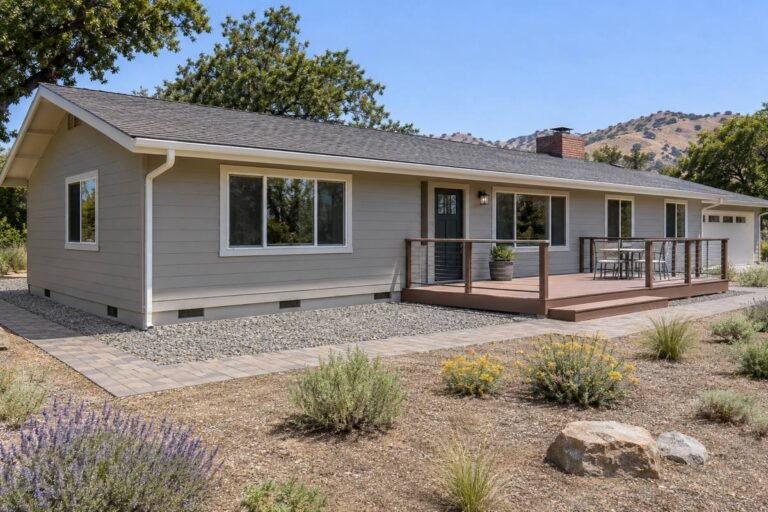
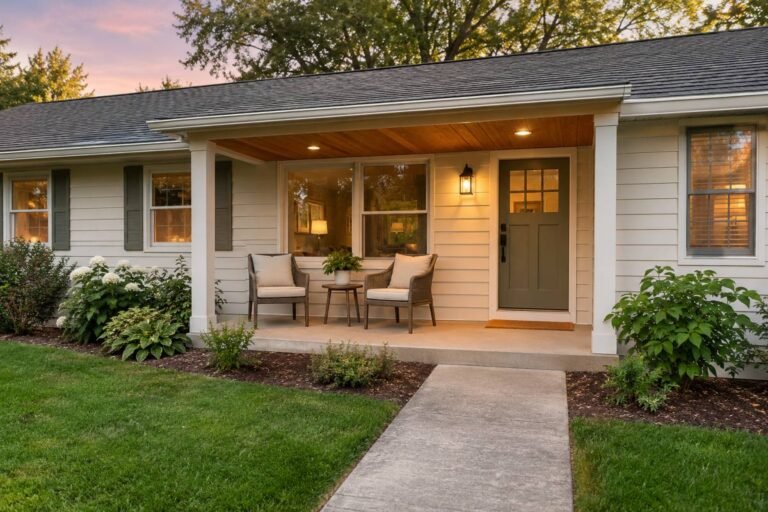
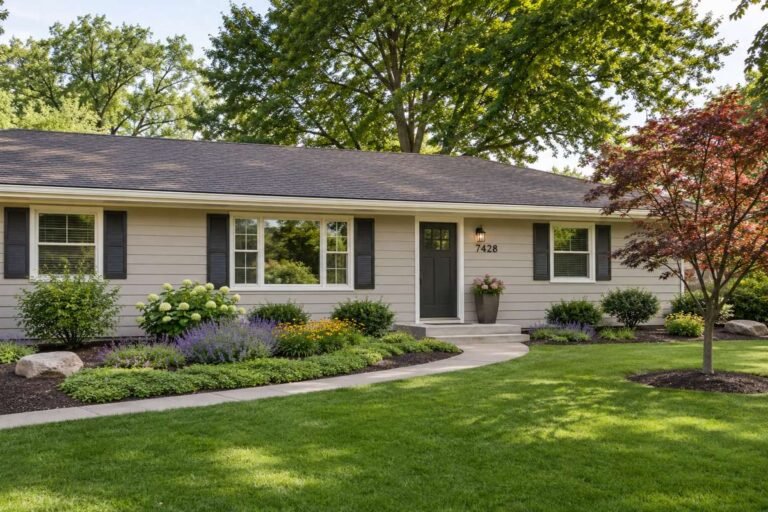
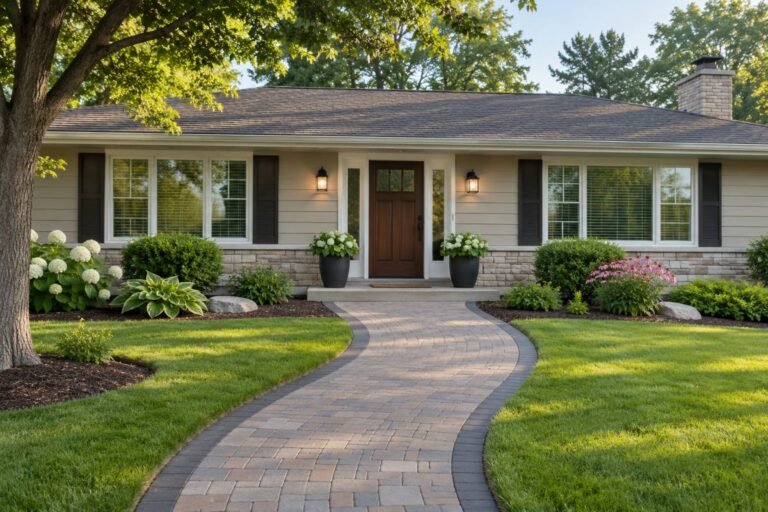
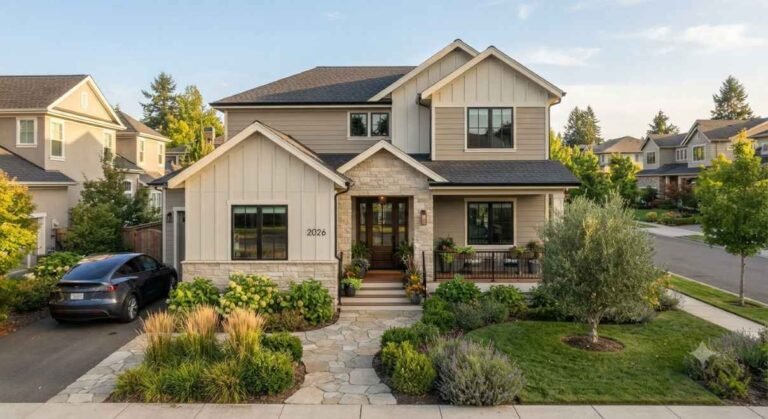
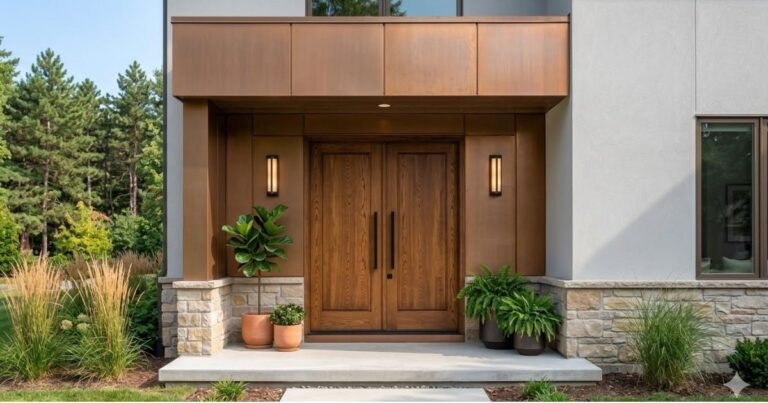
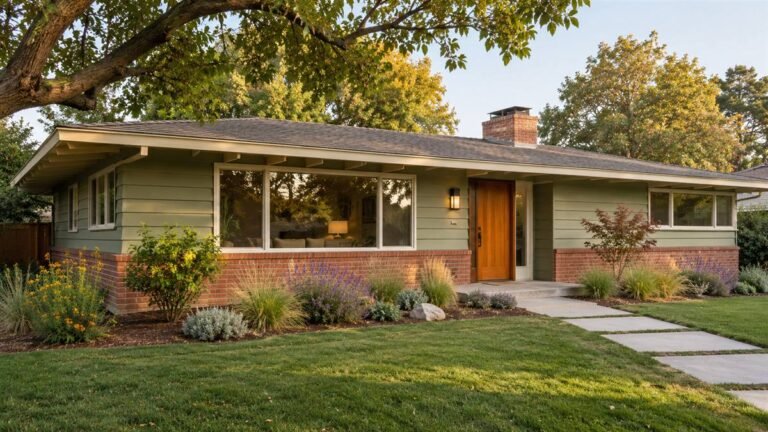
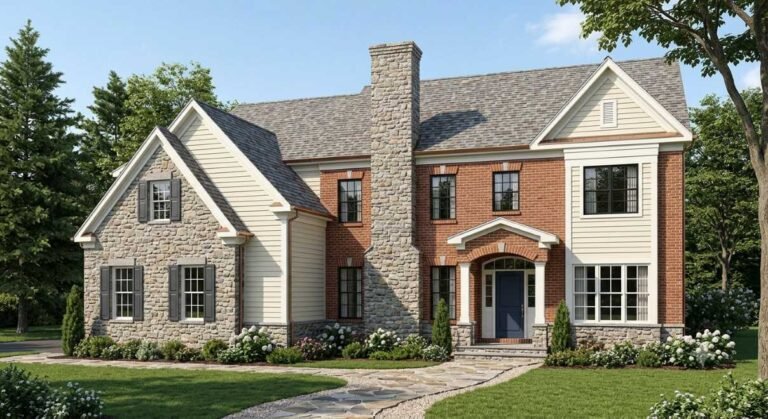
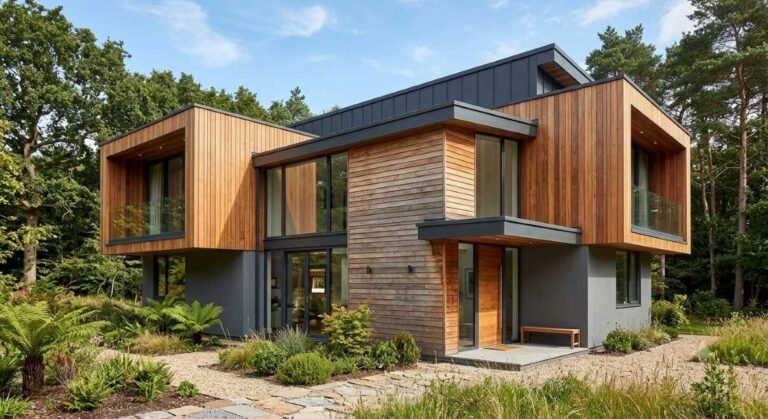
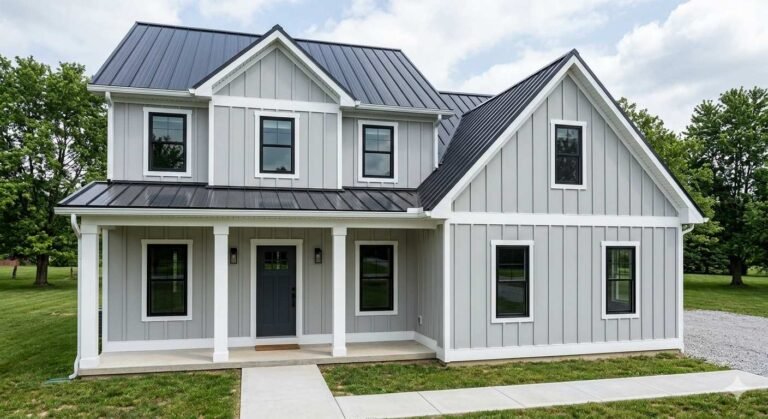
The paired visuals in this guide are original, AI-generated design concepts. They illustrate hypothetical starting conditions and possible updates, not documented completed renovations, contractor portfolios, measured performance, or guaranteed costs. Supporting images illustrate details to consider when planning. Always verify dimensions, products, permits, and construction requirements for your property.
Jump to: Paint updates · Materials and styles · Porches and paths · Landscaping and lighting · Budget · Work sequence
Read a home exterior before and after like a homeowner
When comparing home exterior before and after pictures, look at the roofline, window positions, entry, grade, and permanent masonry first. Identify what actually changed. A photograph may make a second-story addition, replacement windows, new siding, and fresh landscaping look like one paint project. Those scopes have very different costs and disruption.
Check whether the improvement depends on better weather, a different camera angle, mature planting, or brighter lighting. For your own record, take photographs from the same position at a similar time of day. Capture drainage, steps, and side elevations too; the street view cannot show every important condition.
Finally, name the smallest change that solves your main problem. If the door disappears, a clearer path and coordinated entry may be enough. If water is entering the wall, a decorative coating is not the starting point. Repair the assembly before choosing the finished look.
Plan the scope of your home exterior before and after
| Makeover scope | Typical work to discuss | What to confirm before starting |
|---|---|---|
| Maintenance refresh | Cleaning, small repairs, pruning, hardware | Surface condition, cleaning method, repair limits |
| Cosmetic coordination | Paint, door color, fixtures, compatible trim | Samples, product approval, preparation and access |
| Component replacement | Roof, siding, windows, garage door | Flashing, installation details, permits, warranties |
| Layout or access changes | New paths, landings, porch alterations | Grade, drainage, structure, accessibility and code |
| Addition or major rebuild | New enclosed area or changed roofline | Design, engineering, zoning, permits and financing |
Our guide to exterior materials for homes provides the broader material framework. Use it alongside these visual ideas when you are deciding between a coating refresh and a replacement project.
Home exterior before and after ideas: paint and details
1. Clean and repair before changing the color
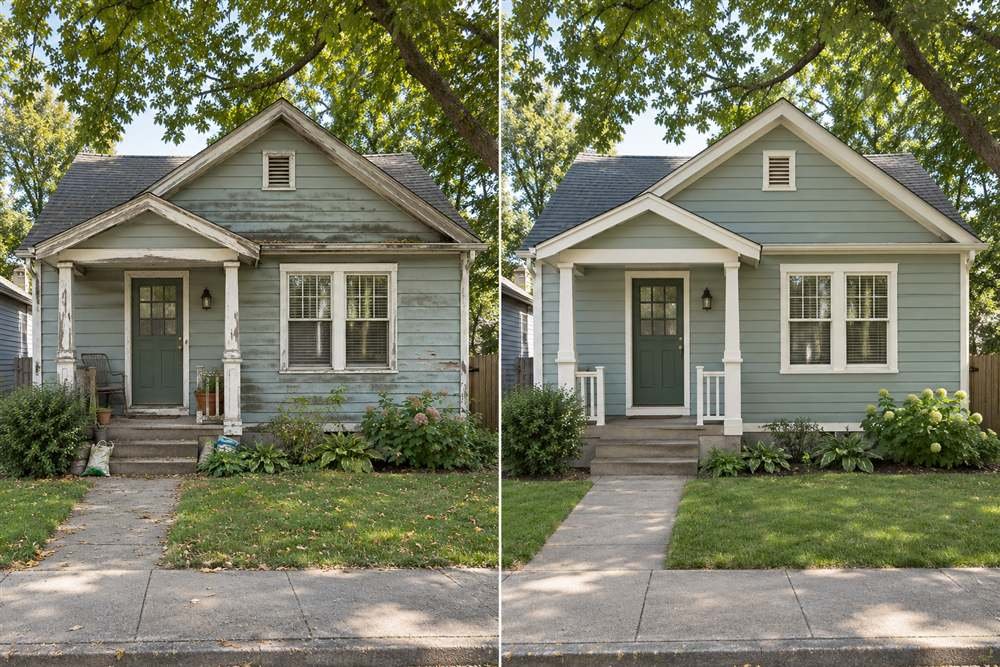
Before: Dusty siding, stained trim, and crowded containers make a sound house feel neglected. After: Compatible cleaning, localized repairs, refreshed trim, and a clear entrance reveal the existing architecture. Keeping the body color can reduce the scope while still producing a visible improvement.
Start with a small cleaning test and follow the siding manufacturer’s guidance. Aggressive pressure washing can damage some surfaces or drive water into joints. Photograph the cleaned wall before ordering paint; you may discover that the original color works once dirt and failing details are addressed.
2. Give a cottage a muted sage palette
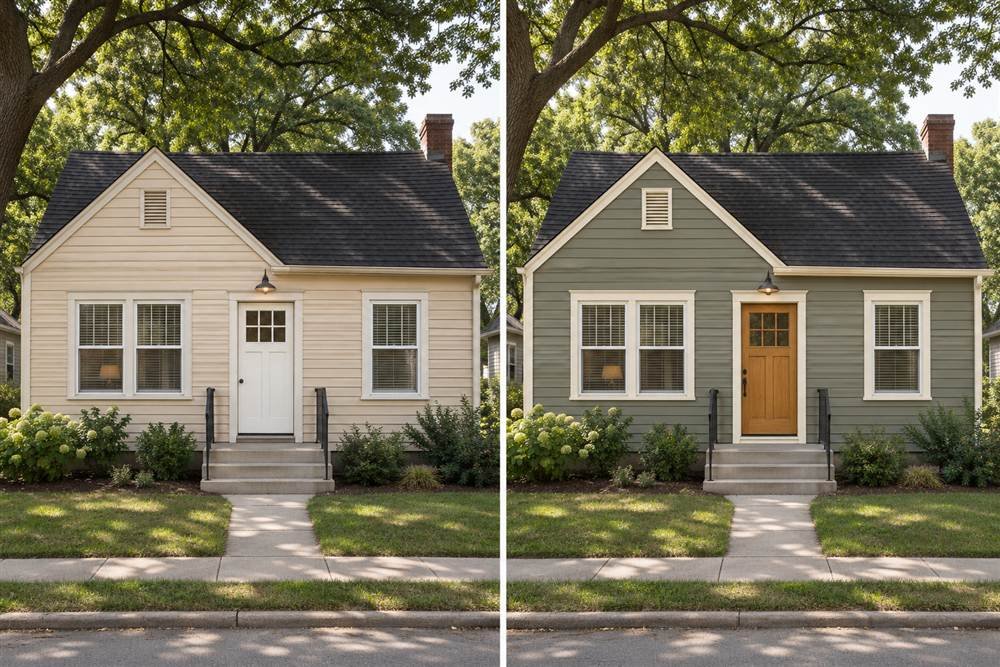
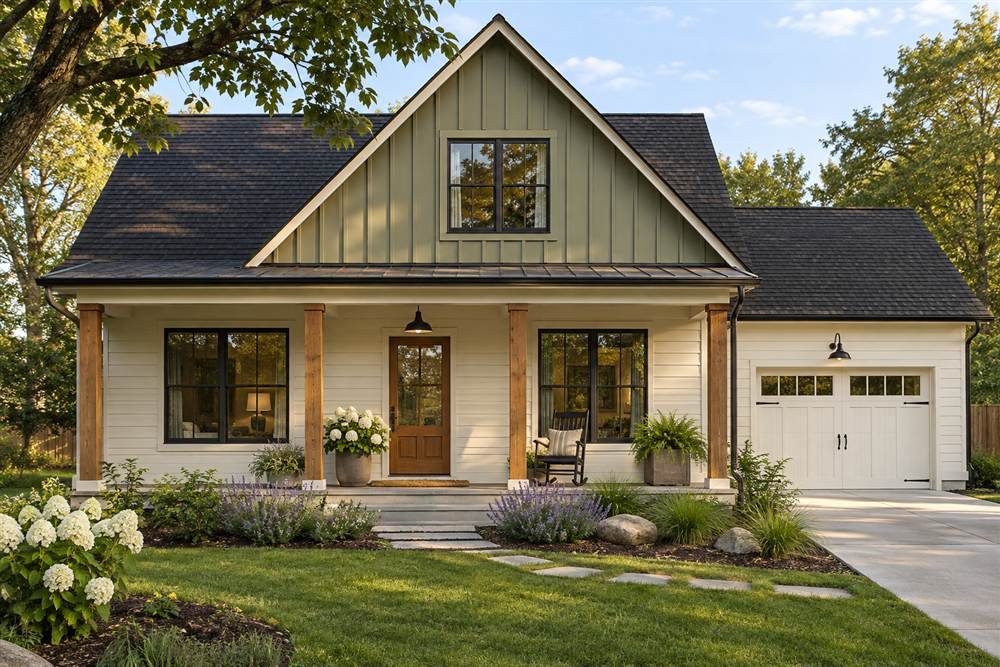
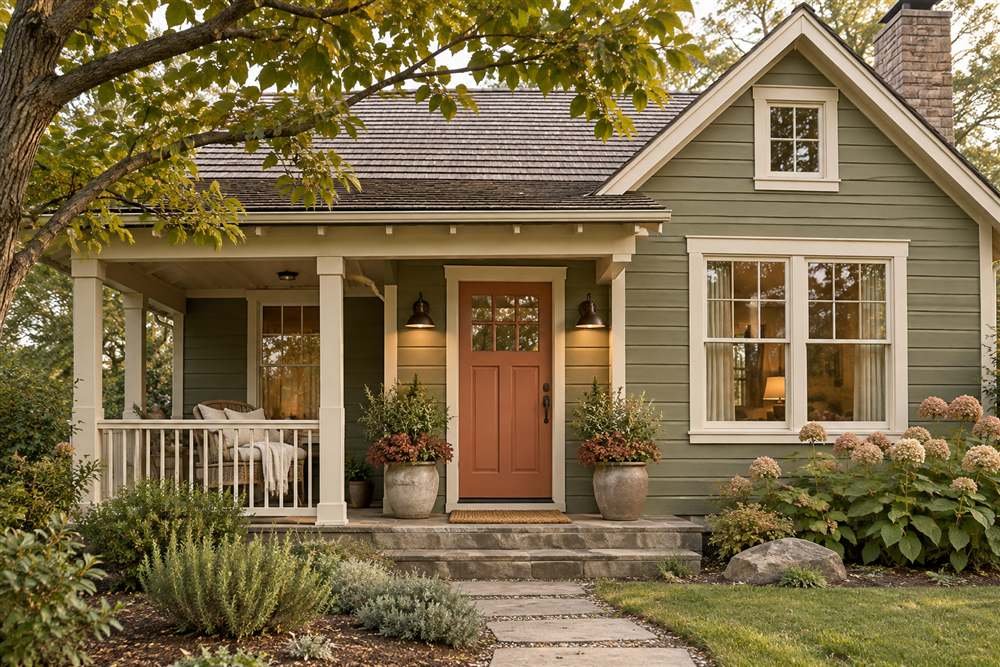
Before: Beige siding blends into a brownish roof and leaves the entrance without definition. After: Muted sage siding, cream trim, and a wood-toned door introduce a coherent palette while retaining the roof. The change relies on coordinated undertones rather than a long list of new materials.
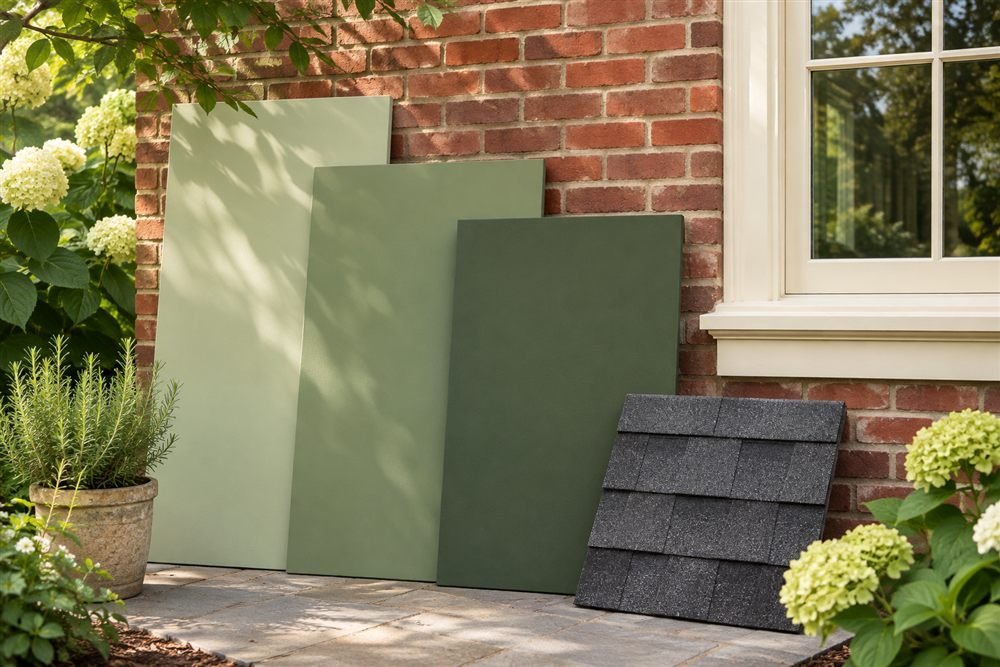
Test the green against the actual roof and foundation before choosing it. Compare a light, medium, and warmer sage outdoors. Our sage green house exterior ideas explain sampling, trim, roof, and door combinations for different styles.
3. Replace a stark white with a softer white
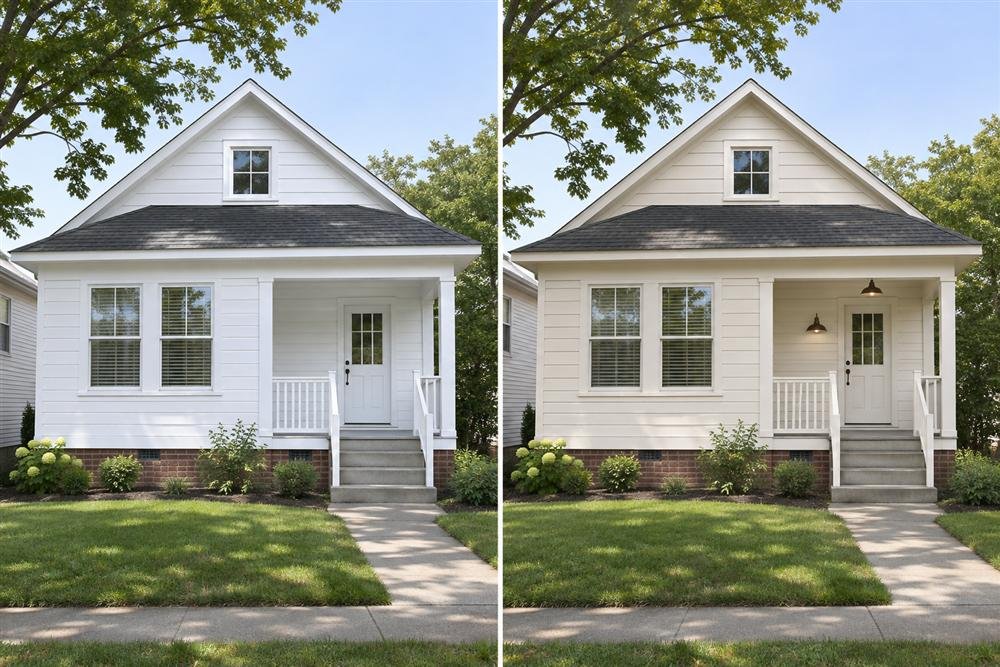
Before: A very cool white makes warm brick, cream windows, or brown shingles appear mismatched. After: A softer white connects those permanent finishes and gives the facade a more settled appearance. The improvement can come from undertone compatibility rather than a dramatic color change.
Sample several whites together in sun and shade. An off-white that appears neutral indoors may look yellow next to a cool roof or gray beside stone. Use our warm white exterior paint colors guide to narrow the shortlist, then make the final decision at home.
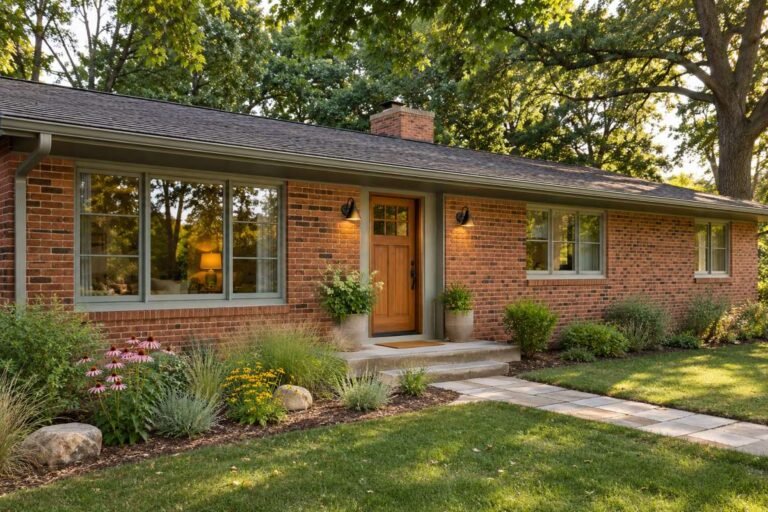
4. Update a brick ranch without painting the brick
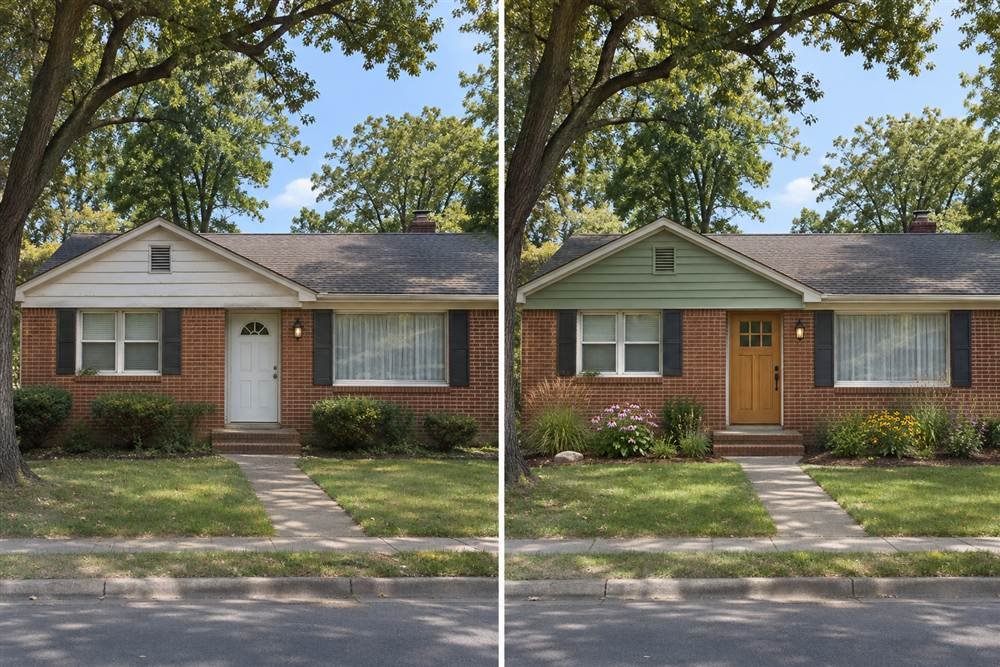
Before: A dark gable, faded door, and overgrown planting make a brick ranch feel heavy. After: Repaint the non-masonry siding, refresh the entrance, and lower the planting while preserving the brick. This approach can improve the palette without creating a new masonry coating maintenance cycle.
Inspect mortar, flashing, and drainage before making cosmetic decisions. Match new colors to both the brick and the mortar. If the brick is attractive and sound, let it remain a permanent anchor. A quieter gable and clearer entry often produce enough contrast on their own.
5. Remove shutters that do not fit
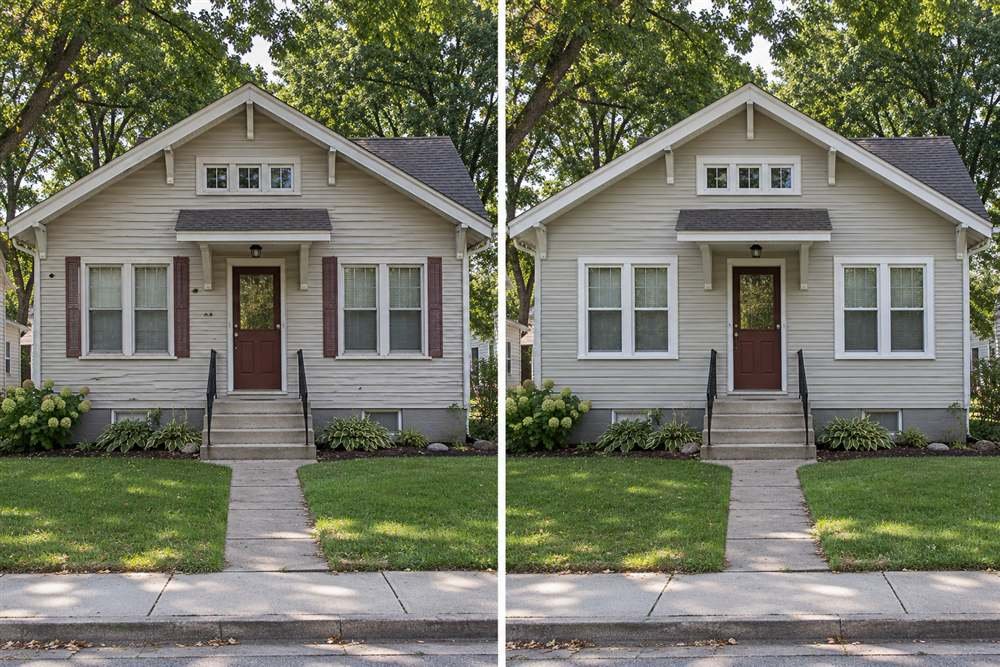
Before: Narrow decorative shutters crowd wide windows and add visual noise. After: Removing inappropriate shutters, repairing their attachment points, and refreshing window trim lets the openings read clearly. The facade can look better with fewer elements rather than more accessories.
First determine whether the shutters are functional or historically important. Do not remove significant original features simply to imitate a modern image. If you keep shutters, choose proportions that suit the windows and maintain proper attachment. Include patching and finishing in the scope so old fixing holes do not become the next visible problem.
6. Restore Craftsman trim instead of replacing its character
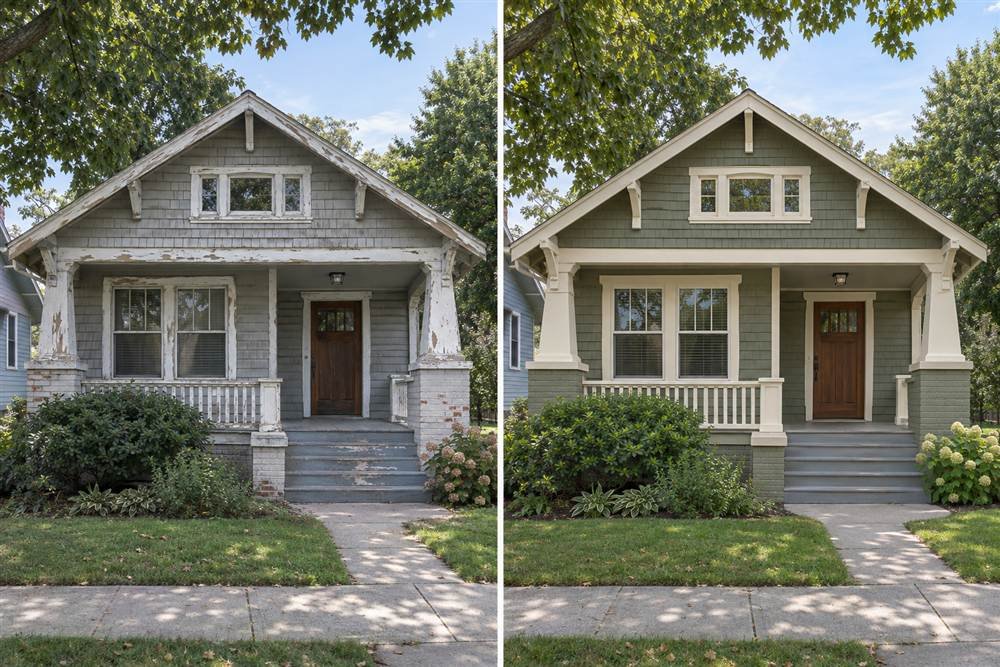
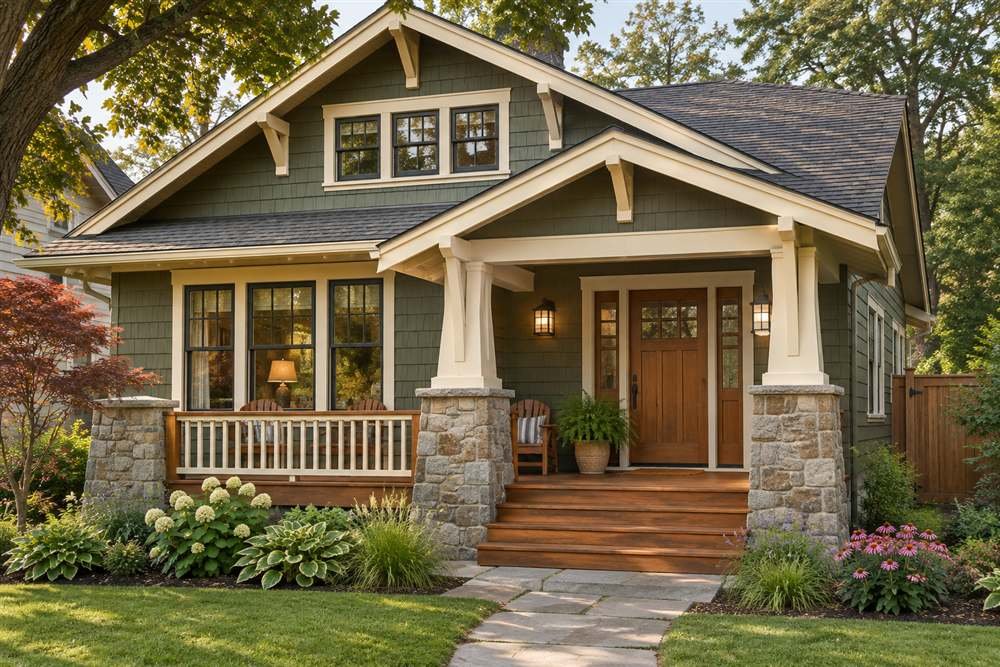
Before: Peeling brackets and faded shingle details obscure a Craftsman’s craftsmanship. After: Repair the sound original elements and use a restrained body-and-trim palette to reveal them. The result can feel refreshed while keeping the details that distinguish the house from a generic new facade.
Ask a qualified contractor which pieces need repair and which genuinely need replacement. Match profiles and proportions when replacing trim. On an older home, check lead-paint requirements before preparation begins. A well-documented repair proposal is more useful than a blanket instruction to strip away everything decorative.
7. Coordinate existing windows with paint and trim
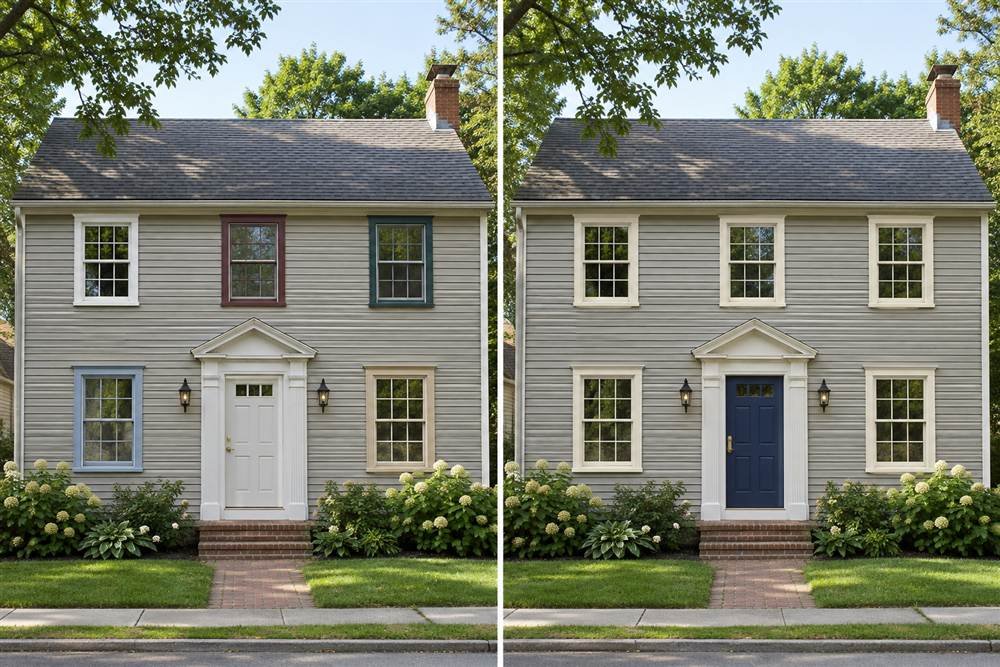
Before: Several window-frame colors and unrelated trim finishes fragment a simple elevation. After: A consistent surrounding trim color and one entry accent give the existing windows a calmer setting. Keeping functioning units can leave more budget for repairs that affect comfort or water management.
Painting frames is material-specific. Confirm that the window manufacturer allows the product and color before coating a factory finish. If units leak or fail, investigate installation and seals rather than treating the problem as cosmetic. Replacement should solve a defined performance issue as well as fit the design.
8. Use one front-door color as the main accent
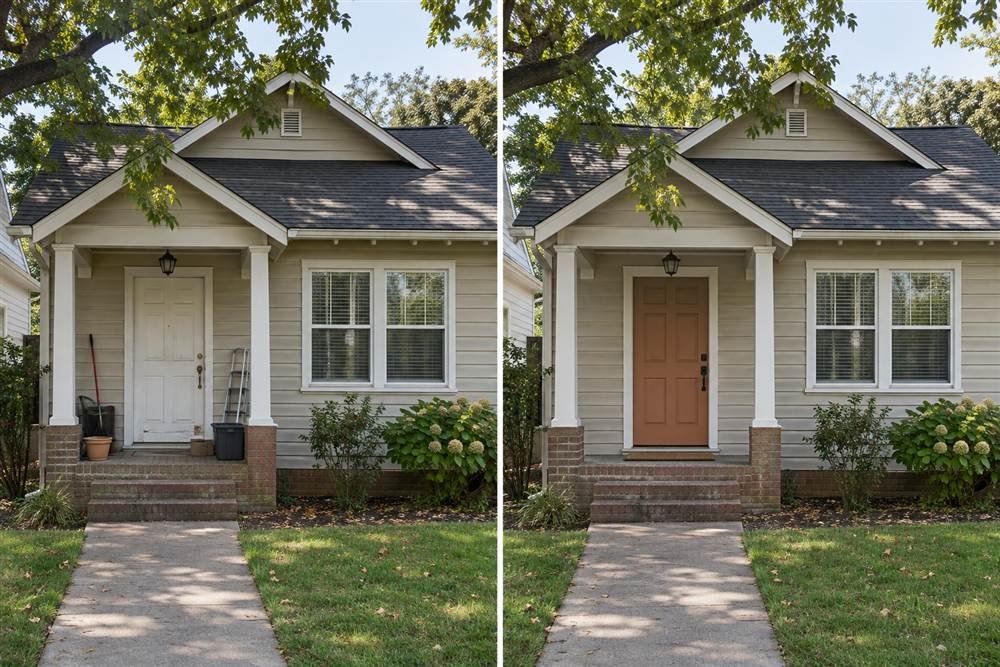
Before: A faded neutral door disappears among planters, signs, and mismatched hardware. After: A controlled terracotta, navy, or green accent makes the entrance readable while simpler accessories reduce clutter. A small painted surface can change the focus of the whole facade.
Test the color under the actual porch light and in daytime shade. Check the door’s required preparation and drying conditions before removing hardware. Include the edges specified by the manufacturer, and avoid coating weatherstripping or moving components. Keep the path and door swing clear after returning furniture and containers.
9. Warm a recessed entrance with wood

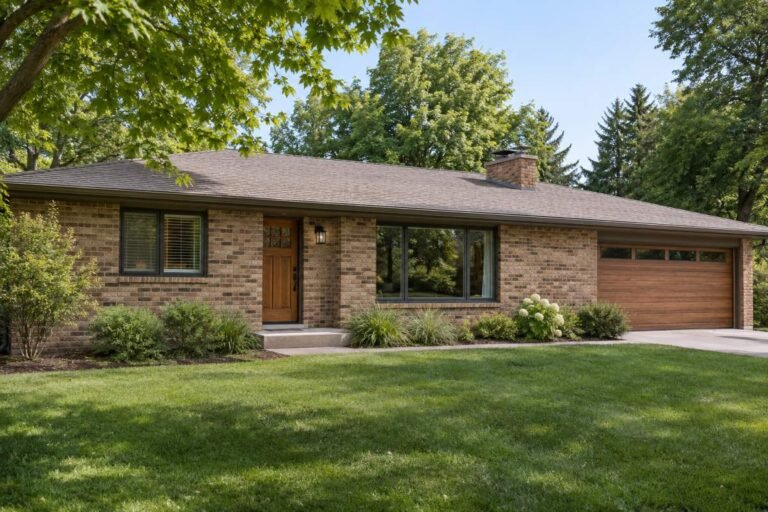
Before: A dark recess hides the entry and makes the house feel closed. After: A wood-toned door, appropriate light, and visible address numbers give the recess a destination. A warm finish can add contrast even when the main body remains unchanged.
Choose a door and finish suited to its exposure, security needs, and local conditions. A natural-wood appearance may also be available in another door material. Compare upkeep and warranty requirements alongside appearance. The finished entry should operate smoothly and seal properly, not just look welcoming in a photograph.
10. Let an existing garage door blend in
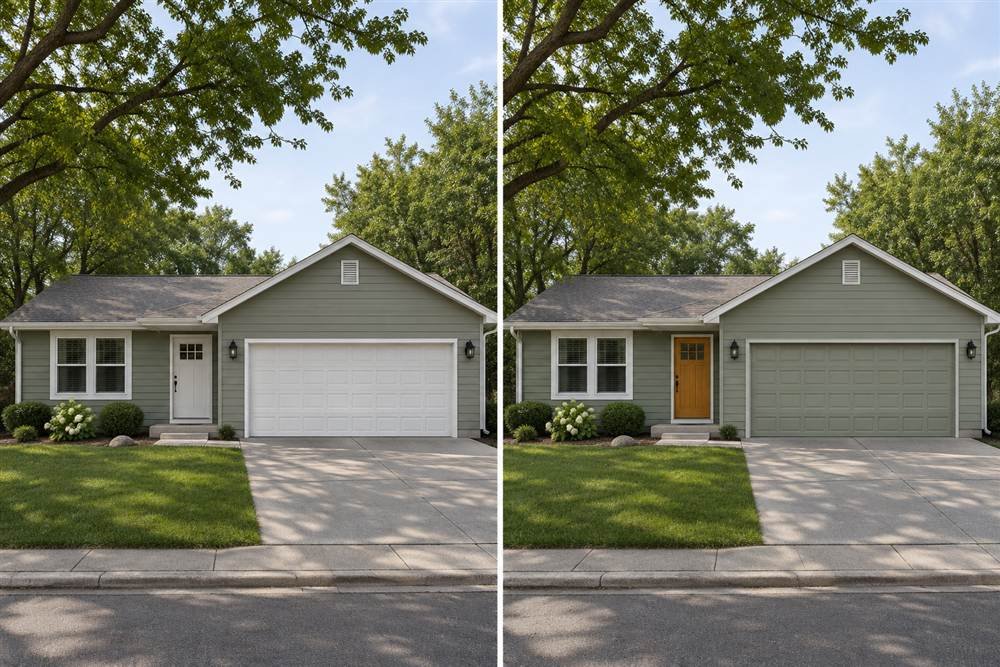
Before: A bright garage door becomes the largest contrasting rectangle on the street elevation. After: A compatible finish closer to the body color lets the pedestrian entry receive more attention. The change can rebalance the facade without moving a wall or opening.
Confirm that repainting is allowed for your specific door and that the chosen color meets its restrictions. Follow instructions for cleaning, primer, and compatible coatings. Do not paint seals, safety labels, hinges, tracks, or other operational parts. Plan access and drying time so the household can use the garage safely.
11. Replace a failing garage door for function first
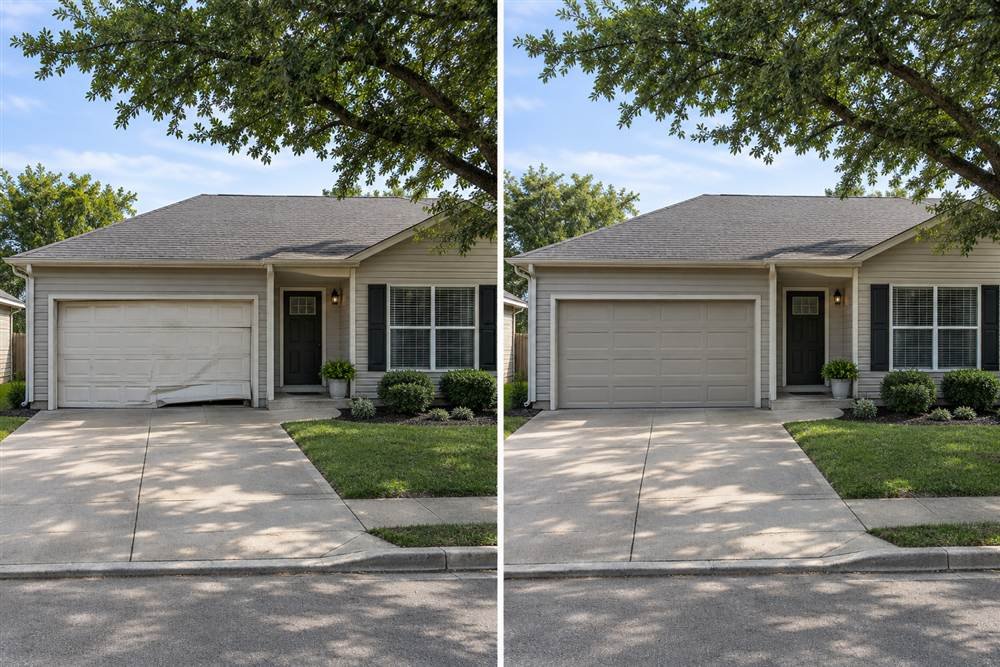
Before: A damaged or unreliable garage door weakens both the facade and everyday convenience. After: A properly sized replacement with a restrained panel pattern fits the architecture and operates correctly. Coordinate the finish with the body, trim, or entry rather than introducing another unrelated material.
Get a written scope covering the door, tracks, opener compatibility, controls, disposal, and safety checks. Discuss insulation and local wind requirements where relevant. Broad resale reports can offer context, but they do not promise your home’s return. Choose a replacement because it solves your actual condition and use requirements.
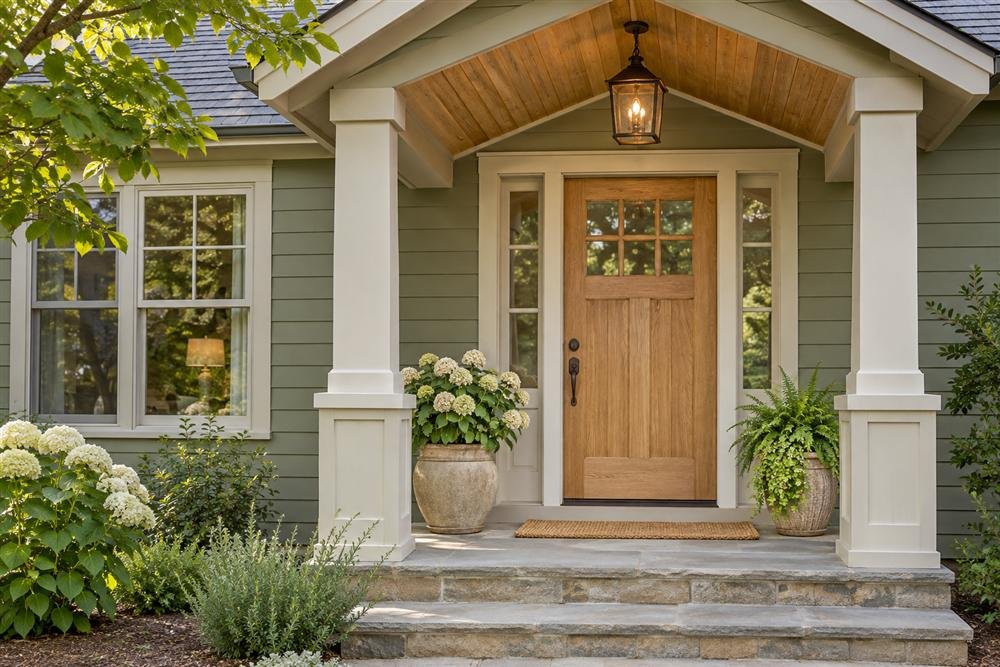
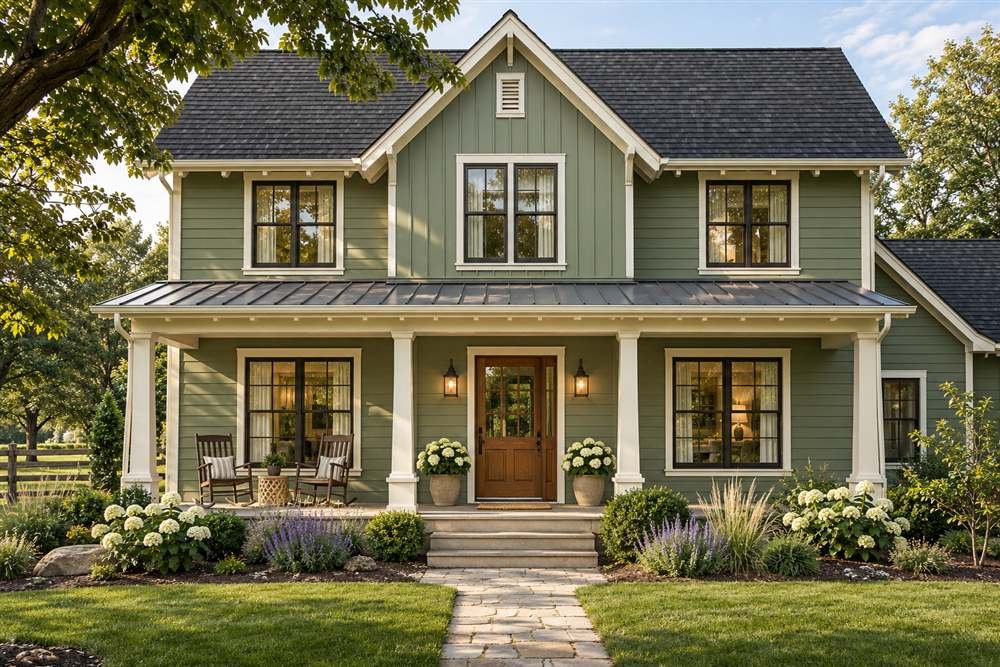
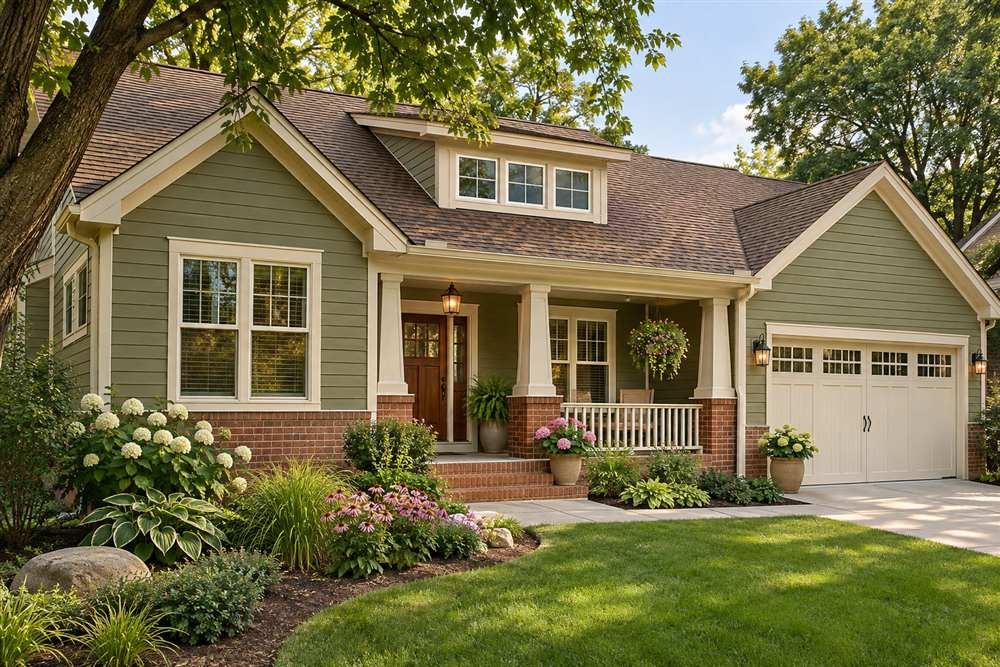
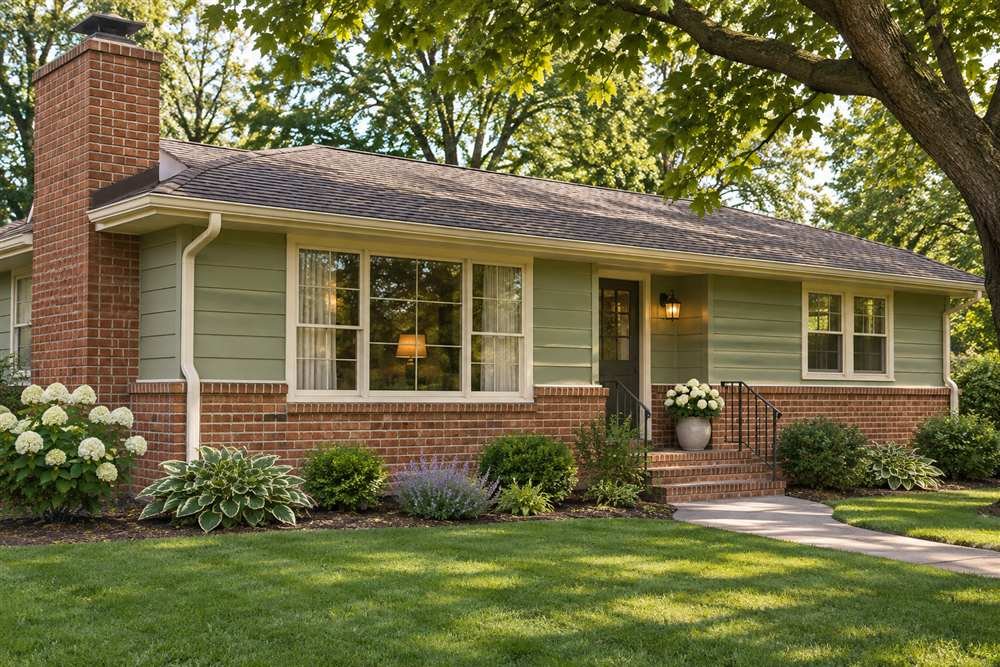
Before-and-after exterior ideas for different house styles
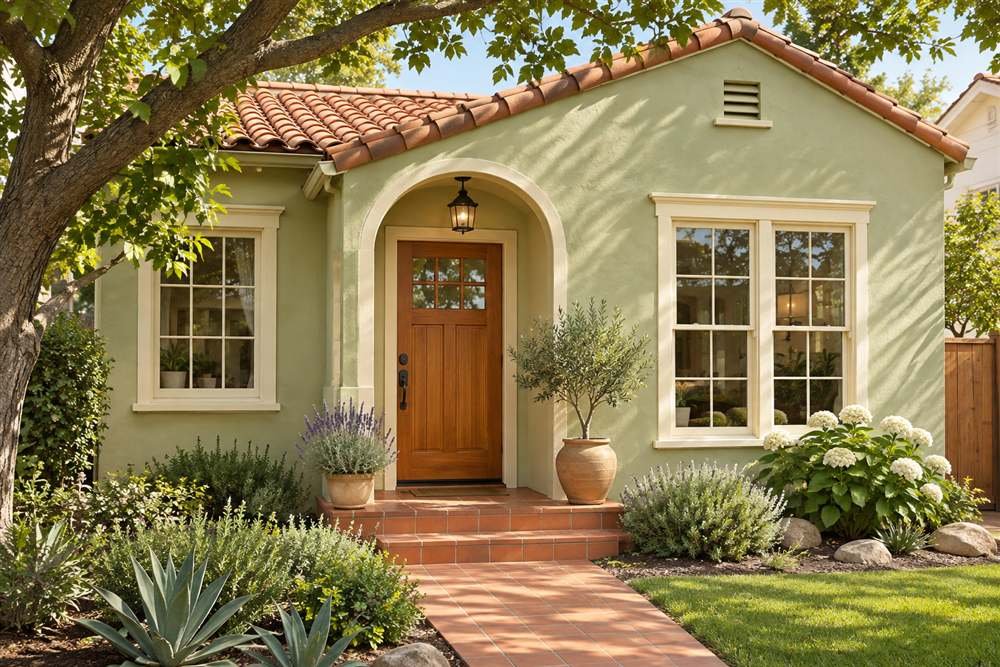
12. Repair and repaint tired stucco
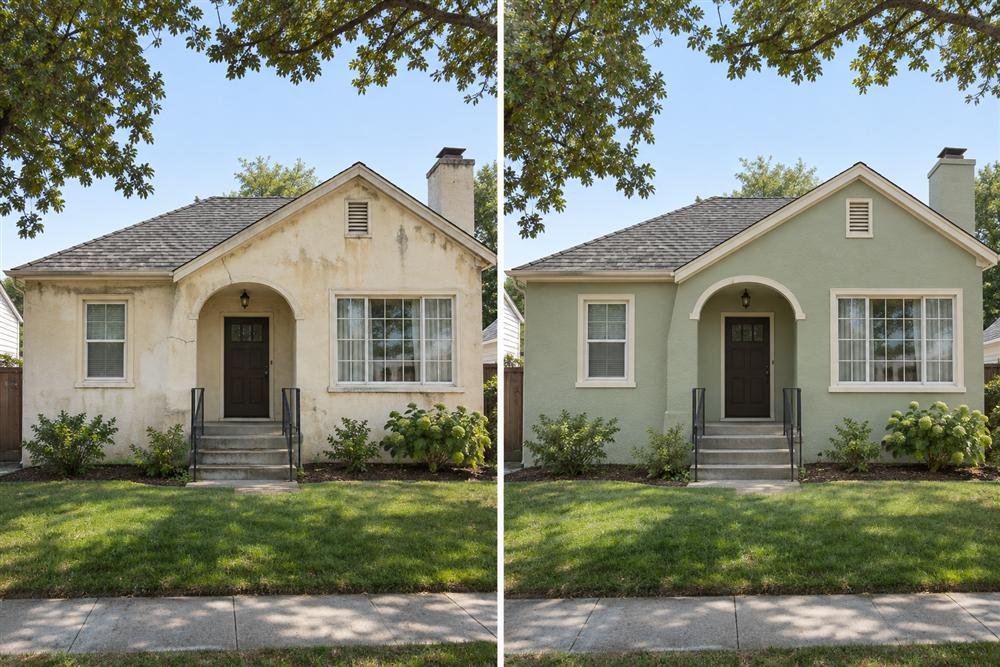
Before: Staining, fine cracks, and uneven old paint make a stucco exterior appear worn. After: Investigate the cause, complete appropriate repairs, and apply a compatible finish. A calm color and consistent trim can then make the elevation read as one complete surface.
Do not assume that every crack is harmless or that a thick coating fixes water entry. Ask for advice appropriate to the wall system and local climate. Follow curing and application instructions. Our exterior stucco wall construction guide explains why the underlying assembly matters to the finished appearance.
13. Replace damaged siding with a consistent layout
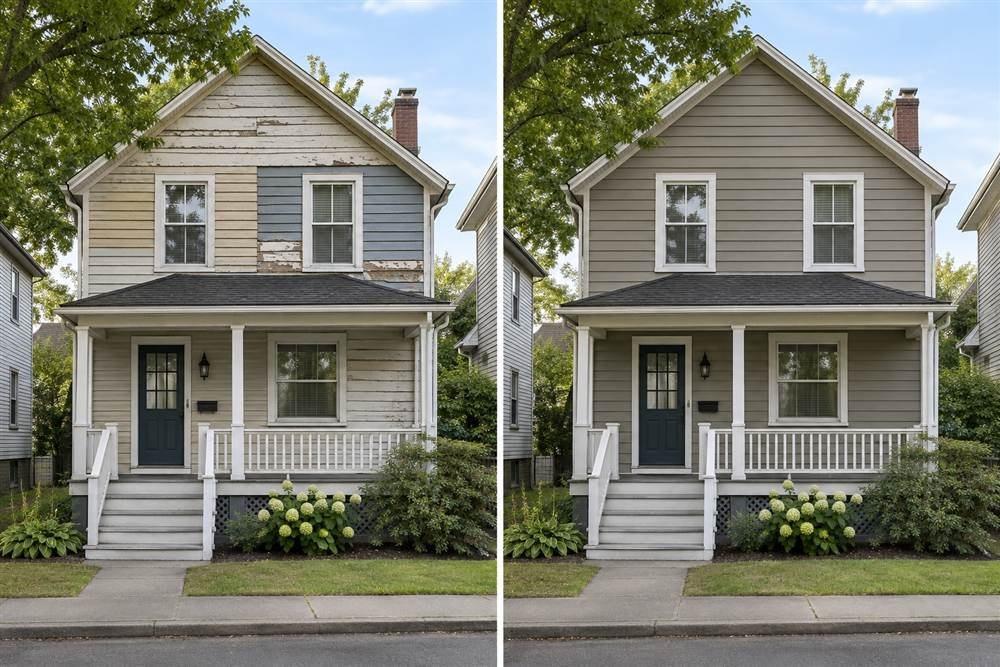
Before: Mismatched patches and failing boards make the wall look pieced together. After: Repair underlying damage and use a coordinated siding profile, exposure, and trim approach. Consistent lines often matter more than a dramatic new color or a fashionable panel pattern.
Inspect the water-resistive layer and flashing where the work opens the wall. Include penetrations, transitions, and cut-edge treatment in the installation plan. If only one elevation needs work, agree how the new surface will meet the old. A material sample alone cannot explain how those junctions will be built.
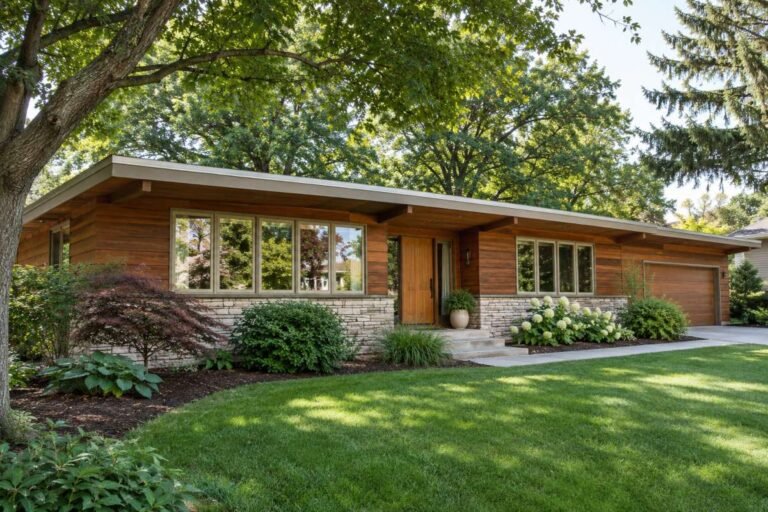
14. Add wood at a sheltered focal point
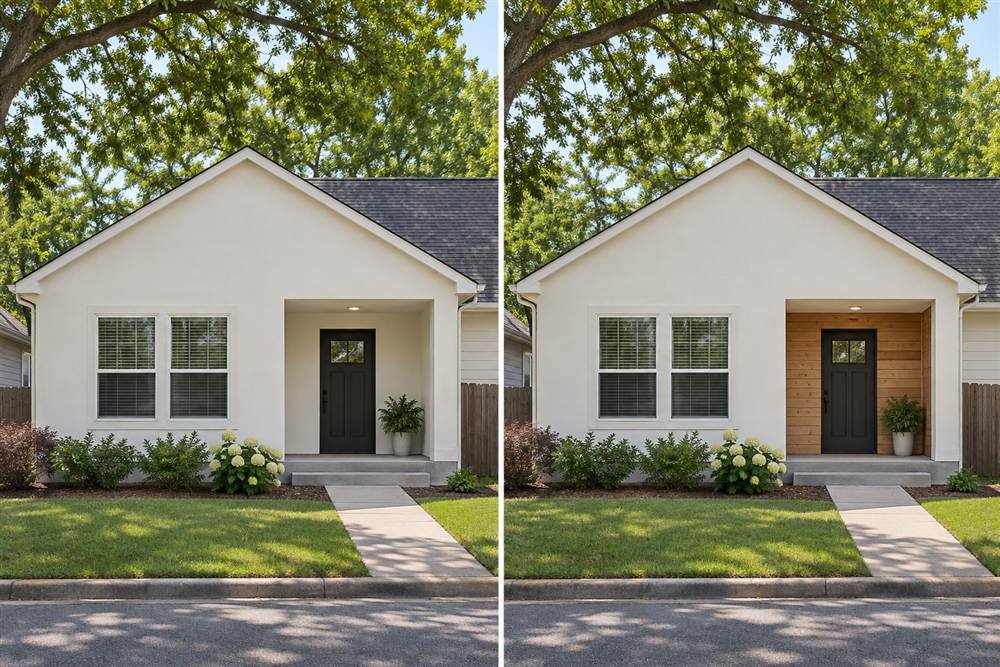
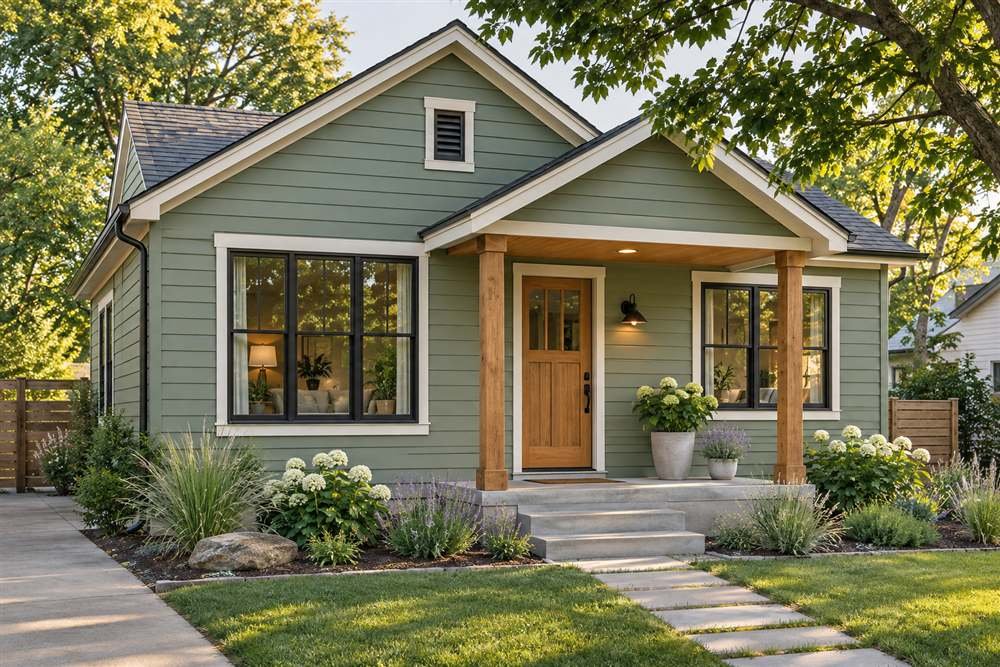
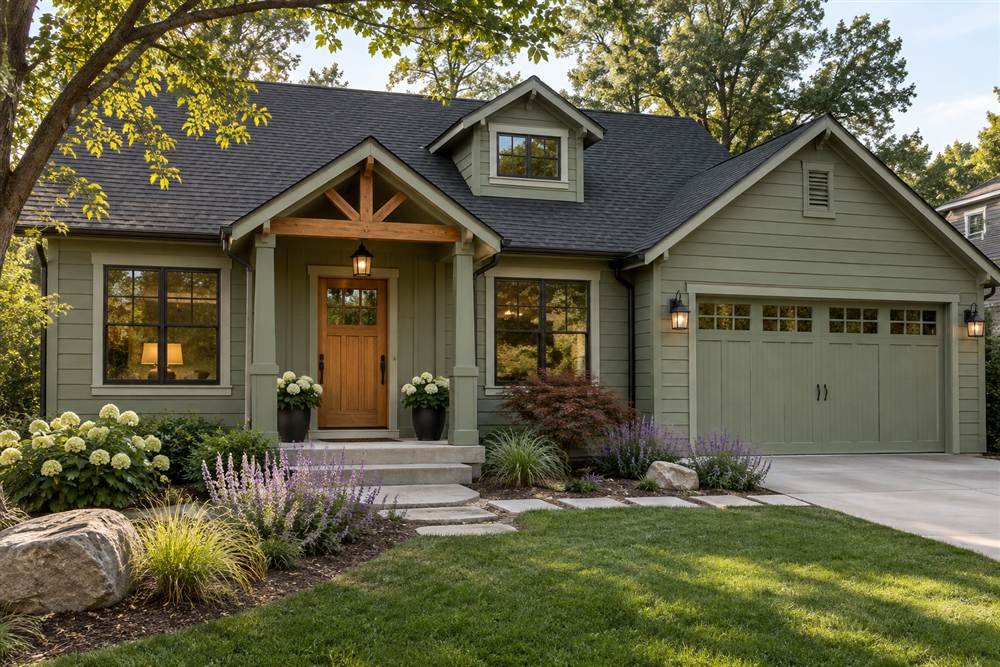
Before: A featureless entry bay lacks depth. After: A limited wood accent around the covered entrance creates warmth while the surrounding facade stays quiet. Keeping the accent to a meaningful area avoids making every wall a different material.
Choose a system designed for exterior use and detail its drainage, ventilation, and connections. Wood under cover may weather differently from exposed pieces. Plan how the finish will age and how it will be maintained. The accent should still look intentional after several seasons, not only on installation day.
15. Rebalance a house with existing stone
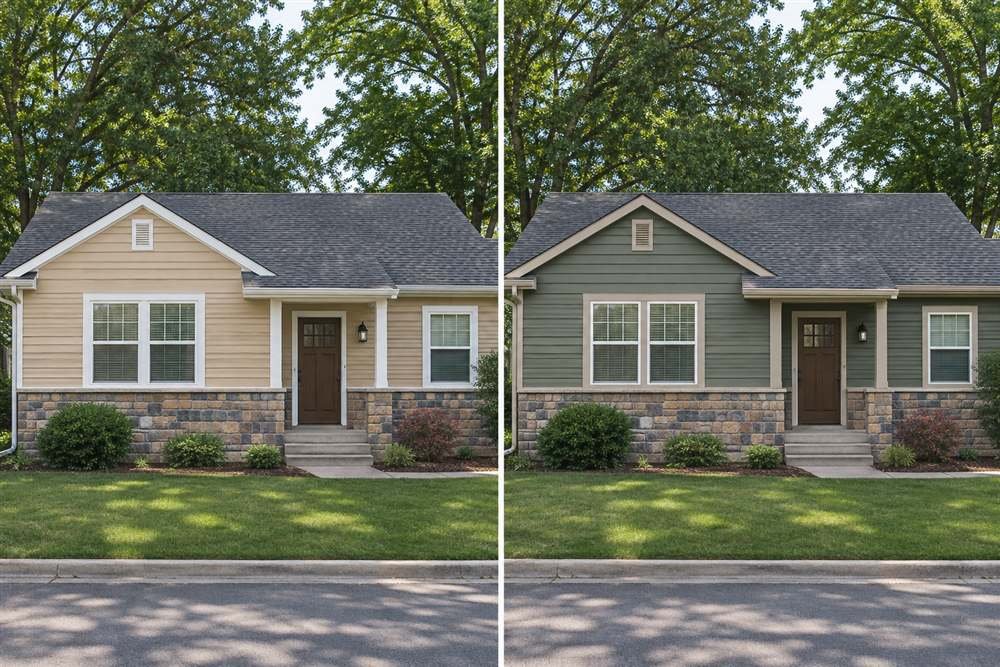
Before: Tan siding competes with a strongly patterned stone base or entry. After: A quieter body color and compatible trim allow the retained stone to become the primary texture. This can reduce visual competition without covering a durable material.
Study the stone’s overall background tone from a distance rather than selecting a paint to match one small fragment. Include mortar in the comparison. If the stone is damaged, determine whether it is veneer or structural masonry before planning repairs. Color coordination comes after understanding what the wall is and how it manages water.
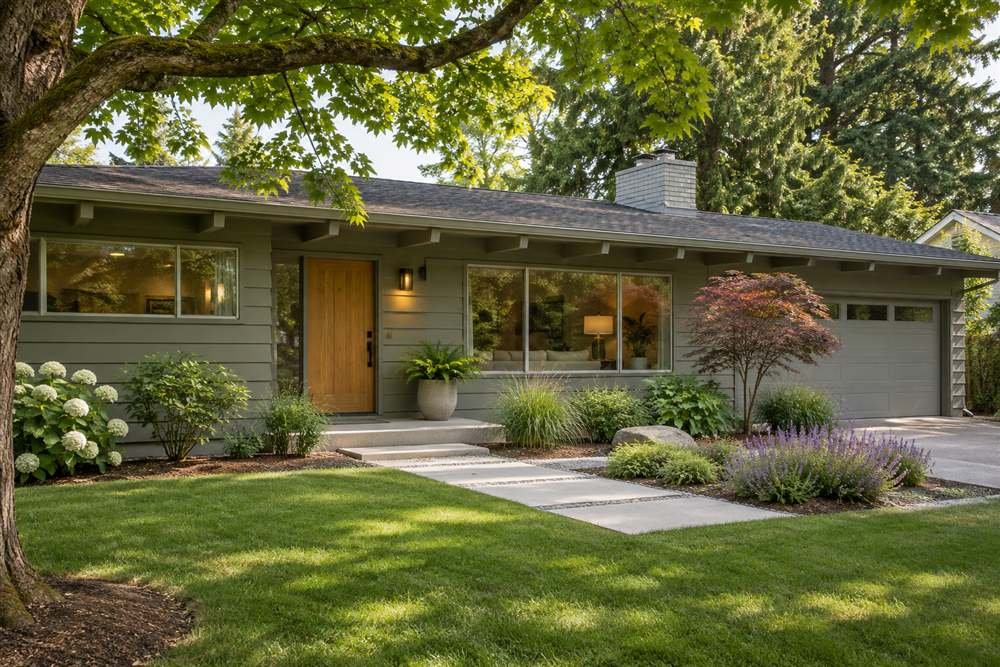
16. Unify a long ranch elevation
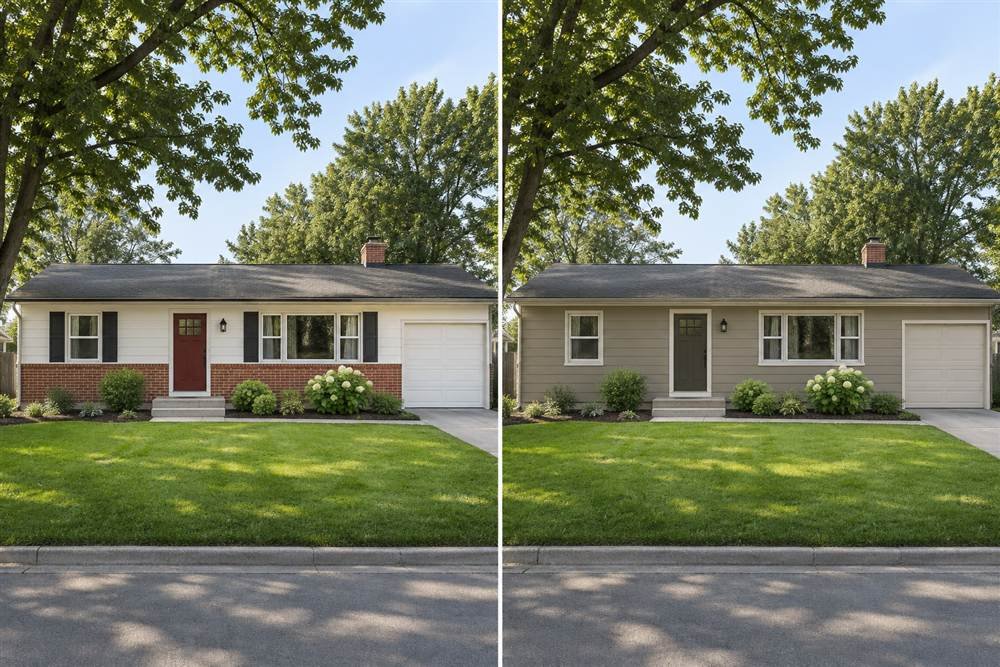
Before: Several paint bands and unrelated accents break a ranch into disconnected sections. After: One main body color, modest trim contrast, and a clear door accent reinforce its horizontal character. The roof and long eaves can remain the organizing features.
Avoid copying a tall farmhouse facade onto a low ranch without considering proportion. Landscaping and paths can establish rhythm without changing the roof. Our modern ranch exterior guide discusses updates that work with a low silhouette rather than treating the existing architecture as a problem.
17. Clarify a split-level entrance
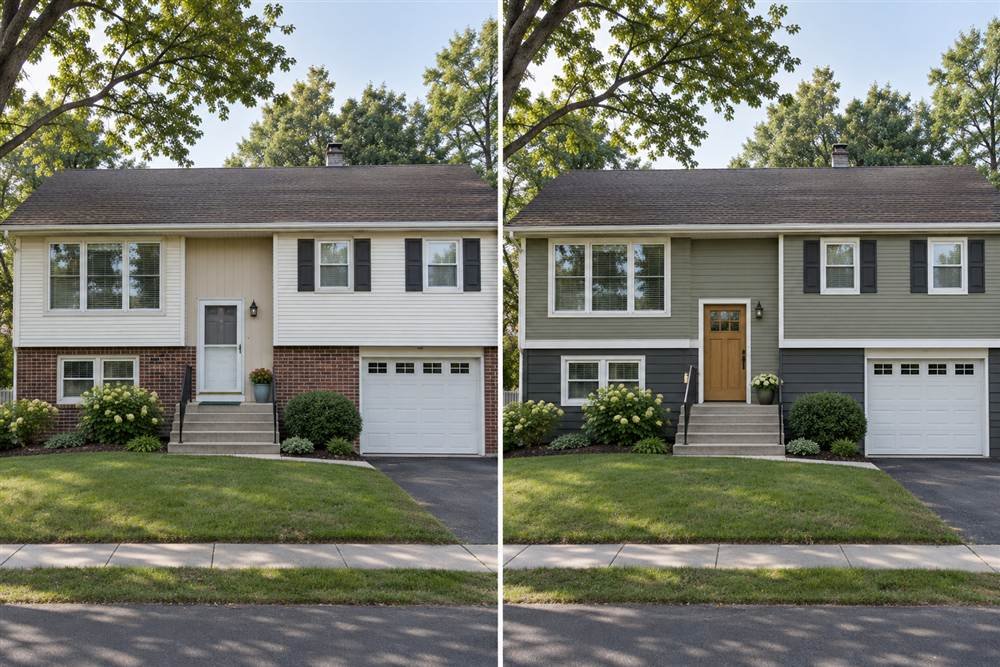
Before: A split-level’s changes in height and several finishes make the main entrance hard to read. After: Coordinate the larger surfaces and use a defined door, landing, and path to show visitors where to go. Existing architectural breaks can support a controlled two-tone scheme.
Test the plan in a straight-on photograph before ordering materials. A dark upper section can appear heavier than expected, and a sharply contrasting garage can steal attention. Include railings, steps, and lighting in the same drawing. The entrance should be clear to someone visiting for the first time.
18. Refresh a Cape Cod without changing its proportions
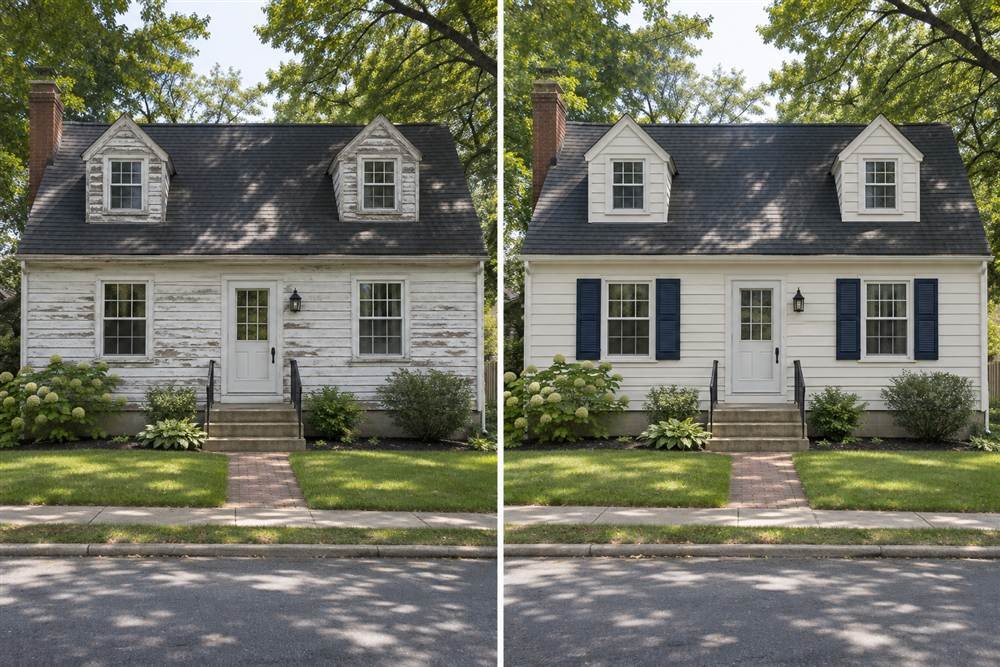
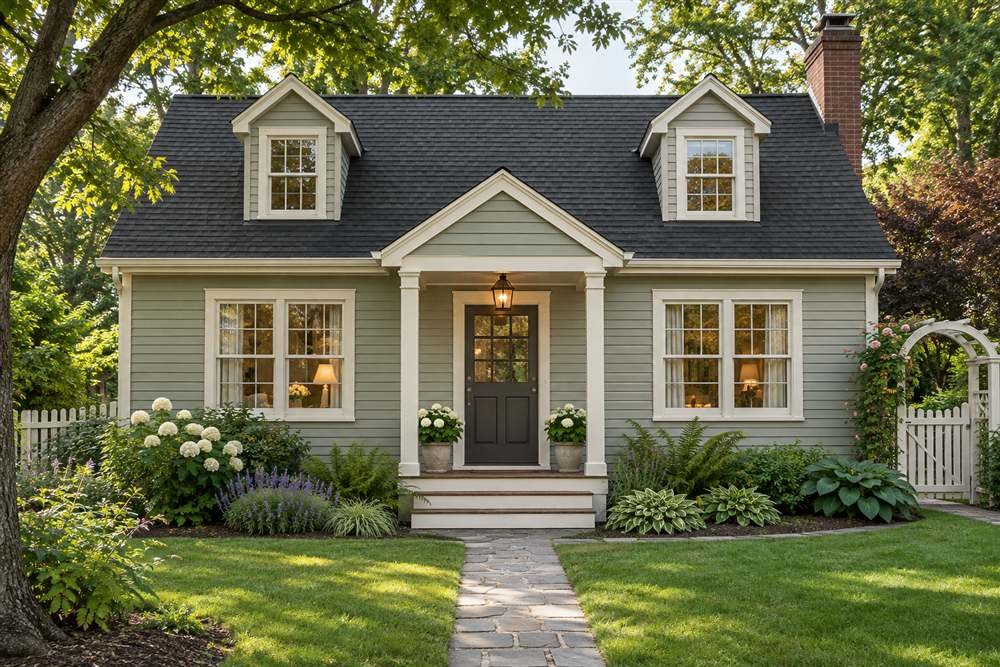
Before: Weathered clapboard, faded dormer trim, and inconsistent shutters make a Cape feel tired. After: Repair siding and details, use a coherent light body color, and choose restrained accents that suit the dormers and windows. The original roof shape remains the main feature.
Do not add shutters to every opening merely for symmetry. Check their size and architectural fit. Address roof drainage and flashing around dormers before painting the trim. A neat finish will last only as well as the preparation and water-management details beneath it.
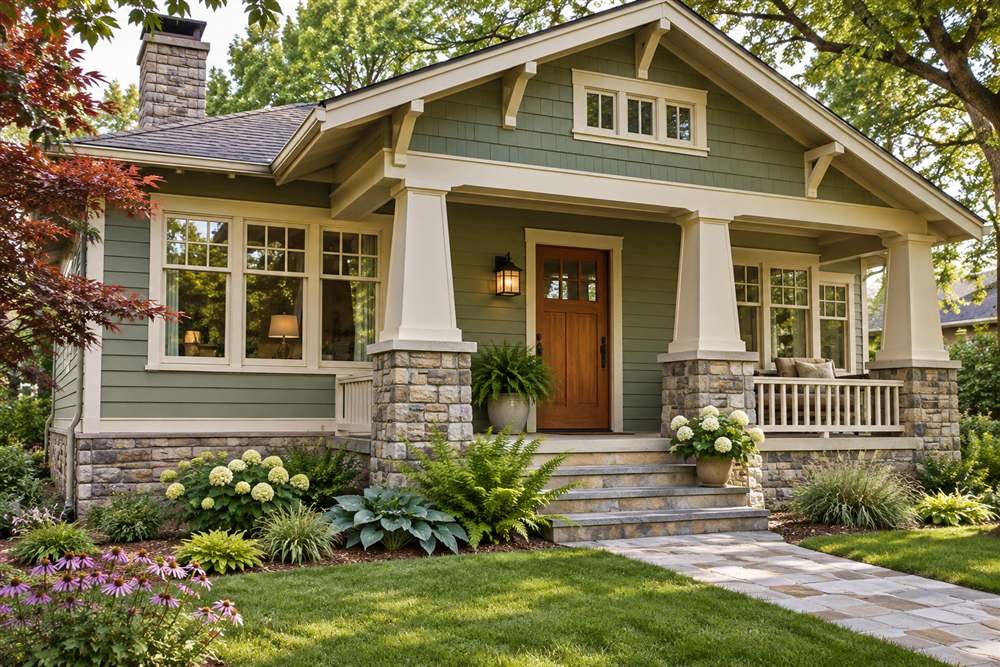
19. Open up a Craftsman porch
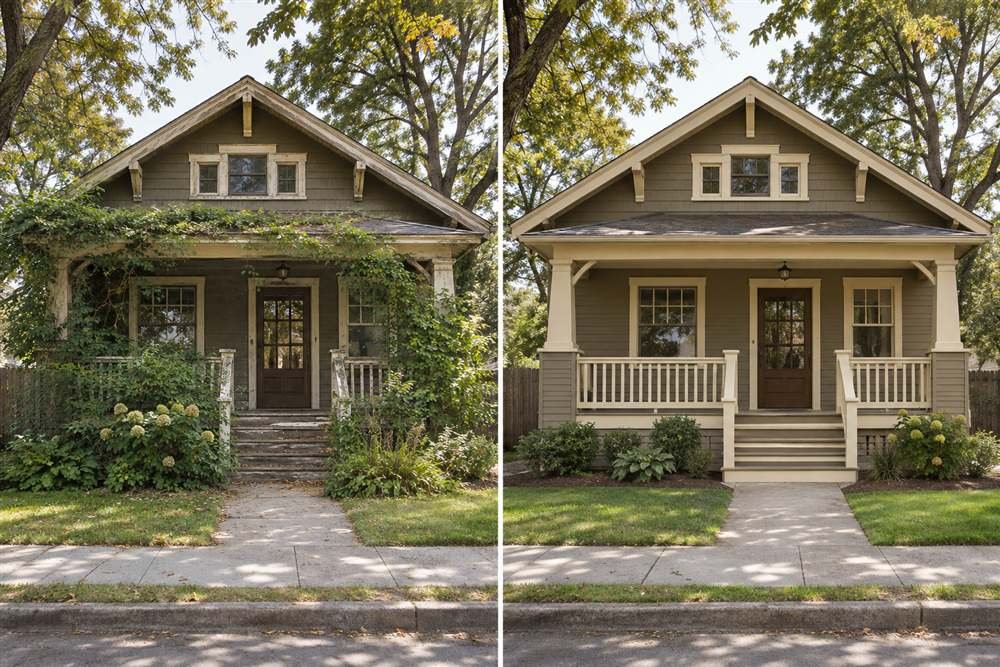
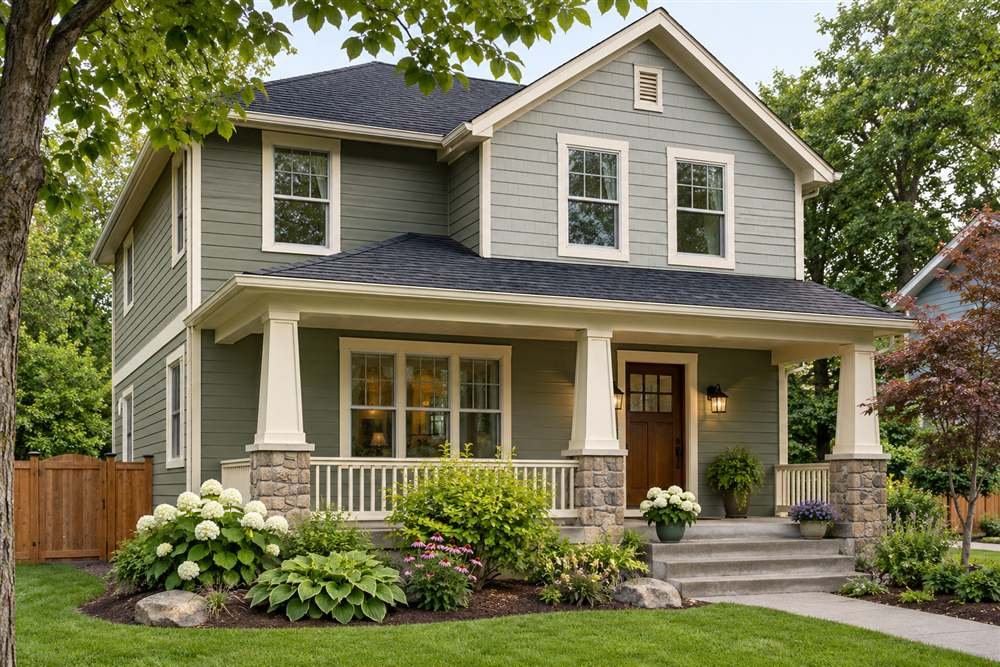
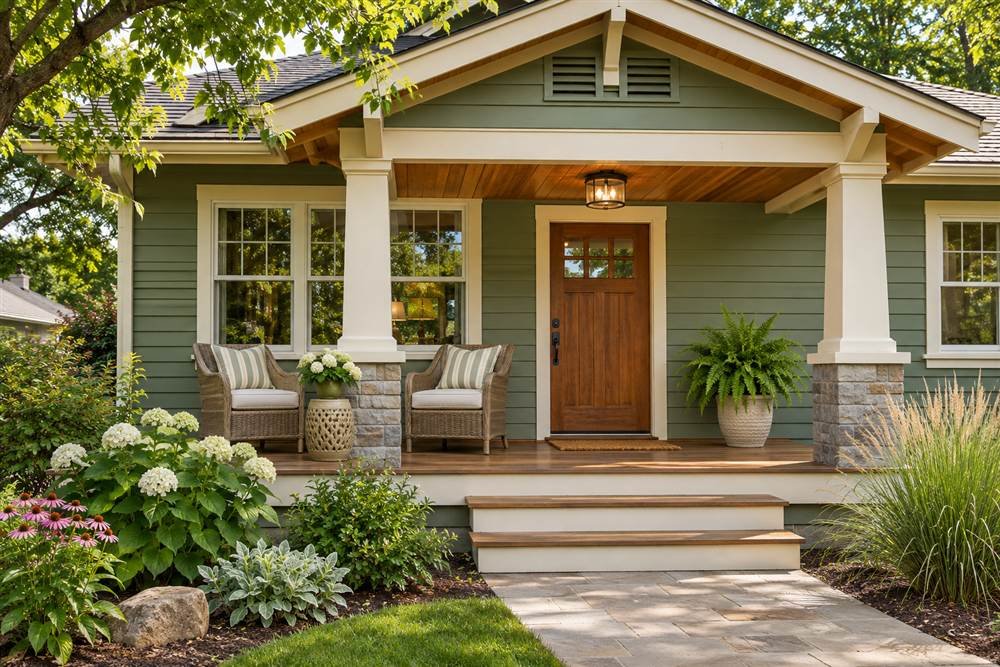
Before: Tall shrubs and stored objects hide porch posts, brackets, and the front door. After: Pruning, repair, and a simpler furniture layout let those original elements become visible. A restrained earthy palette can reinforce the house’s materials without adding new decorative features.
Check whether plants can be pruned safely or need staged replacement. Keep roots, mature plant size, and access to the foundation in mind. Repair porch flooring and supports before placing furniture. The improvement should provide a usable threshold as well as a better street photograph.
20. Preserve a Tudor-inspired facade
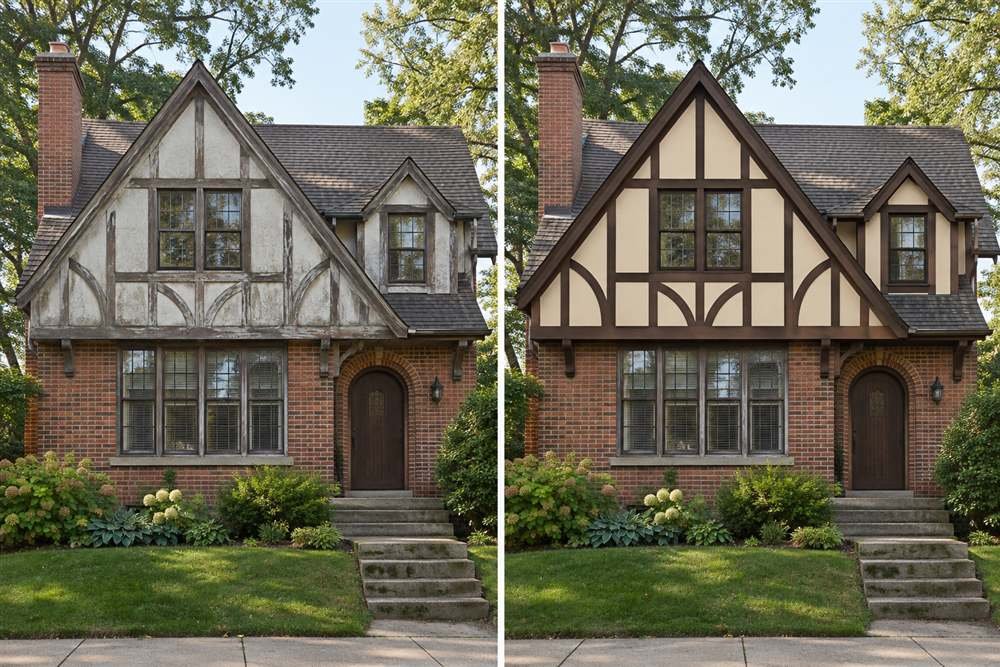
Before: Faded timber details and mismatched infill colors make a Tudor-style home look neglected. After: Repair sound woodwork and use coordinated finishes that preserve the pattern. The characteristic details can remain the reason the house stands out.
Determine whether elements are original, structural, or applied decoration before altering them. Historic-district rules may affect the work. Review the National Park Service preservation guidance when planning repairs to older materials. A modern makeover can improve condition while respecting the architecture already present.
21. Restore a Victorian’s details selectively
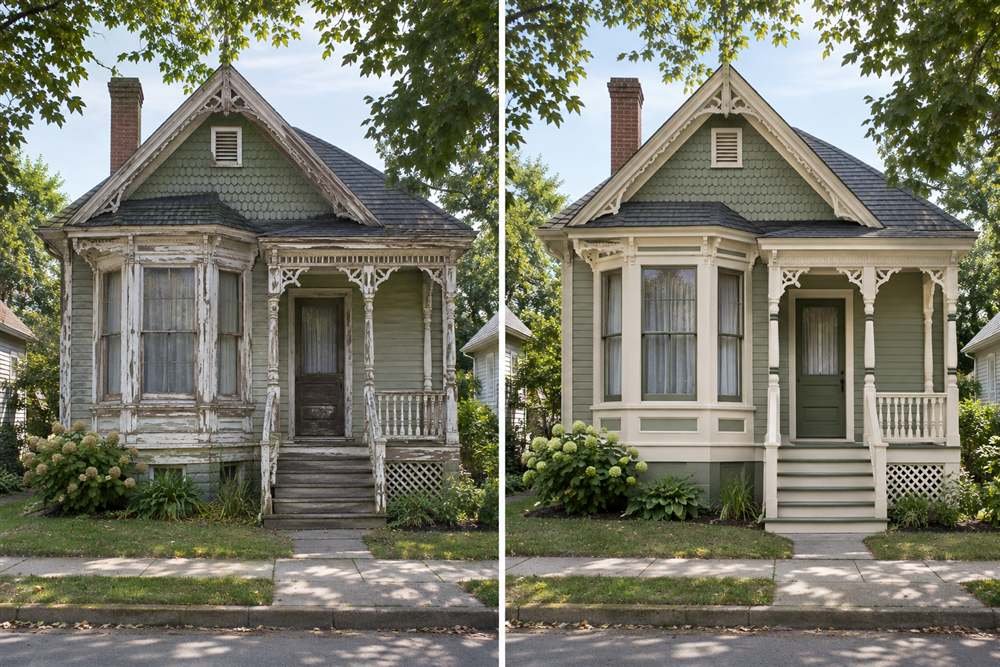
Before: Peeling paint and failing porch trim make an ornate cottage look busy and worn. After: Repair the details, simplify the color hierarchy, and repeat a small set of compatible tones. The goal is legible craftsmanship, not automatic removal of ornament.
Record original profiles and colors before work begins. Seek appropriate advice for historic features, lead paint, and deteriorated wood. Include small replacement parts in the estimate; brackets, balusters, and trim profiles can be labor-intensive. A coherent plan prevents separate repair decisions from creating a mismatched finished porch.
Before-and-after exterior ideas for entrances and porches
22. Replace a failing entry canopy at the right scale
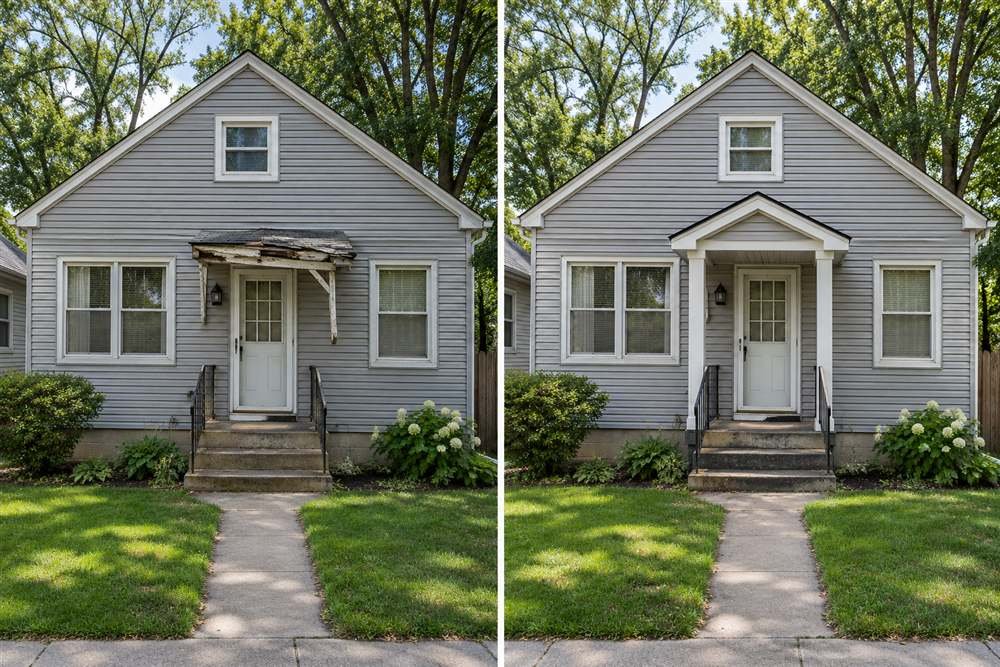
Before: A damaged canopy gives little protection and looks detached from the house. After: A proportionate replacement defines the doorway and manages rain more effectively. Match its lines and materials to the existing architecture rather than adding an oversized feature.
A canopy changes loads, connections, and water flow. Confirm permit and design requirements before construction. Detail flashing at the wall and decide where roof water will discharge. A visually simple canopy still needs proper attachment; the attractive underside cannot compensate for a leaking connection above the front door.
23. Make a small porch usable
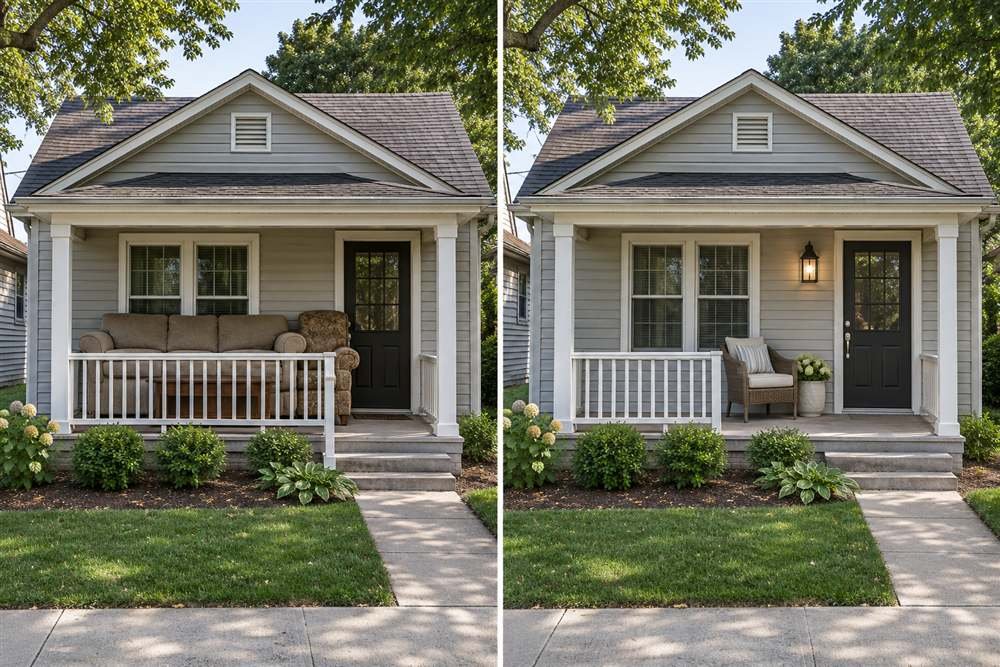
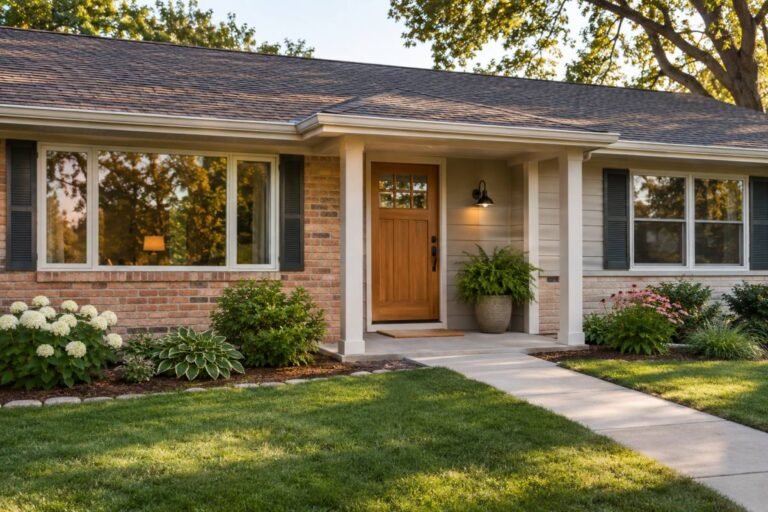
Before: Oversized chairs block the door swing and leave visitors stepping around furniture. After: One compact seat, a wall-mounted light, and a clear route make the same footprint work better. Small changes to layout can create a stronger before-and-after than adding more decor.
Measure the door swing, landing, and walking space before buying furniture. Keep emergency access and local requirements in mind. Our small front porch ideas offers layouts for tight entries, including ways to add character without filling the route with planters.
24. Repair porch railings and steps as a complete system
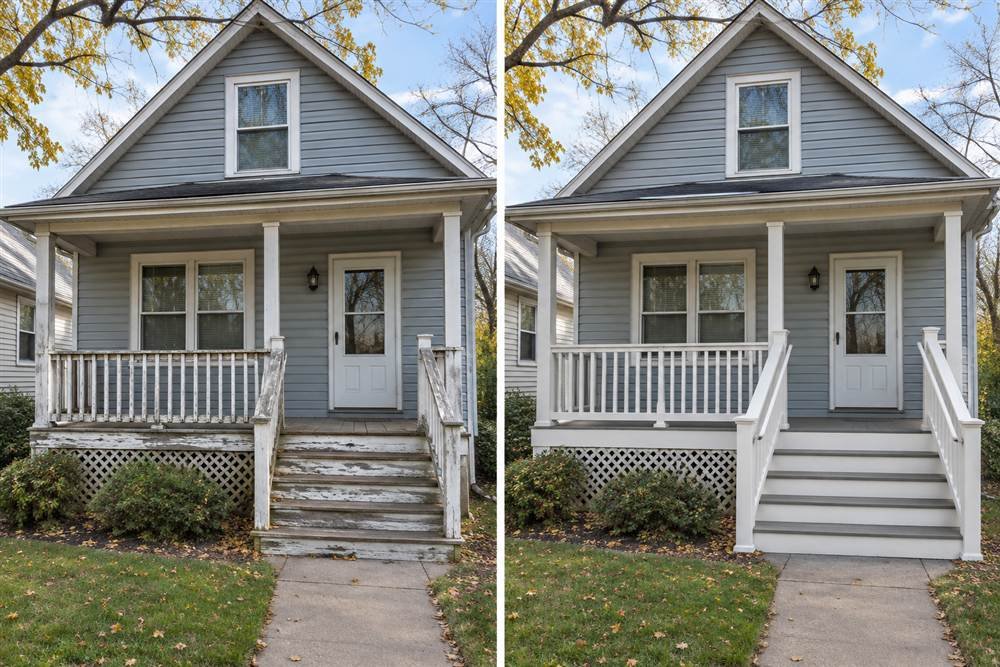
Before: Worn rails and inconsistent steps make the entrance feel unsafe. After: Repair the supporting structure and install suitable guards and handrails where required. Coordinate their finish with the door and fixtures so the practical repair also improves the appearance.
Have dimensions, connections, and local code requirements checked by a qualified professional. A decorative railing photograph does not show whether it is strong enough or correctly positioned. Include fasteners, corrosion resistance, and the condition of the supporting framing in the scope. Paint should follow sound construction rather than conceal loose components.
25. Give the front door a direct path
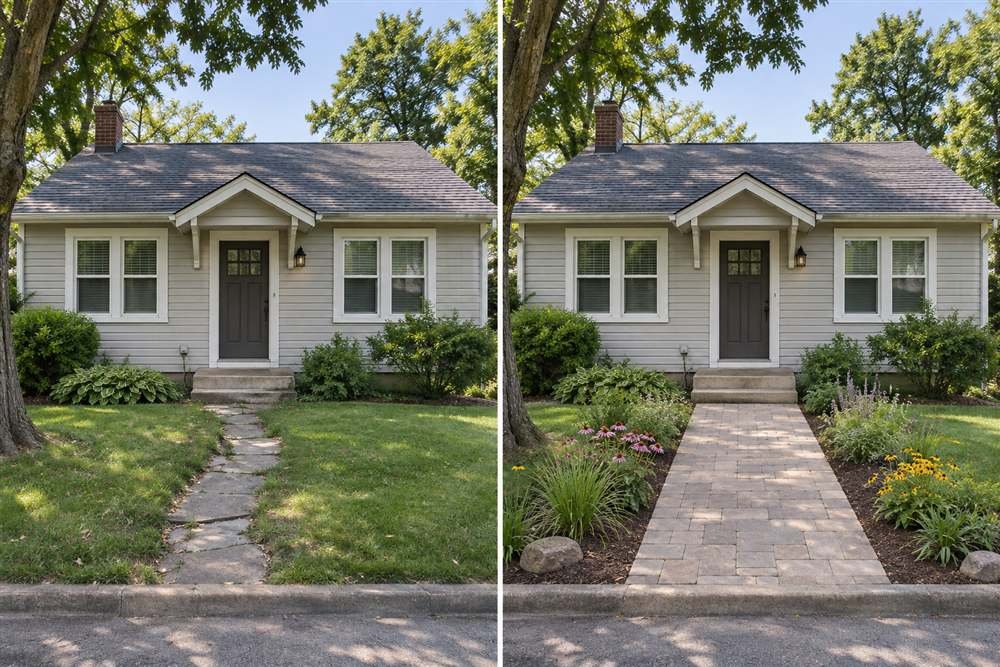
Before: A narrow, wandering, or broken path leaves the entrance disconnected from the street. After: A clearly aligned route and a comfortable landing make the door the obvious destination. Simple edging and restrained planting can strengthen the line without expensive materials.
Plan drainage, surface traction, and transitions before choosing pavers. Match the route to how people actually arrive from parking and the sidewalk. Avoid directing water toward the foundation. A path should remain usable in wet weather and after planting matures, not just on a dry day immediately after installation.
26. Integrate a more accessible approach
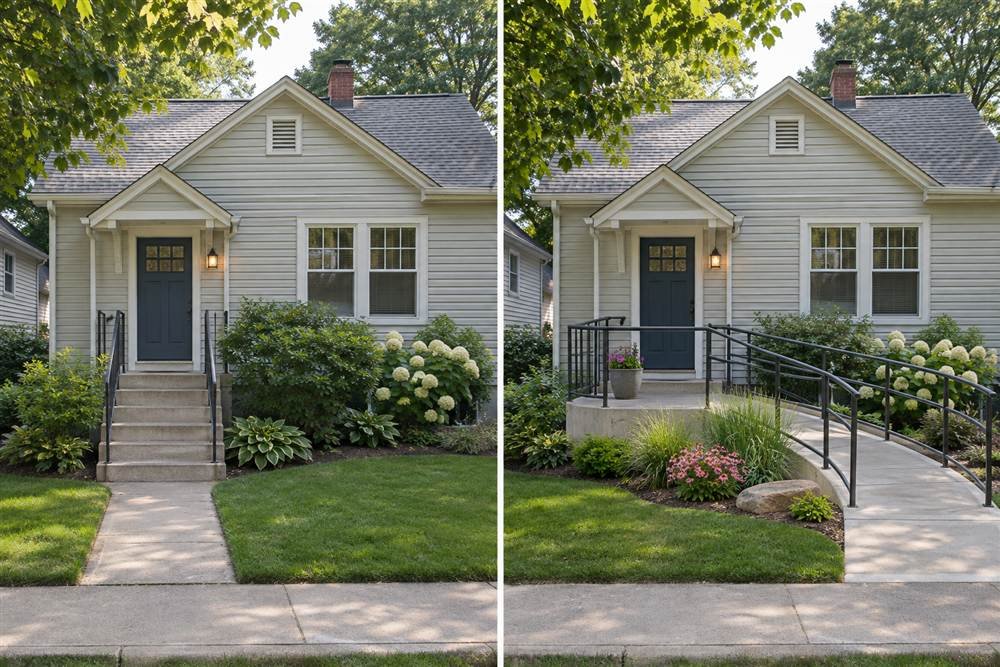
Before: Steps are the only route to the door, limiting access for some visitors or household members. After: A professionally planned graded route or suitable access solution connects to an appropriate landing. The landscape can help it feel integrated with the house.
This is a design problem involving slope, space, drainage, handrails, surfaces, and local requirements. A picture cannot establish compliance. Discuss actual mobility needs with the designer and check door thresholds too. Better access should connect the whole journey from arrival to entry rather than solve one isolated step.
27. Define an entry across a plain lawn
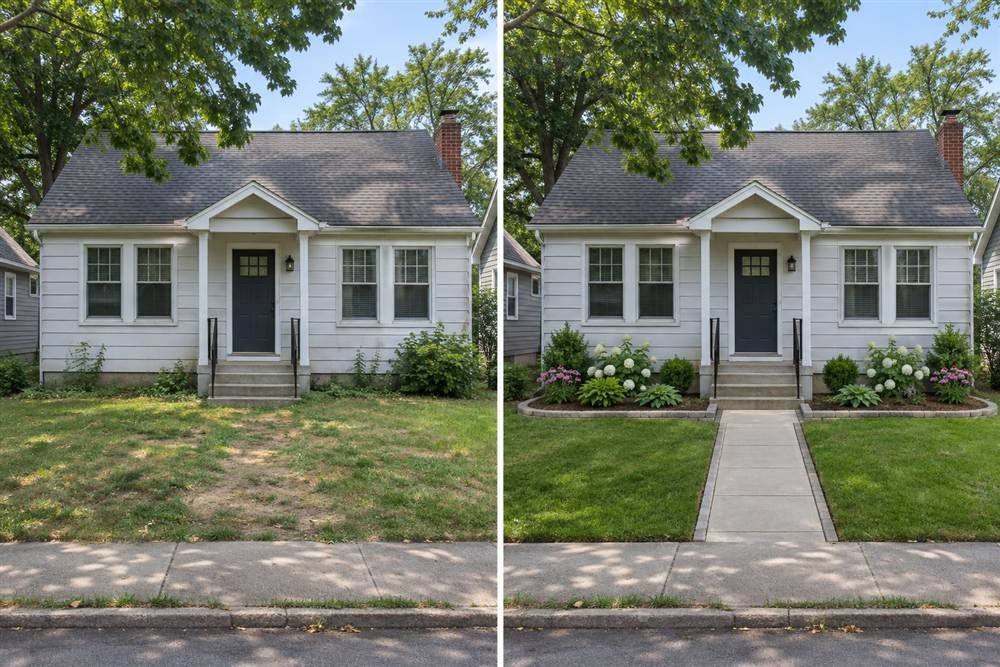
Before: A patchy lawn runs to the doorway without a clear approach. After: A defined path, modest planting beds, and readable house numbers create an arrival sequence. The house itself may need little alteration once the ground plane provides direction.
Choose a layout that fits maintenance time and local water conditions. Keep sightlines open near the door and road. Mark the proposed path on the ground before construction and walk it with groceries or a stroller. This simple test can expose awkward turns that a flat drawing fails to communicate.
Landscaping, drainage, and lighting
28. Replace oversized foundation shrubs thoughtfully
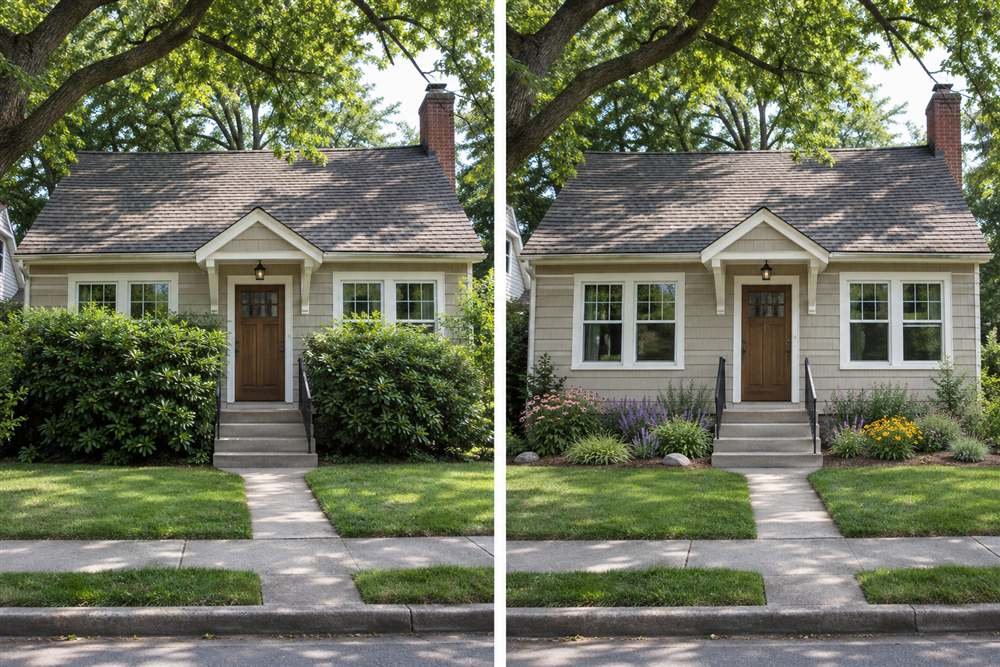
Before: Mature shrubs cover windows, trap debris, and hide the entrance. After: Lower, appropriately spaced planting reveals the facade and gives each plant room to grow. The new scheme should be selected for mature size, not the small nursery container.
Check local species suitability and avoid disturbing utilities or important roots. Keep vegetation clear of vents, siding, and maintenance access. If privacy is important, provide it where people sit rather than blocking every window. Seasonal interest can come from varied forms and textures instead of a row of identical shrubs.
29. Adapt the front yard to a dry climate
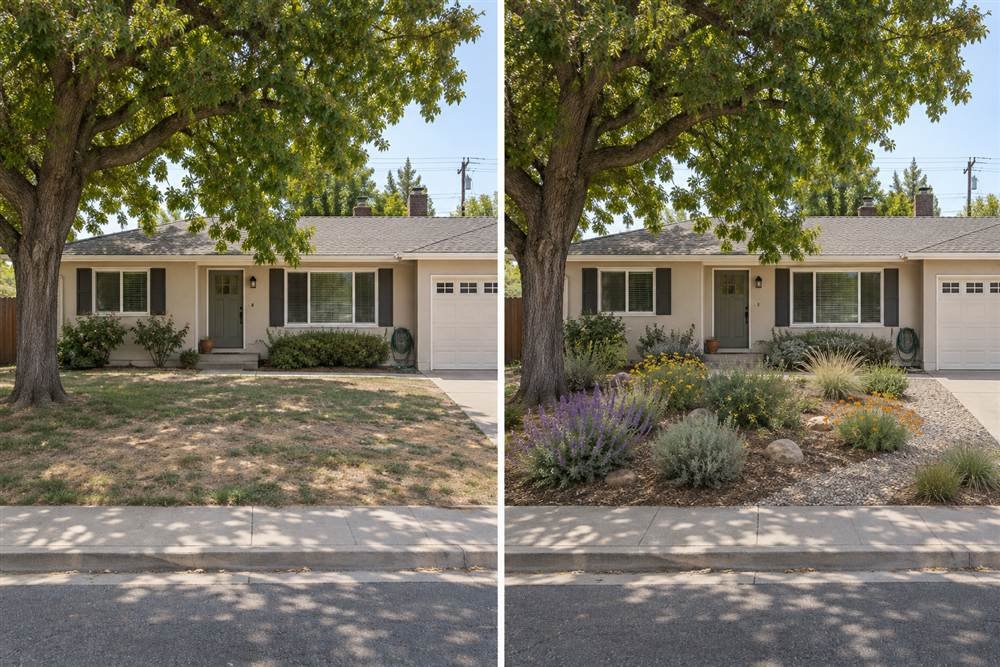
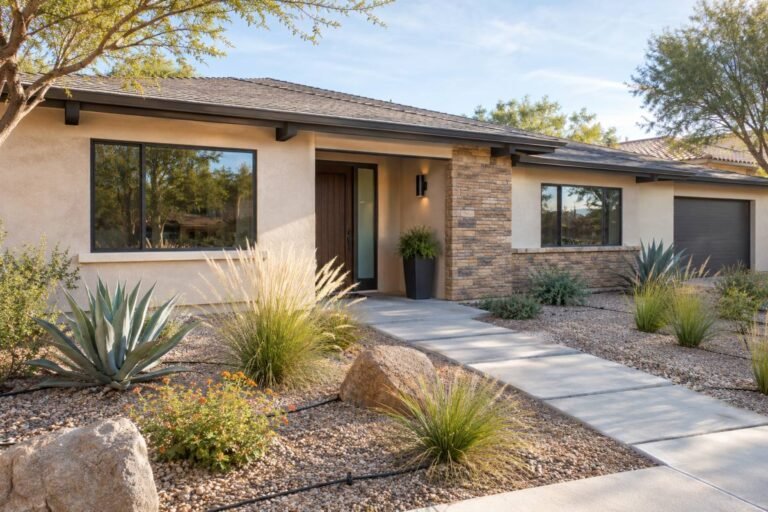
Before: An unsuitable lawn needs frequent watering and still looks patchy. After: Locally appropriate plants, purposeful paths, and a considered ground-cover strategy suit the conditions. The facade may look more grounded when the garden reflects the region rather than an unrelated inspiration photo.
Ask a local extension office or qualified landscape professional about plant selection, irrigation, and soil. Gravel is not automatically the correct answer everywhere. Maintain required clearances and follow local wildfire guidance where relevant. A drought-conscious garden should remain comfortable, useful, and maintainable as it grows.
30. Correct gutter and downspout problems
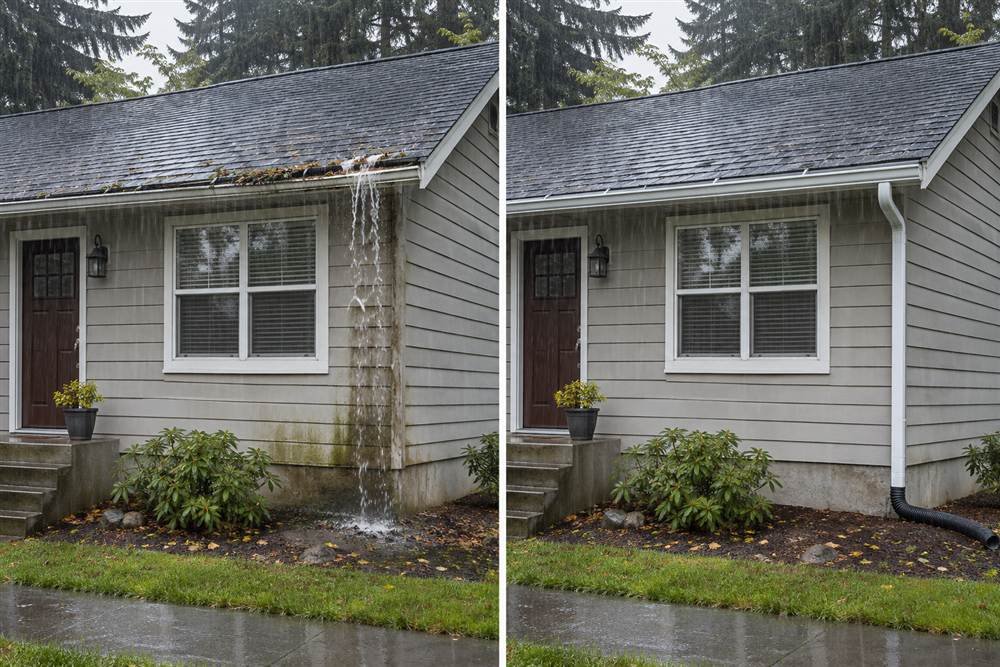
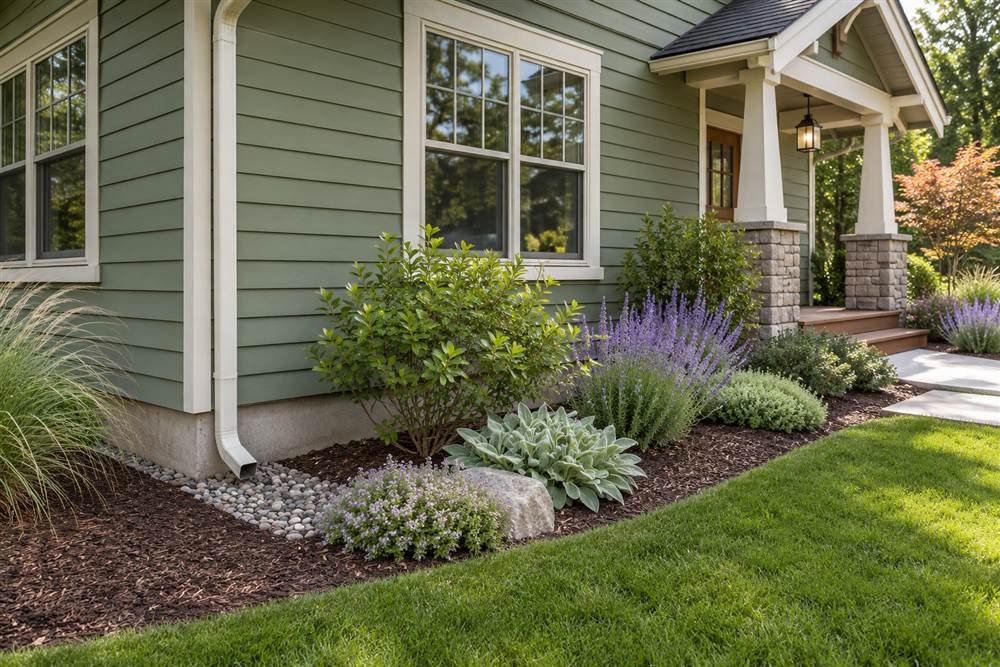
Before: Overflowing gutters and concentrated discharge stain the facade or leave water near the foundation. After: Appropriate repairs and an approved discharge route address the cause before decorative work begins. A cleaner wall is a useful result, but water management is the priority.
Have the system sized and assessed for the roof and local rainfall. Do not simply extend a pipe toward a neighbor or public route. Confirm a suitable outlet, property rules, and underground utility conditions before excavation. Revisit the area during rain to check the completed work under actual conditions.
31. Repair a muddy path edge with drainage in mind
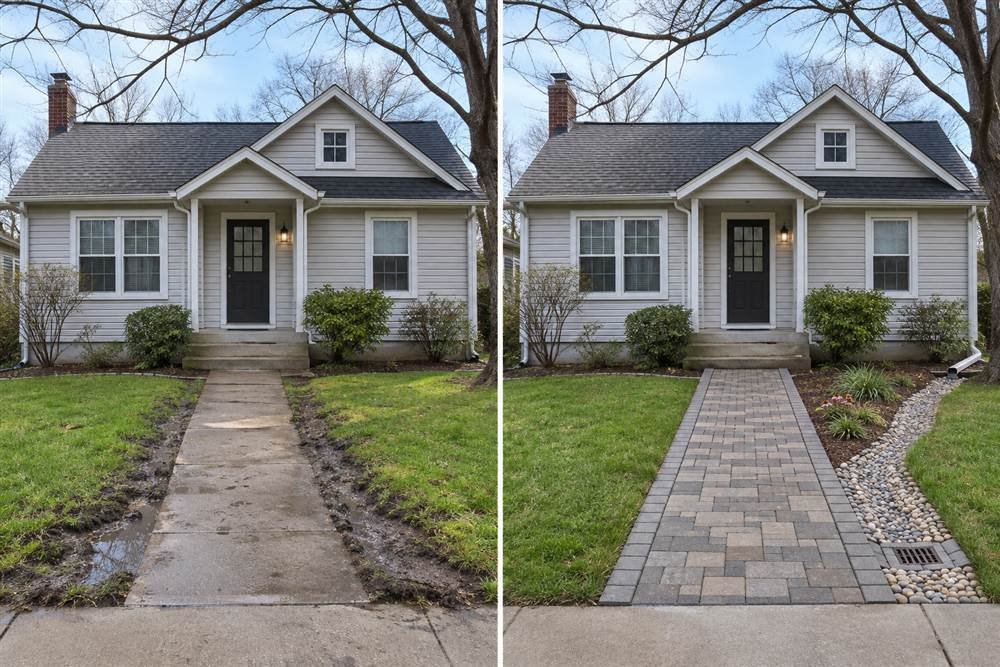
Before: A worn edge sends mud onto the approach after every storm. After: Correct localized grading and a suitable path system keep the route more usable. Planting and edging can then provide a clean finish without becoming barriers to drainage.
Permeable paving is one option, not a universal cure. It requires an appropriate base, soil conditions, maintenance, and a defined overflow strategy. Ask the installer how the system handles heavy rainfall. A surface that looks porous in a product photograph may still perform poorly when built over the wrong base.
32. Replace glare with useful exterior lighting
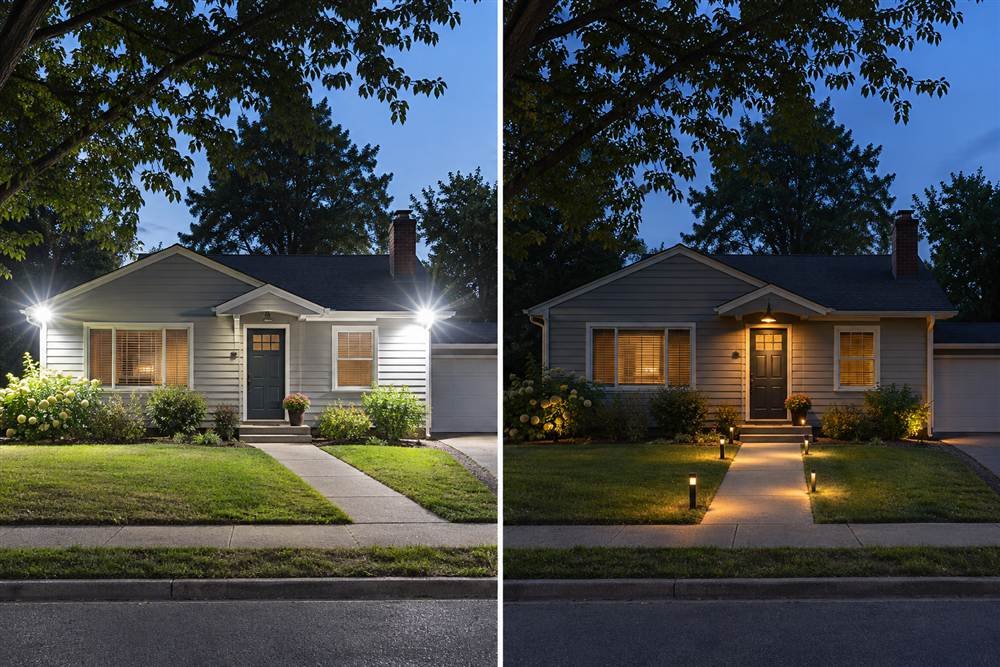
Before: Exposed floodlights create harsh contrast while leaving steps difficult to see. After: Shielded fixtures aimed at the entry and walking surfaces produce a more comfortable approach. The house can feel welcoming without lighting every wall and tree.
Check the view from the sidewalk and neighboring properties after dark. Use appropriate wet-location products and qualified electrical work where needed. Confirm local lighting rules and avoid interfering with visibility near traffic. The test is whether people can find the door and see hazards comfortably, not how bright the facade appears in a photograph.
33. Make address numbers readable day and night
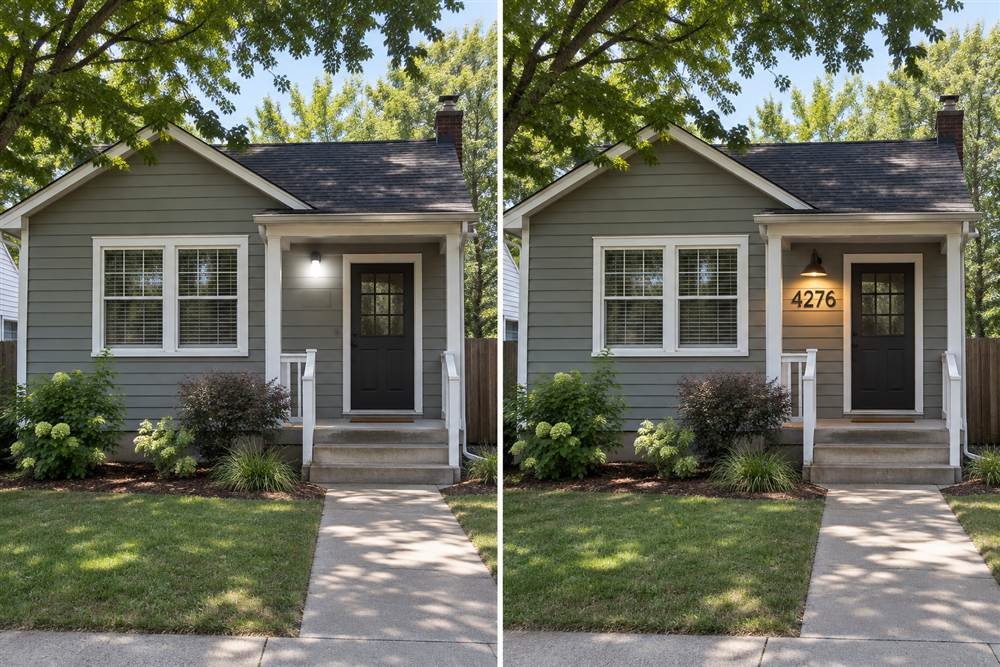
Before: Small numbers disappear against a textured wall or under porch shadow. After: A legible style, adequate contrast, and suitable placement help visitors identify the house. A modest lighting adjustment can support visibility without another decorative spotlight.
Check local emergency-address requirements before choosing the size and location. Read the numbers from the actual arrival point, including after dark. Avoid hiding them behind hanging baskets or seasonal decor. Coordinate the finish with nearby hardware, but prioritize recognition over a delicate font that only looks attractive from a few feet away.
Roof, windows, and functional repairs
34. Repair fascia before fitting new gutters
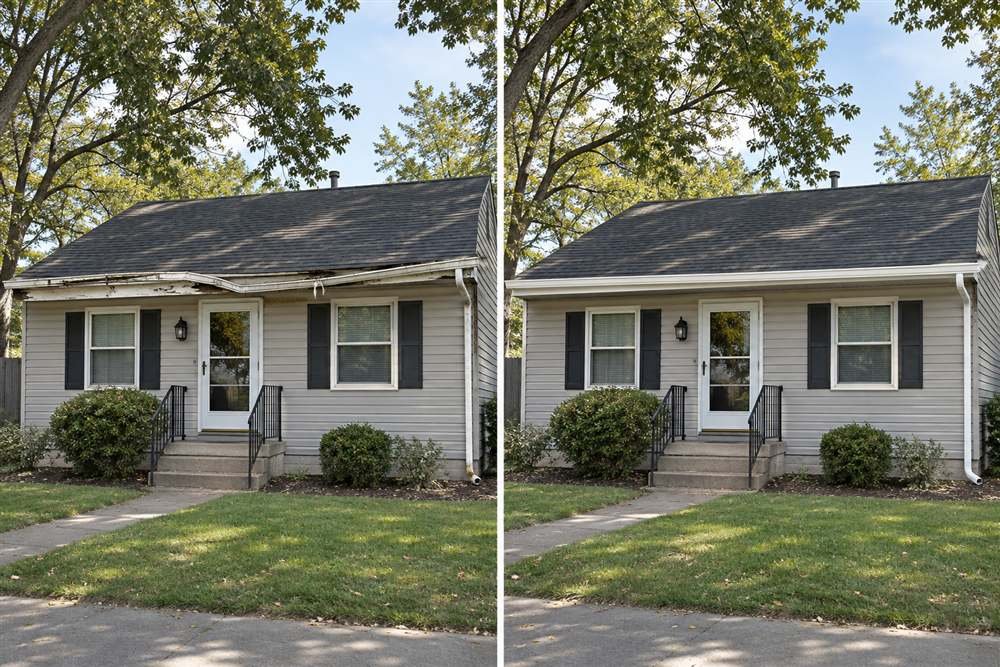
Before: Sagging gutters and deteriorated fascia make the roof edge look uneven. After: Repair the supporting material and install an appropriate gutter system with a coordinated finish. Matching gutters to fascia can keep this necessary component visually quiet.
Investigate why the fascia deteriorated. Leaks, overflowing gutters, and installation defects need correction before the new finish goes on. Include attachment, flashing, ventilation interfaces, and discharge in the work plan. Replacing the visible gutter alone may leave the underlying problem ready to damage the new material.
35. Replace a worn roof without changing the silhouette
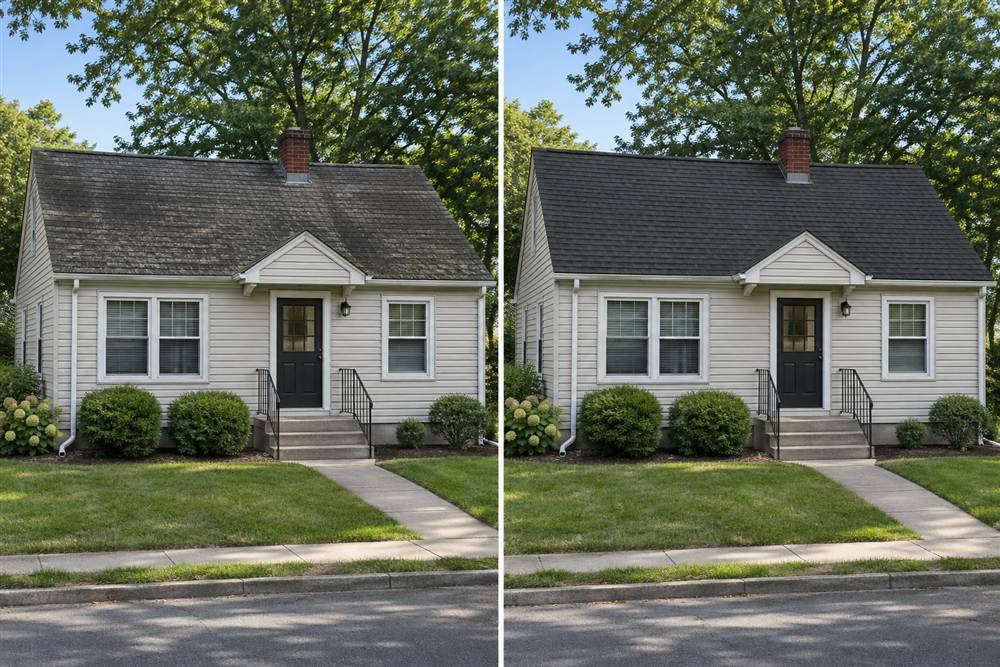
Before: A roof at the end of its service life makes the whole house appear neglected. After: A properly selected replacement and repaired flashing restore a consistent upper boundary. Keeping the existing roof shape often preserves both the architecture and a more predictable project scope.
Choose material for local conditions, structure, and installation requirements. Request a proposal covering underlayment, flashing, ventilation, disposal, and damaged decking allowances. Coordinate color with permanent walls and windows. Do not treat a roof replacement and a major roofline redesign as equivalent versions of the same job.
36. Reveal and maintain ventilation openings
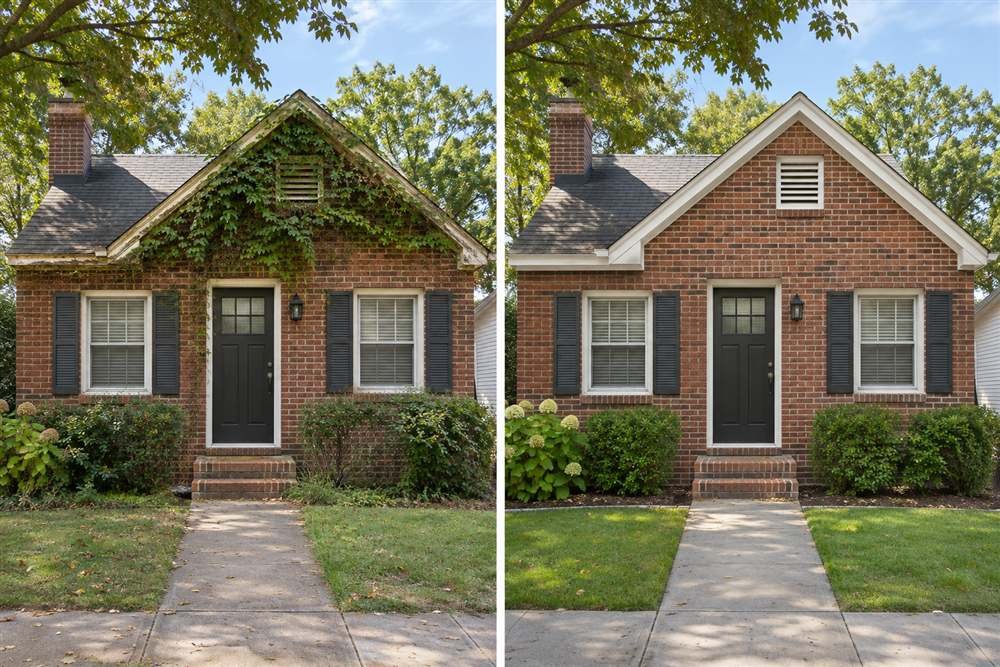
Before: Vines, stored items, or added trim block visible vents and make the facade look untidy. After: Appropriate clearing and repair restore a cleaner elevation while preserving required airflow. This is an example where a restrained maintenance project can improve appearance and function together.
Identify the opening’s purpose before screening, sealing, or painting it. Attic ventilation, crawl-space openings, and mechanical exhaust have different requirements. Ask a qualified professional about damaged components or pest concerns. A decorative cover should not reduce needed airflow or prevent safe inspection and maintenance.
37. Repair window trim and weather details
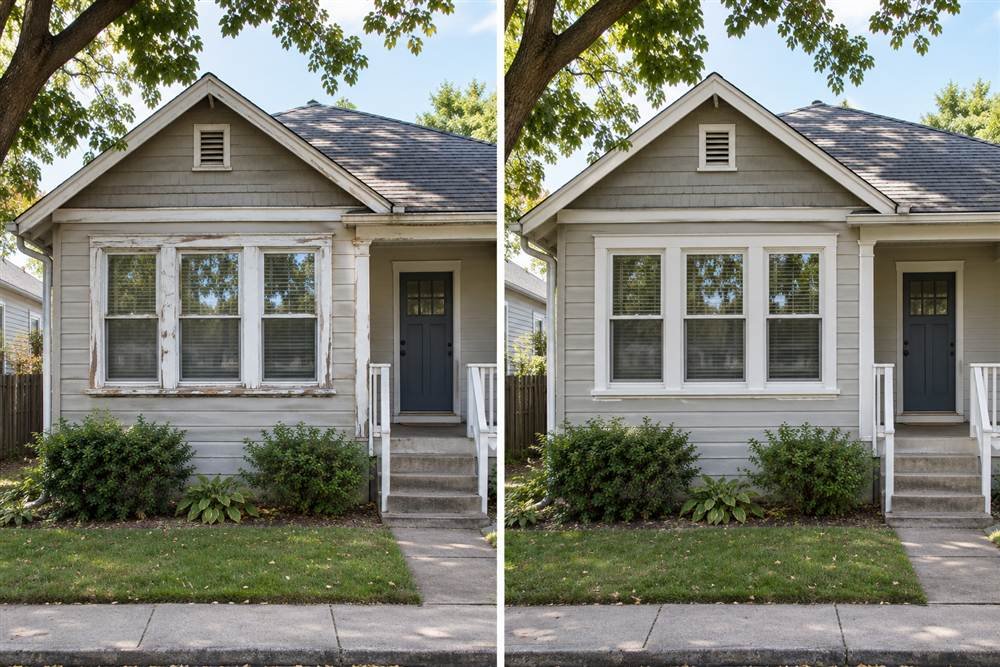
Before: Cracked window trim, peeling paint, and failed seals draw attention away from otherwise sound windows. After: Correctly repair deteriorated material and renew appropriate joints before finishing. Consistent profiles and careful preparation give the openings a clean edge.
Locate the source of moisture instead of sealing every visible gap. Some drainage paths must remain open. The window and siding installation instructions should guide the work. If damage extends behind the trim, include investigation and repair in the scope. A neat bead of caulk is not evidence that a hidden leak has been solved.
38. Coordinate front and side doors
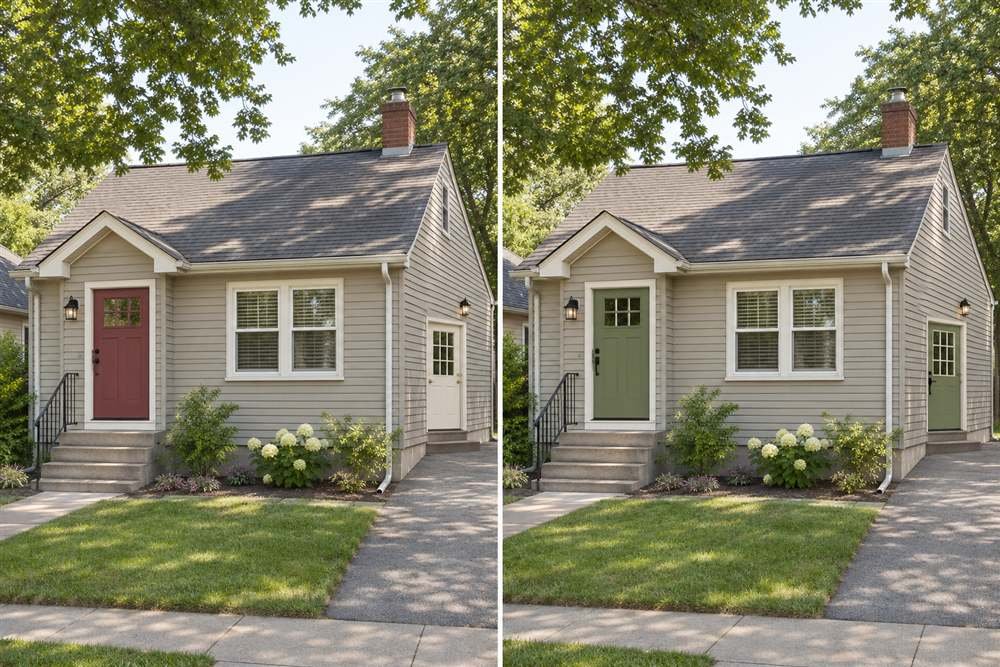
Before: Unrelated replacement doors make different elevations feel disconnected. After: A small coordinated palette and repeated hardware finishes connect them while allowing the main entrance to remain the strongest accent. The side door can stay quieter if it faces the street.
Compare security, weather sealing, glazing, and maintenance needs as well as appearance. Existing doors may only need repair and a compatible finish. If replacing one, confirm the opening and installation details before ordering. Matching colors should not mean giving every door the same product when their exposure and use differ.

Backyards and whole-property improvements
39. Repair a deck before changing its styling
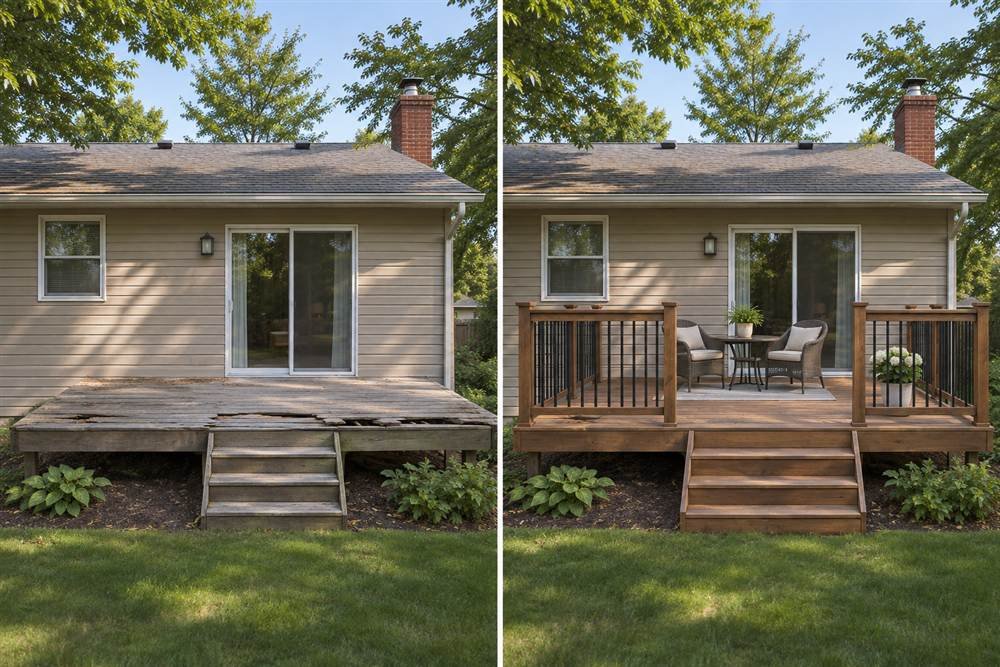
Before: Worn boards, loose rails, and scattered furniture make a rear elevation feel unfinished. After: Inspect and repair the structure, then use suitable decking, guards, and a clearer layout. A restrained furniture arrangement can make the restored surface more useful.
Have structural connections and supports assessed where condition is uncertain. Stain cannot correct decay or an unsafe ledger connection. Include local permit requirements, attachment details, and access during construction in the plan. Choose the finish after the repair scope is clear, and follow product requirements for preparation and drying.
40. Replace an uneven patio with a planned surface
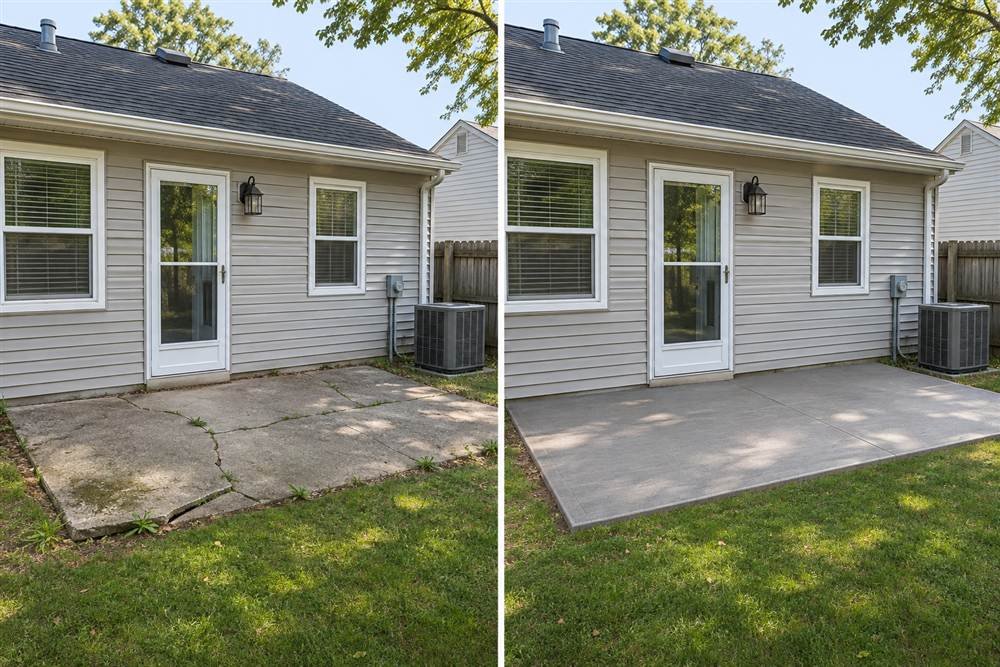
Before: Cracked slabs and awkward level changes reduce the usable space outside the door. After: A properly designed surface and controlled transitions create a more comfortable outdoor area. Coordinate the paving with the house rather than selecting it from a small showroom sample alone.
Confirm grading, drainage, foundation clearances, and surface traction. A larger patio is not automatically better if it crowds planting or sends water toward the building. Mark furniture positions before finalizing the dimensions. The successful after-image should reflect a space that works when chairs are pulled out and doors are open.
41. Clear the route between house and garden
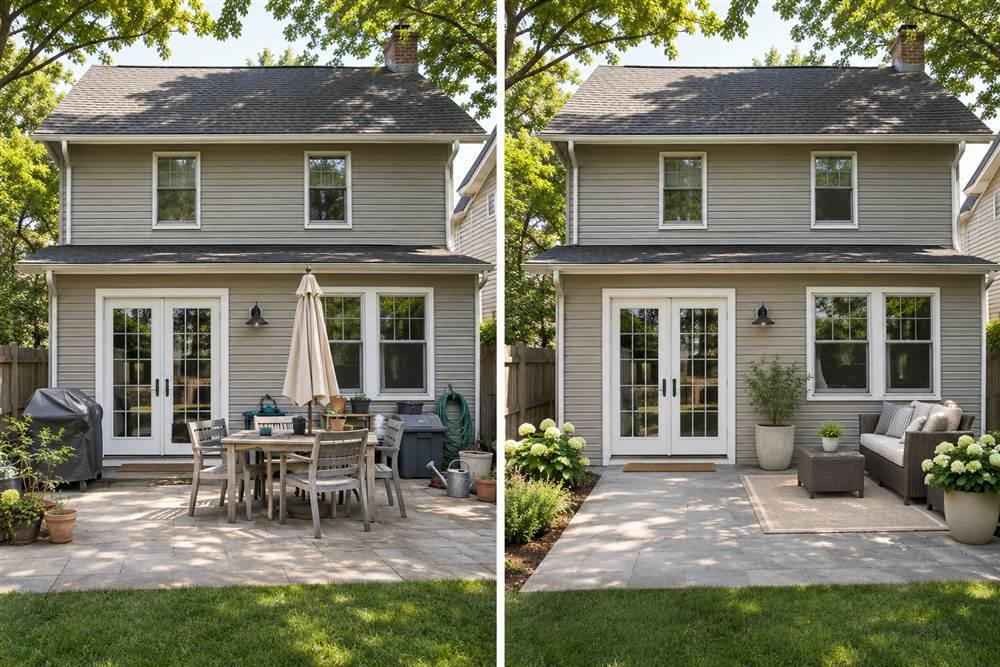
Before: Storage, planters, and furniture crowd rear doors. After: Reorganize the space around a direct walking route and give seating its own area. The building may remain unchanged while the outdoor room feels significantly larger and easier to use.
Observe how people carry food, move equipment, and supervise children or pets. Keep cladding, vents, drains, and door clearances accessible. Use storage that fits the site rather than moving every object to another maintenance-critical corner. A realistic layout should work on an ordinary busy day, not only when prepared for photography.
42. Rework a fence without blocking the entrance
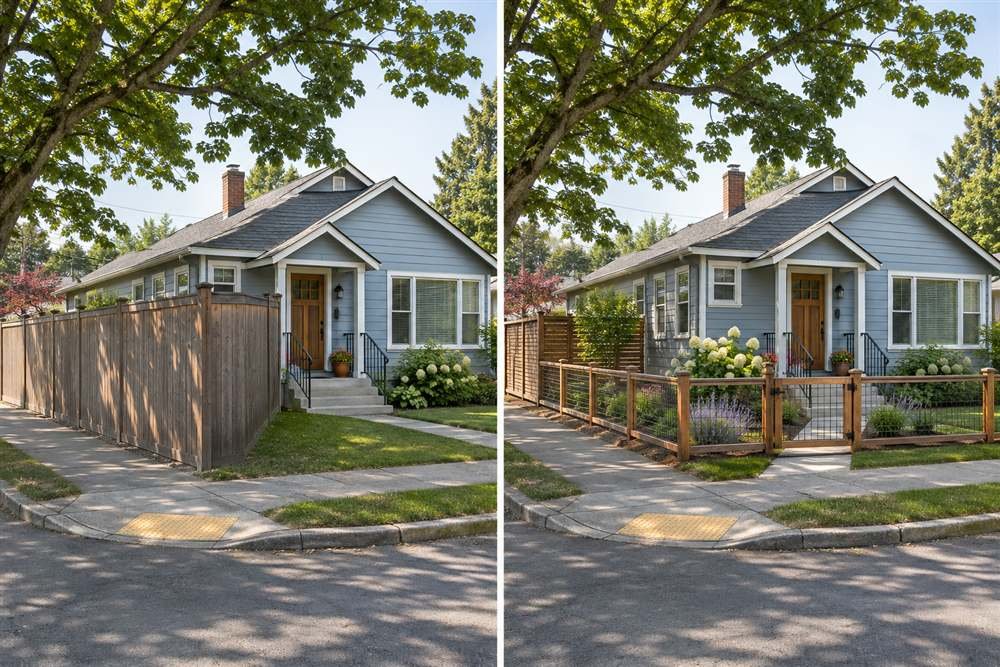
Before: An oversized fence hides the front door and makes a small property feel closed. After: A suitable lower or more open front section can make the entrance visible while retaining privacy where it is actually needed. Materials and proportions should relate to the house.
Check property boundaries, height limits, permits, utility locations, and traffic sightlines before installation. A corner lot may have particular visibility requirements. Discuss gates, access, and maintenance with the installer. Avoid copying a tall inspiration fence into a location where it interferes with arrival, safety, or local rules.
43. Add shading as part of the exterior design
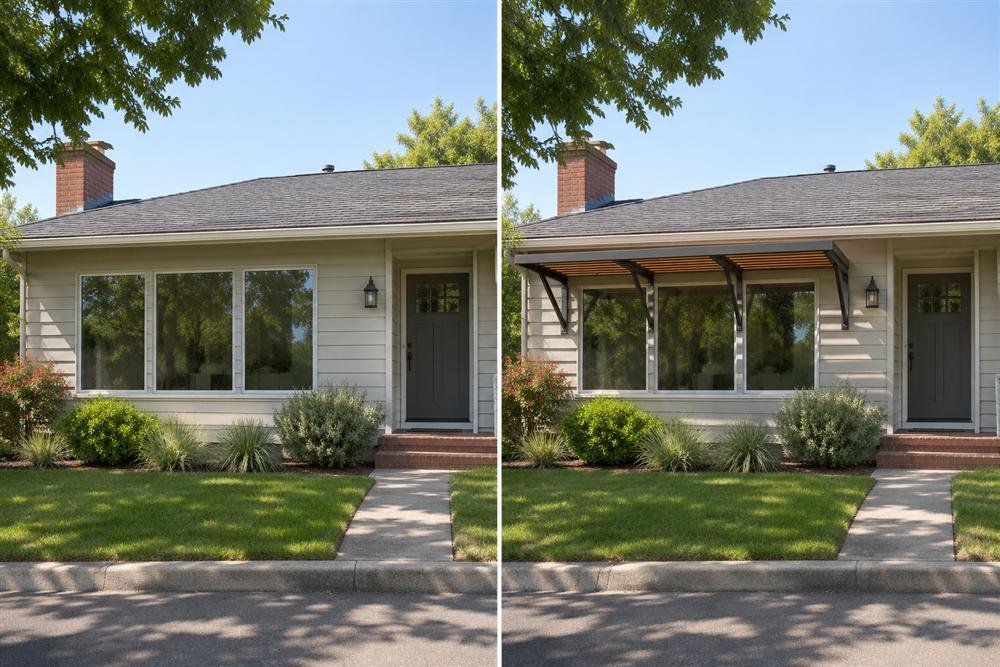
Before: Unprotected glazing receives uncomfortable sun and the facade lacks depth. After: A suitably designed overhang, awning, or exterior shading element can complement the architecture while addressing exposure. Its shape should respond to orientation and seasonal needs.
The U.S. Department of Energy discusses window attachments as part of managing window performance. Actual results depend on the product, climate, orientation, and use. Check structural attachments, wind exposure, escape routes, and local requirements before installation. A visually attractive canopy is not automatically an effective shading design.
44. Finish with one coordinated whole-house plan
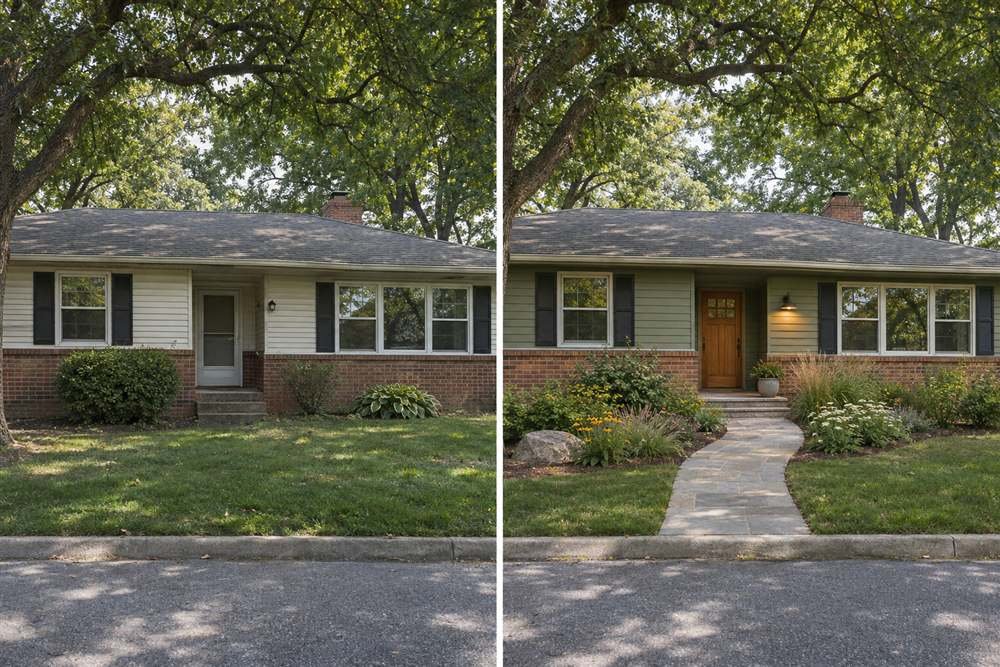
Before: Separate purchases have produced a new door, random lights, several paint colors, and disconnected planting. After: A single plan coordinates repairs, palette, entry, paths, and landscape. The final result feels intentional because each element supports the same priorities.
Lay photographs, samples, and the scope of work together before approving contracts. Decide what stays, what changes now, and what can wait. If the budget changes, return to the priorities rather than substituting unrelated products one at a time. A clear plan helps modest updates add up to a complete exterior.
Build a budget from the work, not the picture
No single national price describes an exterior makeover. When planning your home exterior before and after, separate cleaning and painting a door from replacing siding or rebuilding a porch. Roof area, access, local labor, repairs, materials, and permitting can change the total substantially.
Request itemized local estimates using the same written scope. Ask each contractor to separate preparation, repair allowances, products, coats or assemblies, equipment, waste removal, and optional upgrades. Confirm whether taxes, permits, and difficult access are included. A short estimate that says only "exterior refresh" is hard to compare with a detailed proposal.
For example, a hypothetical homeowner may postpone a decorative gable to fund a leaking gutter connection and damaged trim first. That choice may create a less dramatic photograph initially, but it protects the next phase of paint work. Treat this as a planning example, not a typical price or a return forecast.
Keep necessary repairs, functional improvements, and decorative preferences in separate budget lines. Set a contingency appropriate to the age and uncertainty of the building, and agree how concealed damage will be documented. Approve additional work in writing before it begins. Save product records and warranties with the project photographs.
Put renovation tasks in a sensible order
Begin with an inspection and a photographic record. Investigate leaks, movement, rot, drainage, and unsafe components. Then confirm any zoning, historic, association, and permit requirements for the intended scope. A color approval does not authorize a structural change.
Plan the building envelope before its finish: roof and flashing repairs, gutters, siding transitions, windows or doors being replaced, and substrate repairs. Coordinate these trades so new paint is not damaged by later installation. Discuss weather windows, curing times, and temporary protection before committing to dates.
Next complete coatings and permanent fixtures according to the approved scope. Finish paths, planting, and furniture after heavy access is no longer needed. Keep equipment from damaging new drainage or compacting planting areas. Leave required access to utilities and inspection points clear.
Walk through the work in daylight and after dark. Check door operation, clear routes, railings, lighting, drainage, and the agreed finish details. Record incomplete items, responsibilities, and completion dates. Your home exterior before and after record should include handover documents and functioning details, not just a final street photograph.
Avoid the common mistakes behind impressive pictures
Painting brick deserves careful assessment. Coating changes its maintenance and drying behavior, and the appropriate approach depends on the masonry and assembly. The National Park Service’s brick guidance explains how non-permeable coatings can trap moisture in older masonry. Ask for material-specific advice before covering existing brick or stone.
Check paint compatibility on vinyl too. Darker colors can create heat-related problems on some systems. Follow both siding and coating instructions rather than selecting a color solely from an online mockup. A shade name does not establish that a particular formula is approved for your surface.
Older paint also affects the project. For work disturbing coatings on a pre-1978 U.S. home, review EPA lead-safe renovation guidance. EPA recommends using a lead-safe certified contractor. Include appropriate preparation, containment, and cleanup in discussions before sanding or scraping begins.
Finally, do not copy a major addition as though it were a cosmetic refresh. Changing a roofline, adding glazing, enlarging an opening, or building another story can require design, engineering, and permits. Compare the actual scope behind the image with your property’s structure and budget.
Questions to ask before approving a contractor
Ask who will perform each part of the work and who supervises the trades. Confirm applicable licensing, insurance, permit responsibilities, and the process for inspecting hidden conditions. Request product names and installation specifications instead of accepting broad descriptions such as "premium siding" or "weatherproof paint."
Have the contractor identify excluded surfaces and tasks. Ask how landscaping, windows, neighboring property, and occupied entrances will be protected. Agree on daily cleanup, working access, and how rain or temperature delays affect the schedule. Written details reduce the chance that an attractive proposal leaves necessary work undefined.
At handover, collect warranties, color formulas, product information, permits where applicable, and photographs of concealed work. Note maintenance intervals recommended by the actual manufacturers. Keep a small labeled supply of suitable touch-up material if the product permits storage, and retain the invoice identifying the finish applied.
Frequently asked questions
What is the cheapest way to improve an exterior?
Begin with compatible cleaning, tidying, localized repairs, readable numbers, and a clear entrance. A door repaint or restrained trim refresh can be useful when the surrounding materials are sound. Choose the smallest project that addresses the most visible problem without postponing necessary repairs.
Does a dramatic makeover guarantee a higher resale value?
No. Condition, market, project quality, buyer preferences, and what you spend all affect the outcome. National remodeling reports are broad estimates rather than individual appraisals. Compare nearby homes and seek local advice before undertaking an expensive renovation mainly for resale.
Should every part of the exterior be updated at once?
Not necessarily. A coordinated master plan can be completed in phases. Prioritize safety, water management, and failing components, then finish the most useful cosmetic changes. Keep materials and color records so later phases connect with the completed work instead of starting a new palette.